Showing posts with label Distress Markers. Show all posts

Tuesday, May 24, 2022

So Loved Baby Card & coordinating Gift Card w/ Papertrey Ink!!

Pin It

Hello Crafty Friends!! 

I'm back with another SWEET Baby Project today!! I'm just SWOONING over the NEW Papertrey Ink May Release, AVALIBLE tonight (May 24th, 2022) at 10:00 pm ET!! 
I've made a So Loved Baby Card and coordinating Shaped Gift Card for today!! I KNOW I'm not alone with my LOVE for ALL things Rainbow!! The NEW Little Ones Stamp Set is just SO SWEET!! Not only PERFECT for those Baby Projects, but I could see this Stamp Set being used with the Papertrey Ink Baseball T Die Set to create more Femine Styles too!! You could even use the In-Stitches: Baby Onesie Die you could just cut off the Bottom of  the Onesie for a T-Shirt Design!! 
SO MANY Possibilities!! 
Here's what I've Created for today!! So CUTE Right!!
Here's how I created them!! 

I Started by Stamping all of the Images from the NEW Little Ones Stamp Set!! I used Distress Oxide Inks in Tumbled Glass for the Clouds and Hickory Smoke for the Hanging Baby Letters!! I KNEW I wanted to use Rainbow Colors for the Rainbow so instead of trying to mask and stamp each arch separately, I decided to pull out my Distress Markers and I Colored each Arch of the Rainbow with a different Color!! I used Candied Apple, Worn Lipstick, Mustard Seed and Cracked Pistachio!! SQUEAL!! I LOVE this Technique and have told myself I NEED to use this Technique more often!! Then I Die Cut the Images out using the coordinating NEW Little Ones Dies!! I added some White Pen Details!! 
I Die Cut the In-Stitches Onesies and Die Cut them from some Distress Watercolor Cardstock!! I inked the edges of the Onsies with some Hickory Smoke Distress Oxide Ink for some Dimension!! Then I Inked the center of the Onesies with Salvaged Patina Distress Oxide Ink!! I then added some Tumbled Glass Distress Oxide Ink Splatter!! Then I adhered the Rainbow, Clouds and Letters to create my Design!! I added some Star Die Cuts using Dies from the Set and Inked them with Fossilized Amber Distress Oxide Ink!! Then I added some Nuvo Midas Touch Glitter Pen to the Stars for some Gold Shimmer and in real life it REALLY adds that special Touch!! I then added some Mini Iridescent Stars for even more Sparkle!! 

I Used the NEW Night Sky Background Stencil to Emboss the Card Panel!! After Embossing the Design into the Card Panel I Inked the Panel with some Mustard Seed Distress Oxide Ink!! I replaced the Stencil over the Card Panel and then Inked the Embossed Design with Fossilized Amber Distress Oxide Ink and then I colored the Stars with the Nuvo Midas Touch Glitter Pen!! SWOON!! The Background all on it's own would make for a BEAUTIFUL Card!! 
Then I Die Cut the Star Tag from the Go-To Gift Card Holder: Bookmark Die Set out of some Distress Watercolor Paper and Inked it with Mustard Seed Distress Oxide Ink and then Stamped the "So Loved" Sentiment using Hickory Smoke Distress Oxide Ink!! I added it to the Card using a Bling Zots Adhesive Dot and then adhered a PTI Satin Bow to finish off the Design!! 

I created the coordinating Gift Card in the same way!! Only I Die Cut the In-Stitches: Baby Onesie Die it to Create a Tag Shape!! I Folded the Cardstock to create a Top Fold and placed the Die just to the top of the Folded Cardstock so it Cut Out 2 Onesies together to create the Tag Base!! 

I Die Cut another from some Distress Watercolor Cardstock and Inked it again with Hickory Smoke Distress Oxide Ink to add some Dimension!! Then I Inked the center of the Onesies with Salvaged Patina Distress Oxide Ink!! I then added some Tumbled Glass Distress Oxide Ink Splatter!! Then I adhered the Rainbow, Clouds and Letters to create my Design!! I added some of the Die Cut and Mini Iridescent Stars too!! 
I Stamped the Sentiments onto the inside of the Gift Card and and added more Die Cut and Mini Iridescent Stars to finish off the Design!! I added a Twine String and my Gift Card is ready to attach to a Gift Bag!!
I just LOVE how this Card and coordinating Gift Card turned out and I hope I've INSPIRED you with some ways to use the NEW May Release Products with some of your FAVORITE Older PTI Products to create some SPECIAL Gifts for someone in your Life!! 

DON'T FORGET the NEW Papertrey Ink May Release will be avaliable tonight at 10:00 pm ET!! 
I'll be back to share some more Projects soon!! 
THANKS SO MUCH for stopping by and I hope you have a FABULOUS WEEK!! 

COUNTRY HUGS-N-KISSES
LARISSA
  💗
 

Monday, August 17, 2020

Newton's Nook Designs August Release ~ Sips & Stories, Mugs & Houndstooth Stencil!!

Pin It
HELLO CRAFTY FRIENDS!! 

I'm here with Day 1 of the 
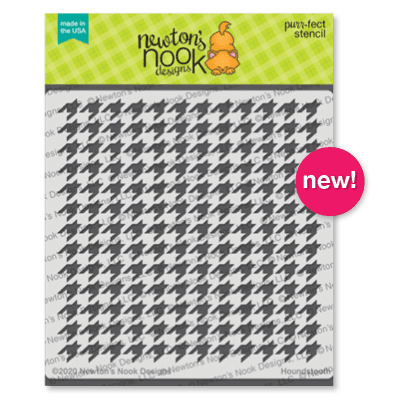
Today we're showcasing the NEW "Sips & StoriesStamp Set coordinating Sips & Stories Die Set, Mugs and Houndstooth Stencils!! 
Let's take a look at the AWESOME New Set!!
Sips & Stories Stamp and Sips & Stories Die Set by Newton's Nook Designs
Mugs Stencil by Newton's Nook Designs
Houndstooth Stencil by Newton's Nook Designs
Happiness is by Larissa Heskett for Newton's Nook Designs using Sips & Stories, Mugs Stencil & Heartfelt Wishes  #newtonsnook #newtonsnookdesigns #sipsandstories #mugsstencil #heartfeltwishes
I Started by Stamping and Embossing the Images from the NEW Sips & Stories Stamp Set and coloring them with Copic Markers!! I wanted to go with a FUN Rainbow Color Scheme!! I used Red: R43, R46 & R89  Orange: YR00, YR02 & YR18  Yellow: Y11, Y15 & YR23   Green: YG11, YG13 & YG17  Blue: B32, B34 & B37  Purple: V0, V15 & V17  White: T1 & T3  Kitten: E40, E42, E44 & E47  Cheeks: R11  Blonde Hair: E21, E26 & E99   Brown Hair: E30, E33 & E37  
Skin: E00, E11 & E13 
I Die Cut the Images out using the coordinating NEW Sips & Stories Die Set!! Then I added some White Gel Pen Details and added them to the Embossed Background I created using a FUN Trinity Stamps    Die!! It actually Embosses the Design of the Living Room into the Cardstock and I LOVE how the Size of the Image works PERFECTLY as far as the scale goes!! SO MANY possibilities with this combination of Products!! 
Happiness is by Larissa Heskett for Newton's Nook Designs using Sips & Stories, Mugs Stencil & Heartfelt Wishes  #newtonsnook #newtonsnookdesigns #sipsandstories #mugsstencil #heartfeltwishes
I wanted to keep the Focus on the Images themselves, so I chose to keep the background White!! I LOVE a good White Space Design and I really like how the Images POP and tell such a SWEET Story all on there own!! Just makes me SMILE thinking about all of the HAPPINESS going on in that Room!! ðŸ“šðŸ’–☕ I also wanted to make the Sentiment POP!! I used my MISTI Stamping tool along with some Therm O Web Purple Tape to mask off the word Happiness and I used my Distress Markers in Candied Apple, Carved Pumpkin, Mustard Seed, Mowed Lawn, Peacock Feathers & Wilted Violet to color the Letters in Rainbow Order and then I huffed on the Stamp and Stamped it onto my Card Panel!! I repeated this process a few times in order to get a really Crisp Image!! Then I coated it with some WoW Clear Gloss Embossing Powder!! I repeated the same Process of Stamping and Masking off the Different Words!! I used Versa Fine Black Onyx Ink and Embossed with WoW Clear Gloss, Candied Apple Distress Ink and Embossed with WoW Red Glitz Embossing Powder and Peacock Feathers and Embossed with Teal Sparkle Embossing Powder!! I LOVE the Visual Triangle with the Rainbow Colors!! It really helps to move your eye across the Card Front!! 
Happiness is by Larissa Heskett for Newton's Nook Designs using Sips & Stories, Mugs Stencil & Heartfelt Wishes  #newtonsnook #newtonsnookdesigns #sipsandstories #mugsstencil #heartfeltwishes

I wanted to create a coordinating Envelope so I picked a TE Cookie Monster Envelope and used the NEW Mugs Stencil to decorate the Flap!! I sprayed the back of the Stencil with some Therm O Web Pixie Spray and then placed it over the Flap of the Envelope after I masked off the rest of the Envelope!! I used the TE Blender Brushes to apply some Peacock Feathers Distress Oxide Ink!! Then I heat set the Ink and Stamped and Embossed the Sentiment from the NEW Heartfelt Stamp Set being showcased tomorrow!! I added some Red Glitter Nuvo Drops to the Hearts on the Mugs for a FUN touch of Sparkle and Shine!! 

Would you like to win theSips & Stories” Stamp Set!!?? 

 This stamp set will be given away to ONE lucky winner!!

Here's how to win: Comment on the NND blog and Design Team blogs (see list below)! The winner will be chosen at random from the collective reveal posts. Make sure to check out each of their blogs and comment for your chance to win. You will not know which blog has been chosen so the more you comment on the better your chances are of winning! You have until Thursday August 20th at 9pm EST to comment  -- winners will be announced on the blog post on Friday, August 21st. 

Check out all the awesome Design Team Blogs below to enter:

Newton's Nook Designs

Ellen Haxelmans

Larissa Heskett

Samantha Mann

Zsofia Molnar

Maria Russell

Andrea Shell

Tatiana Trafimovich

Amy Tsuruta

Amanda Wilcox

THANKS SO MUCH for stopping by today!!  
Don't forget to visit tomorrow for a look at the 
NEW "Paw-tumn NewtonStamp Set + coordinating Dies, "Fall Roundabout" Stamp Set, and "Heartfelt Wishes" Stamp Set!! Don't forget to check out the Newton's Nook Designs Blog on the 21st to see if you're one of the LUCKY Winners!! 
Have a FABULOUS WEEK!!
COUNTRY HUGS-N-KISSES
         LARISSA  💗

S U P P L I E S
Below you will find links to the supplies used to create this project(s). Click the icon for the store underneath the thumbnails to start shopping. Where available I use compensated affiliate links at no extra cost to you. Your support helps me to keep bringing you new projects. Thank you!!

Wednesday, May 31, 2017

Paper Sweeties June 2017 Inspiration Challenge #56!!

Pin It

Hello!!
I'm here for the New Paper Sweeties June Inspiration Challenge!!
You're going to LOVE the New Challenge this month!! =)
I've made a Sweet Little Card for today using the Homegrown Stamp Set!!

I thought it would be FUN to Create a Card that I did some Masking and Watercoloring on and then I added some Clear Wink of Stella Glitter Marker and some WoW Clear Detail Embossing Powder!! I used my Distress Markers and my Zig Clean Color Real Brush Markers to Watercolor the Images and then I layered a BEAUTIFUL Sizzix Doily Die Cut and some Vellum along with a Few Crystal Clear Sequins from Pretty Pink Posh, a Burlap Twine Bow and a Vintage Button!! I just LOVE the way it turned out and hope you do too!!??=)
 
I hope you'll stop by to see what the rest of the AMAZING Design Team has created!!
Debbie Marcinkiewicz – Paper Sweeties

THANKS SO MUCH for stopping by and I hope you'll join us for the FUN New Challenge this month!! I CAN'T WAIT to see what you create!! Have a FABULOUS WEEK!!

I'm also Linking up to the

Simon Says Stamp Monday Challenge: We're Going Around in Circles


Simon Says Stamp Wednesday Challenge: Anything Goes
COUNTRY HUGS-N-KISSES
LARISSA   =)

Friday, January 6, 2017

Keep Warm and Snuggle Up with Newton's Nook Designs!! =)

Pin It

Keep Warm Card by Larissa Heskett | A Cozy Day In stamp set by  Newton's Nook Designs #newtonsnook #TayloredExpressions #Watercolor #DistressInk #RangerInk

Keep Warm and Snuggle Up!!

HELLO and HAPPY FRIDAY!!

Is it cold where you live today?? We got Snow and it's about -7 outside!! BRRRRRRR!!  I'm up on the Newton's Nook Designs Blog today So I decided made this card perfect for a Cold Winter Day!! I started by using the image of the girl and cats snuggled up and reading from the Cozy Day In Stamp Set!! The sentiment "Keep Warm and Snuggle Up" is from the Fireside Friends Stamp Set!!
 
I wanted a COZY looking background so I used the AWESOME Taylored Expressions Basketweave Cutting Plate Die to create a "Woven Blanket" from some Watercolor Paper because I wanted to alternate the Front and Back Sideof the Paper for some Noticeable Texture!! I LOVE the way it turned out!! =) Then I layered it onto a Stitched Panel Card Base just to Finish off the Edge!! I Stamped and Embossed my Images onto Distress Watercolor Paper and then Watercolored the Image using my Distress Markers!! I went with Vibrant Jewel Toned Colors and I LOVE the way it POPS off the Card!! I Stamped and Embossed the Sentiment onto a Strip of Watercolor Paper and added it to the Left hand side of the Image!!  Some Stamped and Embossed Hearts were added to the Top of the Image to help make your eye go right for the Image!! SQUEAL!! I LOVE LOVE LOVE this Image and the way the Card came together!! I hope you'll feel INSPIRED to SNUGGLE UP and Read a Good Book or to CREATE this Weekend using some of your FAVORITE Newton's Nook Designs Products!!?? If you do I HOPE you'll SHARE then with us on Social Media as we LOVE to see what you're creating and you NEVER KNOW when you could be Showcased and Shared on the NND Blog!!  =)
I'm also playing along with SEVEAL Challenges!!

Simon Says Stamp Monday Challenge: Start Afresh
I used the New to me TE Baskeweave Cutting Plate Die

Simon Says Stamp Wednesday Challenge: New Something
I think this Card would make a SWEET New Pet/s Card or for a Friend who LOVES to Read and is EXCITED about a New Book she's been wanting to Read!!

Fusion Card Challenge 3rd Anniversary Celebration: Inspiration Photo
I was Inspired by the Photo!! Made me think COZY and WARM!! 
workitwedbanner
SSS Work It Wednesday Challenge: Use Something New
Taylored Expressions Basketweave Cutting Plate
 
THANKS SO MUCH for stopping by today and I hope you have a FABULOUSLY COZY WEEKEND!! 
COUNTRY HUGS-N-KISSES
LARISSA    =)
 

Thursday, December 22, 2016

Holly Jolly Gift Tag w/ Honey Bee Stamps!! =)

Pin It

HELLO!!
SQUEAL!! Christmas is just Days away!!  I'm up on the Honey Bee Stamps Blog today to share a FUN Gift Tag for any of those LAST Minute Gifts that you have to Wrap!!
I LOVE LOVE LOVE to use my Products to make Gift Tags and the Holidays are a PERFECT time to pull them out and use them in yet another AWESOME Way!! To start my Gift Tag I  used the Let It Snow Stamp Set along with the coordinating Let It Snow Sweet Cuts Die Set to Stamp and Die Cut the Sweet Snowman and Bird Images using Distress Markers to Color (Tumbled Glass, Black Soot, Ground Expresso, Carved Pumpkin and Candied Apple) on the Stamps and then Stamping them onto some Distress Watercolor Paper!! I then took a Water Brush and went over some of the Lines to add alittle bit of Watercolored Texture!! I wanted the Snowman to have some Sparkle so I added some of the BEAUTIFUL Ice Chips Glitter!! I LOVE the FUN texture and Sparkle it adds to the Sweet Image!! I also added some to the Ground so it looks like Real Snow!! I Die Cut a Tag Image and Watercolored the Background and then added some of the Pretty Snowflake Images form the Let It Snow Set!! I did the same Technique of Coloring on the Stamp with my Distress Markers using (Tumbled Glass, Salty Ocean and Faded Jeans) to get a FUN Tie Died look!! Then I Embossed them using Clear Embossing Powder!! I added the Sentiment in Black Onyx Versa Fine Ink and then Embossed it using Clear Embossing Powder!! For the Back of the Tag I used the Merry & Joy Stamp Set and Stamped and Embossed the To and From!! Then I repeated the Snowflakes the same way I did them on the Front of the Tag to add some Color and FUN to the Back of the Tag too!!
I hope you give this SWEET Gift Tag a try and if you do I hope you’ll share what you make with us on Social Media!! We LOVE LOVE LOVE to see what you create using the AMAZING Honey Bee Stamps Products!!
I'm also Linking up to the Simon Says Stamp Wednesday Challenge: Make It Sparkle!! 

THANKS SO MUCH for stopping by today and I hope you have a FABULOUS Holiday Week/Weekend!!
COUNTRY HUGS-N-KISSES
LARISSA    =)

Friday, October 14, 2016

Paper Sweeties October Release Party!! =)

Pin It

Hello!!
I'm here with Paper Sweeties for the October Release Party!! SQUEAL!!
This Release is SO FUN!! I CAN'T WAIT to share what I've made!!
Aren't these just SWEET Sets!!??
PS-189
SC-189
PS-191
SC-191
PS-192
SC-192
Stamped and Die Cut the Lights and then watercolored them using my Distress Markers!! I LOVE LOVE LOVE the Sentiment and had to Stamp and Emboss it in the same Rainbow Colors that I Watercolored the Lights in again using my Distress Markers to Color on the Stamps and Stamping then Embossing it!!I added some of the AWESOME Sequin Holly Mix and my Card was done!!
I hope you'll stop by to see what the rest of the AMAZING Design Team Created and leave them some LOVE!!
Nancy Salkeld
Also, I hope you'll join us for the Paper Sweeties October Inspiration Challenge #48!! Our challenge will run for the Entire Month!! You can play along as many times as you wish and combine with as many other challenges as you want!! The challenges will end at 12 pm EST on the last day of each month!!The winner will be revealed on the 1st of each month!!
I CAN'T WAIT to see what you create!! =)
THANKS SO MUCH for stopping by and I hope you'll stop back tomorrow for the Paper Sweeties Release Party and the Reveal of ALL of the NEW Products!! SQUEAL!! SO MUCH FUN!! Have a FABULOUS WEEK!!
COUNTRY HUGS-N-KISSES
LARISSA   =)

Tuesday, June 14, 2016

Paper Sweeties June Release ~ I Love Summer Stamp Set & I Love Summer Sweet Cuts Die Set!! =)

Pin It
Paper Sweeties Design Team 
HELLO!!
I'm here to share the New Paper Sweeties June Release with you!! SQUEAL!! These New Products are just TOO SWEET!! Not only can they be used on there own, but they an also be used with several of the Older Paper Sweeties Sets to create even more AMAZING Creations!! I just LOVE LOVE LOVE when I can mix and match my Products!! =) Today I'm using the New
I CAN'T WAIT to share what I've made!! For today I've made a SWEET Window Shaker Card!! If your a Regular to my Blog you ALREADY KNOW that!!?? LOL!!  =)
I wanted to make a SWEET Scene using SEVERAL of the Images in the I Love Summer Stamp Set and then I Die Cut them out using the Coordinating I Love Summer Sweet Cuts Die Set!!
 I used Tumbled Glass Distress Ink to Watercolor the Background to my Window after I took the (Sparkler Wand Image) to Stamp and Emboss it in order to create a FUN Tree!!?? I used my Misti Stamping Tool so I could Double Stamp them for a Deeper Color!! I used Gathered Twigs, Mowed Lawn and Crush Olive Distress Markers to color right onto the Image and Stamped!! With the Misti it just makes this Technique so EASY!! LOVE IT!!  =) I wanted to fill in the Image alittle so I Double Stamped the Image for more depth and texture and Embossed everything using WoW Clear Super Fine Detailed Embossing Powder!!YIPPEE!! There's SO MANY things you can do with just this one AWESOME Image!! =)  I used my Distress Markers to Color onto the Stamped Images!! I Stamped and Embossed the Nest using Chestnut Embossing Powder!! I Layered it altogether and used a MFT Stitched Arch Die Set to create the Window Opening!! Some Pretty Pink Posh Sequins, Mini Heart Confetti and Seed Beads make the Shaker Filling and I even Sprinkled some on the outside of my Card too!! =) Some Licorice Bakers Twine from Paper Sweeties Finishes off my Card!!
Don't forget to check out what the rest of the AMAZING DT has created too!!
Beth Luetschwager - WELCOME TO THE TEAM! Debbie Marcinkiewicz - Paper SweetiesJeri Thomas
Jinny Newlin - *June Guest Designer* (You're here!)
I hope you FEEL INSPIRED!!?? I've still got LOTS More to Share, So I hope you'll come back tomorrow, to see a little more of what I Love Summer has to offer!!  =)THANKS SO MUCH for stopping by and have a FABULOUS WEEK!!
COUNTRY HUGS-N-KISSES
LARISSA   =)