Showing posts with label Distress Inks. Show all posts

Friday, May 5, 2023

Spring/Summer Coffee Lovers Blog Hop w/ Trinity Stamps!!

Pin It
HELLO CRAFTY FRIENDS!!
Spring/Summer Coffee Lovers Blog Hop 2023

SQUEAL!! This is one of my FAVORITE Times of the Year!!
I ENJOY making FUN and INSPIRING Coffee Themed Projects and sharing them with you as well and being INSPIRED by ALL of the Creations created by other Designs/Crafters!!
Here's what I've created for today!!
 
Hey Cu-Tea Coffee Mug Cards created by Larissa Heskett for Trinity Stamps using Beary Cute Layered Mug Die Set, Cat & Dog Layered Mug Die Set, A2 Coverplate: Quilted Cover Die, Chocolate Bunny Embossed Detail Die & Fairy Rocks Rhinestones
I thought it would be FUN to create some Care Bear Inspired Mugs using the NEW Trinity Stamps Beary Cute and Cat & Dog Layered Mugs Die Sets!! SQUEAL!! How CUTE are they!!?? They make me SMILE!!
Hey Cu-Tea Coffee Mug Card created by Larissa Heskett for Trinity Stamps using Beary Cute Layered Mug Die Set, Cat & Dog Layered Mug Die Set, A2 Coverplate: Quilted Cover Die, Chocolate Bunny Embossed Detail Die & Fairy Rocks Rhinestones
I Started by Die Cutting the Quilted Card Panel using the A2 Coverplate: Quilted Cover Die from some Distress Watercolor Cardstock!! 
Hey Cu-Tea Coffee Mug Card created by Larissa Heskett for Trinity Stamps using Beary Cute Layered Mug Die Set, Cat & Dog Layered Mug Die Set, A2 Coverplate: Quilted Cover Die, Chocolate Bunny Embossed Detail Die & Fairy Rocks Rhinestones
I Die Cut all of the pieces using Pink, Black and White Cardstock along with some Doodlebug Design Gingham Patterned Paper for the Handle and the Bow!! The Bow was Die Cut using the Chocolate Bunny Embossed Detail Die Set!! I Inked the Pink, White and Patterned Paper Die Cut pieces to add some Shading and Dimension to them!! I used Picked Raspberry and Hickory Smoke Distress Oxide Inks!! Then I adhered ALL of the Die Cut pieces to the main Mug Die Cut using some Crafty Glue Friend Adhesive!! 
Hey Cu-Tea Coffee Mug Card created by Larissa Heskett for Trinity Stamps using Beary Cute Layered Mug Die Set, Cat & Dog Layered Mug Die Set, A2 Coverplate: Quilted Cover Die, Chocolate Bunny Embossed Detail Die & Fairy Rocks Rhinestones
I added White Gel Pen Highlights, Lawn Fawn Chunky Glitter to the Whipped Topping and Glossy Accents to the Nose and Eyes for some Shine and Dimension!! Then finished the Design by adding some Fairy Rocks Rhinestones!!  
How FUN is this Cheer Bear Inspired Card, are you LOVING it too!!?? 
Hey Cu-Tea Coffee Mug Card created by Larissa Heskett for Trinity Stamps using Beary Cute Layered Mug Die Set, Cat & Dog Layered Mug Die Set, A2 Coverplate: Quilted Cover Die, Chocolate Bunny Embossed Detail Die & Fairy Rocks Rhinestones
I created the SAME Background as the 1st Card, by Die Cutting the Quilted Card Panel using the A2 Coverplate: Quilted Cover Die from some Distress Watercolor Cardstock!!
Hey Cu-Tea Coffee Mug Card created by Larissa Heskett for Trinity Stamps using Beary Cute Layered Mug Die Set, Cat & Dog Layered Mug Die Set, A2 Coverplate: Quilted Cover Die, Chocolate Bunny Embossed Detail Die & Fairy Rocks Rhinestones
I Die Cut all of the pieces using LavenderBlack and White Cardstock along with some Doodlebug Design Gingham Patterned Paper for the Handle and the Bow!! The Bow was Die Cut using the Chocolate Bunny Embossed Detail Die Set!! I Inked the LavenderWhite and Patterned Paper Die Cut pieces to add some Shading and Dimension to them!! I used Wilted Violet and Hickory Smoke Distress Oxide Inks!! Then I adhered ALL of the Die Cut pieces to the main Mug Die Cut using some Crafty Glue Friend Adhesive!!
Hey Cu-Tea Coffee Mug Card created by Larissa Heskett for Trinity Stamps using Beary Cute Layered Mug Die Set, Cat & Dog Layered Mug Die Set, A2 Coverplate: Quilted Cover Die, Chocolate Bunny Embossed Detail Die & Fairy Rocks Rhinestones
I added White Gel Pen HighlightsLawn Fawn Chunky Glitter to the Whipped Topping and Glossy Accents to the Nose and Eyes for some Shine and Dimension!! Then finished the Design by adding some Fairy Rocks Rhinestones!! 
How FUN is this Share Bear Inspired Card, are you LOVING it too!!??

THANKS SO MUCH for stopping by today!! I hope I've INSPIRED you to look at these FUN Products in a NEW Way and Create some Care Bear Coffee Mugs of your Own!! SQUEAL!! I PROMISE these will make the Recipients SMILE!! 

You have until Friday May 12th, to LINK UP your own Coffee Card Creations to get entered for SEVERAL Chances to WIN!! Trinity Stamps is one of the GENEROUS Super Sponsor for the 2023 Spring | Summer Coffee Lover’s Blog Hop!!

Have a FABULOUS WEEKEND Friends!! 

COUNTRY HUGS-N-KISSES
LARISSA  💗

Thursday, July 14, 2022

Newton's Nook Designs July Release 2022 ~ Bokeh Balloons Stencil Set ~ Birthday Release Recap!!

Pin It
Newton's Nook Designs July 9th Birthday Celebration Release 2022
HELLO CRAFTY FRIENDS!!
 
I'm here with Day 4 of the 
Today I'm showcasing the NEW Bokeh Balloons Stencil Set!!
Let's take a look at this AWESOME NEW Set!!
If you LOVE Stencil Sets, this one is a MUST Have for your Collection!! I LOVE all of the possibilities with this Set!! You can use ANY of your FAVORITE Inks or Mediums to make this Set come to life!!
SQEAL!! Cards for ANY Occasion made EASY!! 

I Started by Spraying the back side of the NEW Bokeh Balloons Stencils with Pixie Spray!! Then I Placed Stencil #1 onto the Card Panel I Die Cut from some Distress Watercolor Cardstock and placed it firmly into place!!  

Then I Inked the Balloons using some Distress Oxide and Distress Inks using some SSS Small Ink Blending Brushes to add some Shading to the Balloons for the look of Dimension and Highlights!! I used Scattered Straw and Fossilized Amber for the Yellow Balloons, Ripe Persimmon for the Orange Balloons, Peeled Paint for the Green Balloons and Salvaged Patina and Peacock Feathers for the Turquoise Balloons!! 

I removed the Stencil #1 once it was completely Inked and then Lined up the Etching marks on the Stencil #2 with the Inked Balloons and pressed the Stencil Firmly into place and then Inked again with the same Ink combos trying not to overlap any of the same color of Balloons!! Once completely Inked I removed the Stencil #2 and this is the BEAUTIFUL Panel I was left with!! 

Next I Stamped and Embossed the "Happy Birthday to You" Sentiment from the NEW Birthday Oval Stamp Set using Versa Fine Black Onyx Ink and Embossed with WoW Clear Gloss Embossing Powder onto a Circle Die Cut from the Circle Frames Die Set!!
Then I Colored the "Happy" with a
Copic Marker YG03
I Die Cut two Layering Circles and Inked them with Distress Inks to match the Inked Balloons!! Then I layered them together and adhered the Circle Sentiment to the Card Panel using Foam Tape!! 
I then Die Cut a Scalloped Frame from some Distress Watercolor Cardstock using the Frames & Flags Die Set and Inked it with Peacock Feathers Distress Ink!! Then I adhered the Stenciled Card Panel and adhered the Scalloped Panel onto a White A2 Cardbase using Faom Tape!! 
I finished off the Card Design by adding some Trinity Stamps Fairy Rocks Rhinestones to add a touch of Sparkle and I LOVE how this Card turned out!! It's SO VERSITLE too as it could be used for either a Masculine or Feminine Birthday Card!! 

Would you like to win the Bokeh Balloons Stencil Set!!?? 
This stamp set will be given away to ONE lucky winner!!

Here's how to win: Comment on the NND blog and Design Team blogs (see list below)! The winner will be chosen at random from the collective reveal posts. Make sure to check out each of their blogs and comment for your chance to win. You will not know which blog has been chosen so the more you comment on the better your chances are of winning! You have until Thursday July 14th at 9pm ET to comment  -- winners will be announced on the blog post on Friday July 15th. 

Check out all the awesome Design Team Blogs below to enter:

Newton's Nook Designs

Donna Idlet

Ellen Haxelmans

Larissa Heskett

Samantha Mann

Zsofia Molnar

Farhana Sarker

Tatiana Trafimovich

Amanda Wilcox

THANKS SO MUCH for stopping by today!! Make sure to leave me comments from ALL of the Release Week Posts for your chance to WIN!!
Then check out the Newton's Nook Designs Blog on Friday, July 15th to see if you're one of the LUCKY Winners!! 

Have a FABULOUS WEEKEND!!

LARISSA HESKETT ðŸ’™

Sunday, May 22, 2022

Hello Cutie with Papertrey Ink May Release: Adorable Outfits, Little One, Night Sky Background Stencil!!

Pin It

Hello Crafty Friends!! 

I'm here today sharing a SWEET Welcome Baby Gift Card Holder Box Book Project showcasing the NEW Papertrey Ink May Release!! I'm using the NEW Adorable Outfits Stamps & Dies the NEW Night Sky Background Stencils and the Little One Stamp Set along with some of the Product released last Month!! SWOON!! I'm SO in LOVE with these NEW Products that'll be available in the Papertrey Ink Store on May 24th at 10 PM ET!! 

I Started by creating my Gift Box using the Go-To Gift Card Holder: Book Box Die Set, Go-To Gift Card Holder: Book Die, Go-To Gift Card Holder: Book Packets Die Set!! I used some Doodle Bug Patterned Paper along with some 110 lb. Neenha Solar White Cardstock!! 

Then in order to create the Decorative Panel I Die Cut the PTI Mix & Mat: Confetti Die from some White Cardstock and then I masked off the border with some Pixie Tape and Inked lightly with some Salvaged Patina Distress Oxide Ink!! Then I Placed the NEW Night Sky Background Stencils and Inked again with Salvaged Patina Distress Oxide Ink for a Tone on Tone Design!! I didn't want a Crisp Design so once I removed the Stencil I went over it again lightly with my Blending Brush just to blend it out alittle and I LOVE the way it turned out!! I Die Cut the Adorable Onsie Out and then Inked with some Spun Sugar Distress Ink!! Then I Inked the Lace Sleeves with some Worn Lipstick Distress Oxide Ink and also Stamped the coordinating Lace Bow too!! I Die Cut the Images out using the coordinating Dies and using Foam Tape to adhere the Adorable Onsie to the front of my Gift Box Book!! I Stamped and Embossed the Star Tag from the Go-To Gift Card Holder: Bookmark Die Set!! Then adhered it to the Front of the Box Book with a Bling Zots Adhesive Dot and adhered a PTI Satin Bow!! 

For the Inside of my Gift Card Holder Book Box I create some Gift Card Holder and I Inked them all with the same NEW Night Sky Background Stencils and Inked again with Salvaged Patina Distress Oxide Ink for a Tone on Tone Design!! I created another Panel exactly like the one on the Front of the Box and Stamped and Embossed the Sentiments from the NEW Little One Stamp Set!! How SWEET is that Psalm 139!! Then I added some Bows and a Trinity Stamps Bauble for the Center for some extra Sweetness!! 

I added a PTI Satin Ribbon for the Book Closure and enclosed some Gift Cards to Amazon and Starbucks!! Those NEW Mommas need their Caffeine to help with those LONG Sleepless Nights and Days!! I LOVE how it turned out and I hope I've INSPIRED you with some Ideas for those NEW Baby Projects you might need to create!! 

THANKS SO MUCH for stopping by today and I hope you have a FABULOUS Week!! I'll be back again tomorrow with another Baby Card and coordinating Gift Card using some of these same Products!! 
Have a FABULOUS and BLESSED Sunday!!
 

COUNTRY HUGS-N-KISSES
LARISSA 💗

Sunday, July 25, 2021

CAS-ual Fridays Stamps July Release ~ Partly Cloudy Stencil!!

Pin It

Hello Crafty Friends!! 

I'm here for Day 3 of the CAS-ual Fridays Stamps July Release!! Today I'm showcasing the NEW Partly Cloudy  Stencil and I just LOVE this NEW Stencil and ALL of the Possibilities!! 
Here's a Look at the NEW Partly Cloudy Stencil!!
Here's the Project I've created for today!! 
I Started by Die Cutting a Panel for my Focal Point Stenciled Scene!! I Placed the Stencil over the Panel and Inked the Cloud Borders using Salvaged Patina Distress Ink!! Then I Inked the Sun using Fossilized Amber, Carved Pumpkin and Rusty Hinge Distress Oxide Inks!! I created a FUN Layered Sun my rotating the Stencil and I LOVE how it looks!! 

Next I Inked the Rainbow!! I wanted it too look like it was coming from behind the Clouds, so I had to do some Masking with Purple Tape in order to extend some of the Rainbow Arches!! I think it was worth the extra work and LOVE how it came out!! I Inked with Festive Berries, Carved Pumpkin, Mustard Seed and Mowed Lawn Distress Inks!! 

I Stamped and Embossed the Sentiment from the Pretty Posies Stamp Set and then added some Trinity Stamps Fairy Rocks Rhinestones for some Sparkle!! Then I adhered the Stenciled Panel to a Sunny Studios Stamps Gingham Patterned Paper Panel and adhered the entire Panel to an A2 White Cardstock Cardbase!! 

THANKS SO MUCH for stopping by today!! I hope I've INSPIRED You!!?? Come back again tomorrow for a look at the NEW Falling Leaves Stencil!! 
Don't forget to visit the CAS-ual Fridays Stamps Blog for a chance to WIN and to check out ALL of the other AMAZING DT Creations!! 

Have a FABULOUS WEEKEND!! 


COUNTRY HUGS-N-KISSES
LARISSA  💗


Thursday, April 16, 2020

Paper Sweeties April 2020 Release Rewind!!

Pin It
HELLO!!
I'm here to share the Paper Sweeties April 2020 Release Rewind!! I've used the NEW Sweet Mini Duo: Just a Note Stamp Set and the Sweet Mini Duo: Have a Happy Day Set!! 
Here's a look at the NEW Sets!! 

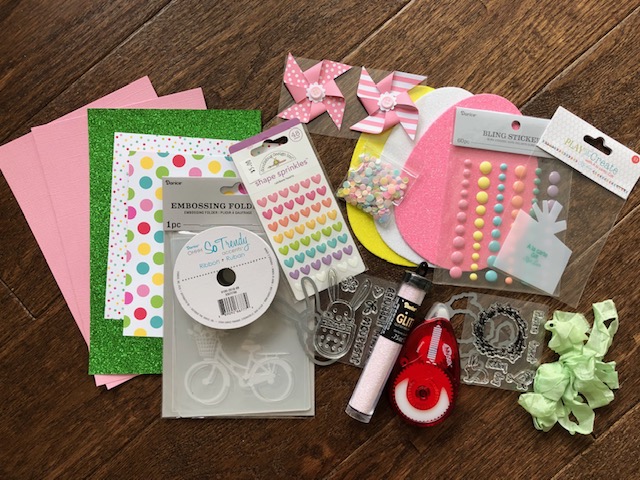
These Sets are part of the Sweet Kits Quarterly CLUB … read all about member benefits HERE!! Here's a snapshot of the FUN Goodies contained in this months quarter’s kit:

 I created two Cards using the Embossing Folder that comes in the Kit along with the Images!! After Embossing the Bicycle onto my Card Panel I then inked over the top with an Ink Dauber to color the Embossed Bicycle!! I wanted it to be light so that the Stamped Images would POP!! 
I added some Black Soot Paint Splatters and the Sentiments where Stamped onto Black Cardstock with Versa Marks Ink and WoW Bright White Embossing Powder!! I LOVE the contrast and think this design would be PERFECT for ANY Occasion just by changing the sentiment!! 

If you’re not interested in the AWESOME Kits, at this time you can find the sets created exclusively for the quarter kits in the Sweet Minis category on our website … WHILE SUPPLIES LAST.  These sets are created for the kits and will NOT be restocked after they sell out!!
 Please continue to hop along and visit our talented Design Team Contributors’ blogs to be inspired by their AMAZING projects:
Debbie Marcinkiewicz – Paper Sweeties 

THANKS SO MUCH for stopping by and I hope you have a FABULOUS WEEK!! 

COUNTRY HUGS-N-KISSES 
LARISSA   ðŸ’–

Wednesday, April 15, 2020

Paper Smooches April #2 Challenge ~ Happy Things!!

Pin It
HELLO!! 
I'm here for the Paper Smooches April Challenge #2 ~ Happy Things!! I thought it would be FUN to create a Birthday Card using a Mix of New and Old Paper Smooches Products!! I LOVE shopping my Stash!! It's FUN to pull out those older Products and see how you can breath New Life into them!! So here's what I've created for today!! 
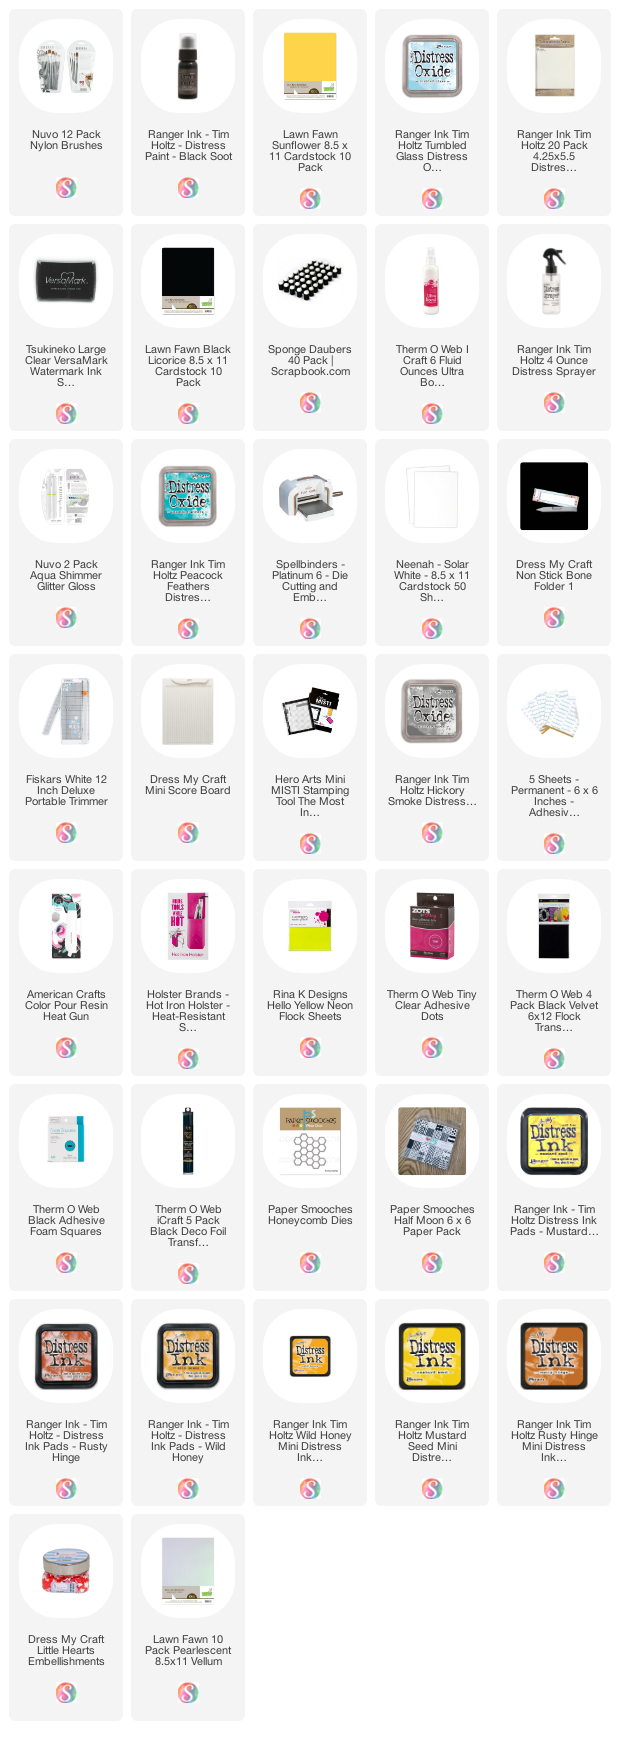
I Started with the SWEET Bumble Bee!! I've used the Build a Bug Die Set and Die Cut it from some Therm O Web Deco Foil Flock Sheets in Black Velvet and the NEW Rina K Designs Neon Hello Yellow Flock!! I Inked the Yellow Body with some Mustard Seed Distress Ink in order to add some Shading and it also helps to make the Flock texture POP!! SQUEAL!! I just LOVE creating my Images with the Flock Sheets!! It really does help to bring them to LIFE!! I wanted the Strip to have some Texture too, and its hard to see in the Photo, but I've used the Paper Smooches Half Moon Patterned Paper and I Foiled the Plaid Design with some Black Deco Foil and then I Inked it with some Black Soot Distress Ink!! It's a FUN Black Foiled Plaid and in real life just that little detail really adds some character to this SWEET Bee!! I Die Cut the Wings from some Lawn Fawn Pearlescent Vellum and Inked them with some Hickory Smoke Distress Oxide Ink for some Dimension!! Then I added a Trinity Stamps Clay Heart to the chest of the Bee and some 3mm Mini Wiggle Eyes to the Bee!! 

I Started by Inking my Background with some Tumbled Glass and Peacock Feathers Distress Oxide Inks and added some Water Droplets for some Texture!! Then I Die Cut the Flourish 1 Die into the Card Panel for the look of Flight!! I LOVE the movement it adds to the Bee!! I wanted to use the Honeycomb Die for a FUN background so I Die Cut it 5 times from some Neenah Solar White Cardstock and then layered them together!! I LOVE the dimension that it added!! I wanted to fill in the Design with some of the Hexagon Pieces, but I wanted to add Color to them so I Inked them using some Mustard Seed, Wild Honey and Rusty Hinge Distress Inks!! Then I added them to the Honeycomb Frame and around the Frame to the Design!! I Stamped and Embossed the Sentiment "Hapbee Birthday" from the Courteous Cuties Stamp Set onto the Card Panel using Versa Fine Black Onyx Ink and WoW Clear Gloss Embossing Powder!! 

Challenge deadline: April 28th, 2018 at 11:59pm PST
Winners will be posted on April 29/30. 
Next challenge begins May 1st. 

Here are the rules: 
  1. Create a NEW project (card, tag, layout, journaling page, etc).
  2. You must use at least one Paper Smooches stamps/dies or free digital images- please link to our website: http://www.papersmoochesstamps.com
  3. Post your project on your blog/social media platform and submit a direct link to your post/image using our linking system. 
  4. Please display our banner on your blog post (right click on the banner and save to your computer. If you have any trouble, I am happy to email the image to you, savannahland2 at comcast dot net)
  5. All skill levels are welcome!!! 
  6. You can enter as many times as you like! 
Here's what you are playing for: 3 winners
  • One winner will win a prize pack (pictured below)
  • One winner will receive a $25 Paper Smooches gift certificate.
  • One winner will receive a $5 Paper Smooches gift certificate.


Also if you wanted to help Kim CELEBRATE her 49th Birthday, you can use this Code: HBKIM49 
to SAVE 49% off ANYTHING in the Paper Smooches store!! You have until April 16th @ 9:00 AM PT to use the Code!! 

THANKS SO MUCH for stopping by and I hope you have a FABULOUS WEEK!! I can't wait to see what you create for the Challenge!! 

COUNTRY HUGS-N-KISSES
LARISSA  💖

Sunday, March 29, 2020

CAS-ual Fridays Stamps March Release ~ Hot Mama!!

Pin It

HELLO!!

I'm here today with Day 1 of the CAS-ual Fridays Stamps for the March Release!! Today I'm showcasing the NEW Hot Mama Stamp Set!!
Here's a look at he NEW Set!! 
Hot Mama
SQUEAL!! How FUN is this NEW Set!! I just LOVE it and ALL of the Possibilities with it!! Not only for the Occasions you can use it, but also with all of the different techniques you can use it with!! I decided to Stamp and Emboss the main Sentiment using Distress Oxide Inks and some WoW Clear Gloss Embossing Powder!! SWOON!! Nothing makes me HAPPIER than a Rainbow, so Rainbow Colors it was!! Think of ALL of those Colors you could use those!! Especially if its for a NEW Mother that's having a Baby Shower and she's got a Theme!! You can use those Colors for a VERY SPECIAL Card!! I used Ink Daubers to apply the Distress Inks to my Stamp using Candied Apple, Carved Pumpkin, Mustard Seed, Peeled Paint and Peacock Feathers!! Some of my FAVORITE Colors!! I wanted to create a Circle Sentiment so I Die Cut it using a Stitched Circle Die Cut!! 
I Die Cut some Lawn Fawn Patterned Paper and then I added some Black Soot Distress Paint Splatters and a few Iridescent Jewels!! I Stamped and Embossed the second Sentiment onto a Black Banner using Versa Mark Ink and some WoW Bright White Embossing Powder!! I used Foam Tape to adhered both the Circle Sentiment and the Banner Sentiment to the front of my Card Panel and I LOVE the Way it turned out!! 

Don't forget to Leave Comments on the CAS-ual Fridays Stamps Blog for a chance to WIN!! 
 Also if you shop the Store for NEW, Old and Sale Products in the CFS Shop, You can use my Discount Code: LARISSASENTME to SAVE 15% off anything in the Shop!!
 
THANKS SO MUCH for stopping by today and I hope you have a FABULOUS WEEKEND!! 
Make sure to come back tomorrow for a look at the NEW Terrific Flowers Set and another chance to get entered to WIN!! 

COUNTRY HUGS-N-KISSES
LARISSA  💖