Showing posts with label Paper Smooches. Show all posts

Thursday, August 27, 2020

Saying GOODBYE to Paper Smooches!!

Pin It

HELLO!!
I'm here to share a Couple Cards I've made as Part of the LAST ๐Ÿ˜ญ Paper Smooches Challenge!! I've been a FAN of Paper Smooches from the beginning and feel SO LUCKY to have not only met the SUPER AMAZING and SWEET Kim in person at CREATIVATION, but I was also a part of the Challenge DT for a couple years and LOVED EVERY Minute of it!! 

So today's cards are my THANKS YOU to both Kim and Paper Smooches!! I will MISS EVERYTHING about you and THANKS SO MUCH for not only seeing something in my Designs, but for also being an AMAZING Role Model!! I look forward to seeing what you'll be doing in the Future!! 
 For my First Card I wanted to channel my inner Heather Nichols!! SWOON!! I'm ALWAYS SO INSPIRED by her Kraft Creations, so that's where I started!! I Die Cut the Frame from TE Toffee Cardstock and inked the edges of the frame with some Walnut Distress Oxide Ink!! 
I Die Cut the SWEET Pumpkin from some Patterned Paper and then I Die Cut the Stem from some Wood Patterned Paper, the Leaf from some Therm O Web Emerald Green Deco Foil Flock Sheet and the Hearts from some of the NEW Therm O Web Peach Princess Deco Foil that I laminated onto some Deco Foil Toner Sheets!! It's hard to see in the Photo, but the Iridescent Shine to this Foil just makes it AMAZING in real life!! I added some Picket Fence and Black Soot Distress Paint Splatters and then Stamped and Embossed the Sentiment and the Curly Tendril by the Pumpkin!!  

I created a Coordinating Envelope using the Gingham Stencil and some Mandarin Orange and Ripe Persimmon Distress Oxide Inks!! Finished it off with some Picket Fence and Black Soot Distress Paint Splatters!! 
My second Card was created exactly the same way, only this time I channeled my LOVE for White Pumpkins!! SWOON!! Not sure what it is, but I LOVE me some White Pumpkins!! I Stenciled the Gingham Pattern using Hickory Smoke Distress Oxide Ink and then Die Cut the Pumpkin!!
I inked the background with some Tumbled Glass and Speckled Egg Distress Oxide Ink!! Then I Die Cut the Stem from some Wood Patterned Paper, the Leaf from some Therm O Web Emerald Green Deco Foil Flock Sheet and the Hearts from some of the NEW Therm O Web Glass Slipper Deco Foil that I laminated onto some Deco Foil Toner Sheets!! It's hard to see in the Photo, but the Iridescent Shine to this Foil just makes it AMAZING in real life!! I added some Picket Fence and Black Soot Distress Paint Splatters and then Stamped and Embossed the Sentiment and the Curly Tendril by the Pumpkin!!
I created a Coordinating Envelope using the Gingham Stencil and some Hickory Smoke Distress Oxide Inks!! Finished it off with some Picket Fence and Black Soot Distress Paint Splatters!! 
I LOVE how these turned out and I hope I've INSPIRED you!! Remember the SIMPLE Designs really POP with those little Details!! Such as the Flocked Leaves and those Deco Foiled Hearts!! Those tiny additions just make me HAPPY!! 
THANKS SO MUCH for everything Kim I will FOREVER be GRATEFUL for you and our Friendship!! 

THANKS SO MUCH for stopping by today and I hope you have a FABULOUS WEEK!! 

COUNTRY HUGS-N-KISSES
LARISSA  ๐Ÿ’—

Wednesday, May 27, 2020

Thanks So Much Friend w/ Paper Smooches & Spring Summer Coffee Lovers Hop!!

Pin It
HELLO CRAFTY FRIENDS!! 
I'm sharing this SWEET Thanks So Much Friend Card that I've made for both the Paper Smooches Thank You Themed Challenge and the Spring Summer Coffee Lovers Hop!! I can't believe how FAST this week is flying by!! I have SO MANY Cards to share, and just a few more days to get them ALL in!! EEKKK!! Here's my Card for today!! 
SQUEAL!! How SWEET is this Coffee Bumble Bee!! I just LOVE her!! I started by Stamping and Embossing the Image from the Caffeinated Stamp Set!! I Stamped with Vera Fine Black Onyx Ink and them Embossed with WoW Embossing Clear Gloss Powder!! 
I Colored the Image using Copic Markers 
(Wrap: Y00, Y15 & YR23   Cheeks: R00 & RV11  Cup & Lid: N6, N4, N2 & N0   Glasses: B00 & BG10)  
Then I Fussy Cut the Image out!! I Die Cut the Wings and the Antenna from the Build a Bug Die Set!! These Images are the PERFECT Scale for the Coffee Cup!! I Die Cut the Wings from some Pearlescent Vellum from Lawn Fawn and Inked them with some Hickory Smoke Distress Oxide Ink using an Ink Dauber for some Dimension!! I used Black Cardstock for the Antenna layering 3 together for a sturdier thickness!! Then I adhered them to the Coffee Cup!! I added some White Gel Pen Details and then added some Foam Tape to the back for some Dimension!! I Die Cut the Friend Die from some Honeycomb Patterned Paper and then layered it with a Black Cardstock for a Shadowed effect!! I LOVE the way it POPS off the Card Panel!! I Stamped and Embossed the Thanks So Much Sentiment from the Graceful Beauties Stamp Set!! 
I wanted to add some Pops of Red to create a Visual Triangle and to make it more of a feminine Design!! I Die Cut the Bitty Bows from some Therm O Web Toner Sheets that I foiled with some Gina K Designs Radiant Red Fancy Foil!! Then I Die Cut the Flowers from some Cherry Pop Cardstock using the Mini Flowers Die Set!! I Layered the Flowers together and added some Pearls to the  Centers!! I LOVE finding CUTE ways to combine the Products in my Stash to create unexpected Cards and this one REALLY Screams Summer and just makes me SMILE!! 
I hope I've INSRED you to look at what you have a create a SWEET Critter!!
THANKS SO MUCH for stopping by today and I hope you'll join in the FUN for SEVERAL chances to WIN!! 
Have a FABULOUS WEEK!! 

COUNTRY HUGS-N-KISSES
LARISSA  ๐Ÿ
Below you will find links to the supplies used to create this project(s). Click the icon for the store underneath the thumbnails to start shopping. Where available I use compensated affiliate links at no extra cost to you. Your support helps me to keep bringing you new projects. Thank you!!


Wednesday, April 15, 2020

Paper Smooches April #2 Challenge ~ Happy Things!!

Pin It
HELLO!! 
I'm here for the Paper Smooches April Challenge #2 ~ Happy Things!! I thought it would be FUN to create a Birthday Card using a Mix of New and Old Paper Smooches Products!! I LOVE shopping my Stash!! It's FUN to pull out those older Products and see how you can breath New Life into them!! So here's what I've created for today!! 
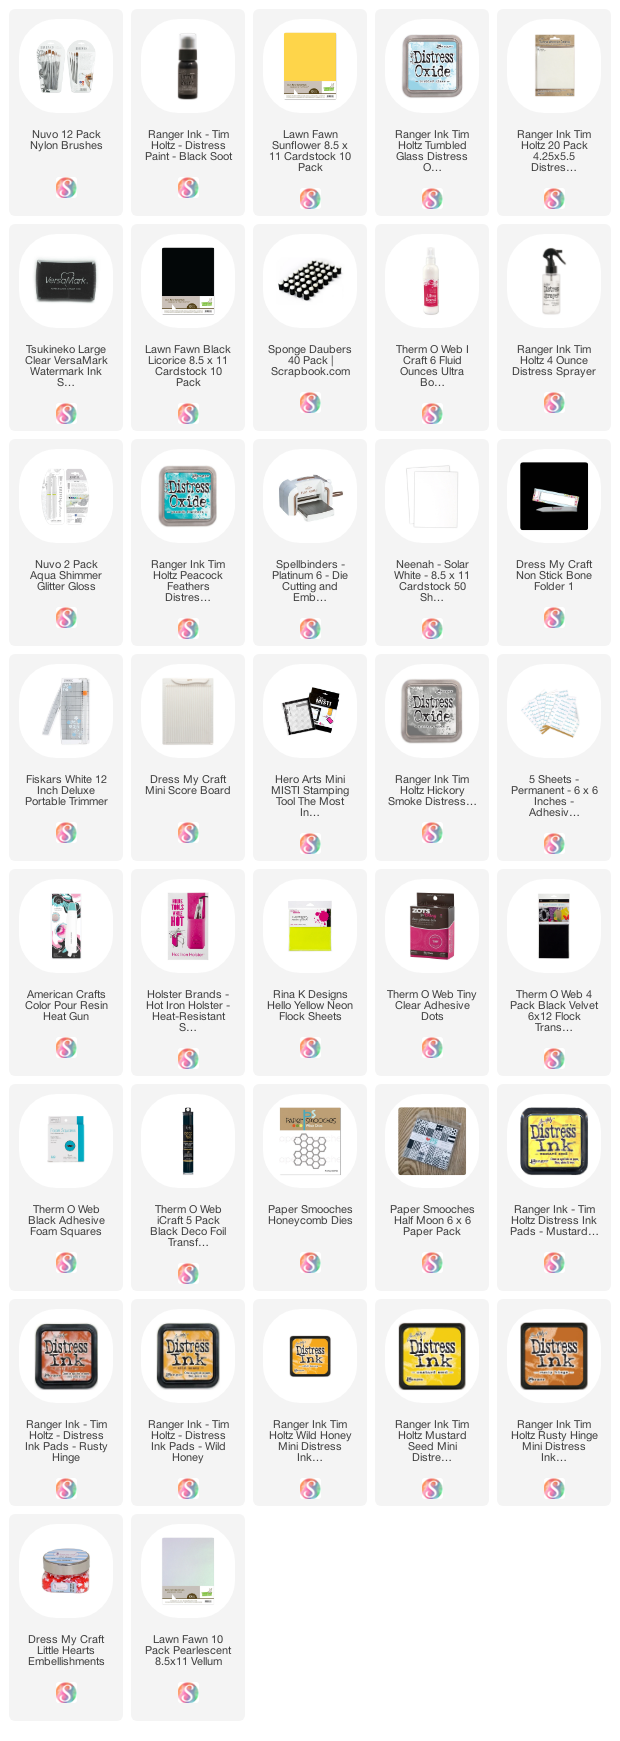
I Started with the SWEET Bumble Bee!! I've used the Build a Bug Die Set and Die Cut it from some Therm O Web Deco Foil Flock Sheets in Black Velvet and the NEW Rina K Designs Neon Hello Yellow Flock!! I Inked the Yellow Body with some Mustard Seed Distress Ink in order to add some Shading and it also helps to make the Flock texture POP!! SQUEAL!! I just LOVE creating my Images with the Flock Sheets!! It really does help to bring them to LIFE!! I wanted the Strip to have some Texture too, and its hard to see in the Photo, but I've used the Paper Smooches Half Moon Patterned Paper and I Foiled the Plaid Design with some Black Deco Foil and then I Inked it with some Black Soot Distress Ink!! It's a FUN Black Foiled Plaid and in real life just that little detail really adds some character to this SWEET Bee!! I Die Cut the Wings from some Lawn Fawn Pearlescent Vellum and Inked them with some Hickory Smoke Distress Oxide Ink for some Dimension!! Then I added a Trinity Stamps Clay Heart to the chest of the Bee and some 3mm Mini Wiggle Eyes to the Bee!! 

I Started by Inking my Background with some Tumbled Glass and Peacock Feathers Distress Oxide Inks and added some Water Droplets for some Texture!! Then I Die Cut the Flourish 1 Die into the Card Panel for the look of Flight!! I LOVE the movement it adds to the Bee!! I wanted to use the Honeycomb Die for a FUN background so I Die Cut it 5 times from some Neenah Solar White Cardstock and then layered them together!! I LOVE the dimension that it added!! I wanted to fill in the Design with some of the Hexagon Pieces, but I wanted to add Color to them so I Inked them using some Mustard Seed, Wild Honey and Rusty Hinge Distress Inks!! Then I added them to the Honeycomb Frame and around the Frame to the Design!! I Stamped and Embossed the Sentiment "Hapbee Birthday" from the Courteous Cuties Stamp Set onto the Card Panel using Versa Fine Black Onyx Ink and WoW Clear Gloss Embossing Powder!! 

Challenge deadline: April 28th, 2018 at 11:59pm PST
Winners will be posted on April 29/30. 
Next challenge begins May 1st. 

Here are the rules: 
  1. Create a NEW project (card, tag, layout, journaling page, etc).
  2. You must use at least one Paper Smooches stamps/dies or free digital images- please link to our website: http://www.papersmoochesstamps.com
  3. Post your project on your blog/social media platform and submit a direct link to your post/image using our linking system. 
  4. Please display our banner on your blog post (right click on the banner and save to your computer. If you have any trouble, I am happy to email the image to you, savannahland2 at comcast dot net)
  5. All skill levels are welcome!!! 
  6. You can enter as many times as you like! 
Here's what you are playing for: 3 winners
  • One winner will win a prize pack (pictured below)
  • One winner will receive a $25 Paper Smooches gift certificate.
  • One winner will receive a $5 Paper Smooches gift certificate.


Also if you wanted to help Kim CELEBRATE her 49th Birthday, you can use this Code: HBKIM49 
to SAVE 49% off ANYTHING in the Paper Smooches store!! You have until April 16th @ 9:00 AM PT to use the Code!! 

THANKS SO MUCH for stopping by and I hope you have a FABULOUS WEEK!! I can't wait to see what you create for the Challenge!! 

COUNTRY HUGS-N-KISSES
LARISSA  ๐Ÿ’–

Tuesday, April 14, 2020

Paper Smooches April Challenge ~ Pastel!!

Pin It

HELLO!! 
I'm stopping in to share this SWEET Missing You...Pig Time!! Card I've made as part of the Paper Smooches April Challenge #1 ~ Pastel!! I LOVE this sentiment and we can't wait to send it to someone SPECIAL to BRIGHTEN their Week!! 
Challenge deadline: April 14th, 2018 at 11:59pm PST
Winners will be posted on April 16th. 
Next challenge begins April 15th.


I started by Die Cutting the Paper Smooches Cat Dog Card Die from some Therm O Web Pink Carnation Deco Foil Flock Sheets!! I Inked them using some TE Watermelon Ink to add some Dimension to make the texture POP!! I Die Cut the Nose using the Bear Frog Card Die and the Eyelashes were Die Cut from the Bunny Card Die!! I wanted to add a BEAUTIFUL Flower so I Die Cut it from the Sunflower Die Set and the Leaves were Die Cut from some of the NEW Therm O Web and Rina K Designs Neon Screamin' Green Flock Sheets!! I inked them with some Lucky Clover Distress Oxide Ink!! The Flower Center was Die Cut from a Piece of Cardstock that I coated with some Gina K Designs Gold Glitz Glitter Gel and then Die Cut it out and backed it with some White Cardstock that I inked with some Scattered Straw Distress Ink!!


I Stamped and Embossed the Sentiment from the Critter Card Puns Stamp Set and then Stamped and Embossed the Heart to tie in the Colors from the front of the Card!! 
I LOVE the way it turned out and I CAN'T WAIT to see what you create for the Challenge!! You still have about 8 hours to play along for chances to WIN!! 

Here are the rules: 
  1. Create a NEW project (card, tag, layout, journaling page, etc).
  2. You must use at least one Paper Smooches stamps/dies or free digital images- please link to our website: http://www.papersmoochesstamps.com
  3. Post your project on your blog/social media platform and submit a direct link to your post/image using our linking system. 
  4. Please display our banner on your blog post (right click on the banner and save to your computer. If you have any trouble, I am happy to email the image to you, savannahland2 at comcast dot net)
  5. All skill levels are welcome!!! 
  6. You can enter as many times as you like! 
Here's what you are playing for: 3 winners

  • One winner will win a prize pack (pictured below)
  • One winner will receive a $25 Paper Smooches gift certificate
  • One winner will receive a $5 Paper Smooches gift certificate
Now its your turn!! I CAN'T WAIT to see what you create!! 
THANKS SO MUCH for stopping by today and I hope you have a FABULOUS WEEK!! 

COUNTRY HUGS-N-KISSES
LARISSA  ๐Ÿ’–

S U P P L I E S
Below you will find links to the supplies used to create this project(s). Click the icon for the store underneath the thumbnails to start shopping. Where available I use compensated affiliate links at no extra cost to you. Your support helps me to keep bringing you new projects. Thank you!!


Wednesday, April 1, 2020

Paper Smooches April #1 Challenge ~ Pastel!

Pin It
Challenge deadline: April 14th, 2018 at 11:59pm PST
Winners will be posted on April 16th. 
Next challenge begins April 15th.


HELLO!! 
I'm here with the NEW Paper Smooches April Challenge #1 ~ Pastel!! I LOVE using Pastel Colors especially during the Spring, so this is a FUN Challenge!! I wanted to create a Floral Bouquet Card that I could send to my Mom!! This has been the LONGEST we've gone without seeing them and its been ROUGH for all of us, especially my Kiddos!! 

I Started by creating the Card Panel Background Inking with Tumbled Glass Distress Oxide Ink!! I added some Water Splatters and let it Dry!! Then I took the Hot Dot stencil and placed it over the Background and Inked it Randomly using Tumbled Glass Distress Oxide Ink!! I LOVE the texture it adds to the Background!! I then added some Black Soot Distress Paint Splatters and some Tonic Studio Clear Glitter Pen Splatters for some Sparkle and set it aside to Dry!! 
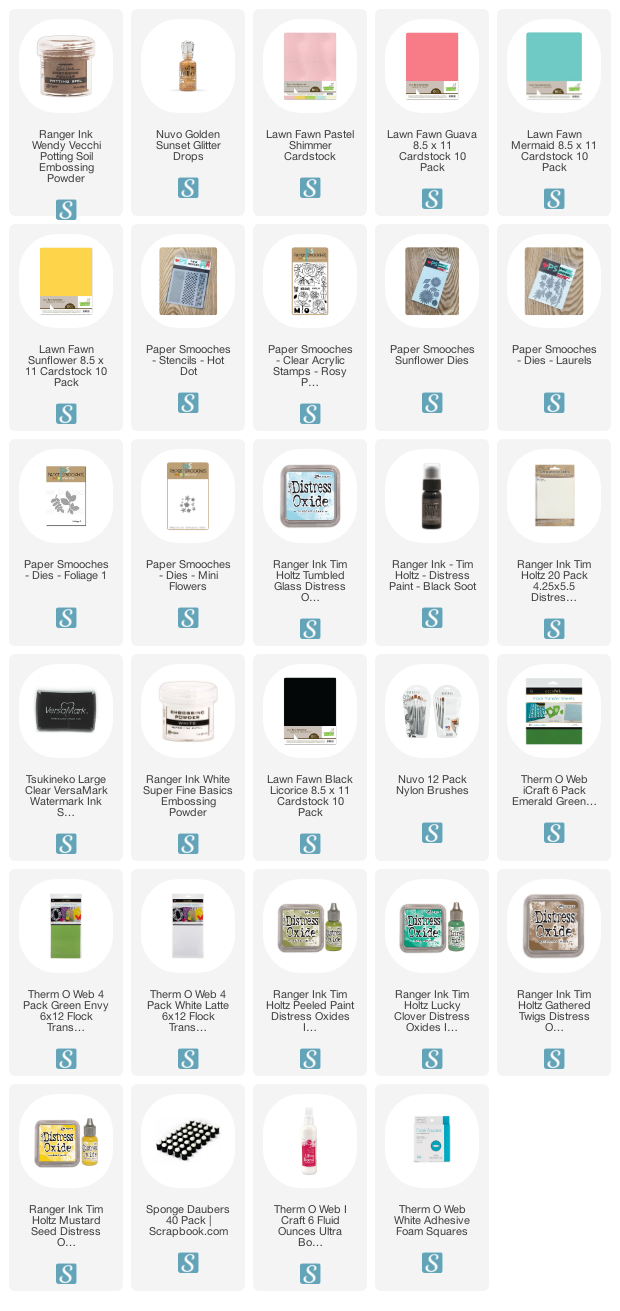
I used SEVERAL Dies to create my Floral Bouquet, but look through your stash and see what you Dies you have!! It's really easy to create a Bouquet and just by mixing together the different Textures and types of Cardstock/Paper you use also adds to the Design!! I've used Lawn Fawn Shimmer Cardstock along with regular Cardstock and some Therm O Web Deco Foil Flock Sheets for the Greenery and some of the other Sprigs to add some extra Texture!! In real life its a GAME Changer!! 

I used the Sunflower Dies and Die Cut it from some Lawn Fawn Cardstock (in Sunflower and Pastel Shimmer) inking the edges of the Die Cuts with Mustard Seed Distress Ink using and Ink Dauber for some Dimension!! For the Center I Die Cut from some Cardstock that I coated with some Versa Mark Ink and Embossed with some Ranger Potting Soil Embossing Powder and Sprinkled it with some WoW Metalic Gold Glitter Embossing Powder to add some Sparkle!! I then added some Glitter Nuvo Drops in Sunset to the holes for some Dimension!! I LOVE the way it turned out!! For the Leaves I Die Cut them from the Therm O Web Emerald Green Deco Foil Flock Sheets that I inked with some Lucky Clover Distress Oxide Ink for some Dimension!! Next I Die Cut the Flower Dies from Lawn Fawn Pastel Shimmer Cardstock and Regular Cardstock in Guava and Mermaid, Layering them together after Inking with Worn Lipstick, Ripe Persimmon and Peacock Feathers Distress Oxide Inks!! I used TE Peach Cardstock for the Centers of the Orange Flowers also Inking with Ripe Persimmon Distress Oxide Ink!! I added Studio Katia Pearls and some Iridescent Jewels for some Sparkle and Shine!! I Die Cut the Foliage 3 Dies along with Flower Dies and Laurel Dies from some Green Envy Therm O Web Deco Foil Flock Sheets and Inked with Peeled Paint Distress Oxide Ink and some White Latte Deco Foil Sheets and Inked with some Gathered Twigs Distress Oxide Inks!! I used both iCraft Ultra Bond Adhesive and Gina K Designs Foam Squares to adhere the Flowers on Card Panel!! I Like adding Dimension to make the Bouquet more realistic!! I Stamped and Embossed the Sentiment from Rosy Posy Dies onto some Black Cardstock with Versa Mark Ink and WoW Bright White Embossing Powder!! 

Here are the rules: 
  1. Create a NEW project (card, tag, layout, journaling page, etc).
  2. You must use at least one Paper Smooches stamps/dies or free digital images- please link to our website: http://www.papersmoochesstamps.com
  3. Post your project on your blog/social media platform and submit a direct link to your post/image using our linking system. 
  4. Please display our banner on your blog post (right click on the banner and save to your computer. If you have any trouble, I am happy to email the image to you, savannahland2 at comcast dot net)
  5. All skill levels are welcome!!! 
  6. You can enter as many times as you like! 
Here's what you are playing for: 3 winners

  • One winner will win a prize pack (pictured below)
  • One winner will receive a $25 Paper Smooches gift certificate
  • One winner will receive a $5 Paper Smooches gift certificate
Now its your turn!! I CAN'T WAIT to see what you create!! 
THANKS SO MUCH for stopping by today and I hope you have a FABULOUS WEEK!! 

COUNTRY HUGS-N-KISSES
LARISSA  ๐Ÿ’–


S U P P L I E S

Below you will find links to the supplies used to create this project(s). Click the icon for the store underneath the thumbnails to start shopping. Where available I use compensated affiliate links at no extra cost to you. Your support helps me to keep bringing you new projects. Thank you!!

Sunday, March 15, 2020

Paper Smooches March Challenge ~ Animals Theme!!

Pin It
Hello Crafty Friends!! 


Today starts the NEW Paper Smooches March Challenge!! Our challenges are a fun way to get you inspired!! This months theme is ANIMALS!!
Challenge deadline: March 28th, 2018 at 11:59pm PST
Winners will be posted on March 29/30. 
Next challenge begins April 1st. 

Here are the rules: 
  1. Create a NEW project (card, tag, layout, journaling page, etc).
  2. You must use at least one Paper Smooches stamps/dies or free digital images- please link to our website: http://www.papersmoochesstamps.com
  3. Post your project on your blog/social media platform and submit a direct link to your post/image using our linking system. 
  4. Please display our banner on your blog post (right click on the banner and save to your computer. If you have any trouble, I am happy to email the image to you, savannahland2 at comcast dot net)
  5. All skill levels are welcome!!! 
  6. You can enter as many times as you like! 
  7. One winner will win a prize pack (pictured below)
  8. One winner will receive a $25 Paper Smooches gift certificate.
  9. One winner will receive a $5 Paper Smooches gift certificate.

 SWOON!! I KNOW I'm not alone when I say that the Paper Smooches Animal Images are among some of my FAVORITES out there, so when I saw the NEW Challenge Theme I have to admit the HARDEST decision was choosing what Image to use!! lol!! I decided to go with the SWEET Bird from the NEW Happy Hellos Stamp Set!! I Stamped and Embossed the Image and then used Copic Markers to Color the Image!! I then used the coordinating Happy Hellos Icons Dies to Die Cut the Image out!! I wanted to make a Base of Leaves for the Image to rest so after looking through my stash I decided on using the Leaf Sprig Images from the Natural Beauties Stamp Set!! These sets are the PERFECT complements to one another!! After Stamping and Embossing the Images (I used the two different Leaf Sprig Images and the Little Bird Image) I colored them in with Copic Markers and then used the coordinating Natural Beauties Icons Dies to Die Cut them out!! 
I wanted to Dress the Bird up alittle so I Die Cut the Bow Die from some Patterned Paper and then added a Jewel to the center for some Sparkle!! I also wanted to finish the Sentiment so I Die Cut the Gift Tags 3 Die and Stamped and Embossed the Sentiment using some WoW Embossing Powders in both Clear Gloss and Red Glitz!! I LOVE the touch of Sparkle and Shine!! I also Die Cut some of the from the same set from some Cardstock that I coated with the same Red Glitz Embossing Powder and added them around the Image!! A Burlap Twine Bow finishes off the Tag, and some Tonic Studios Nuvo Drops in Morning Dew were added to the Beak and white Gel Pen Details for some Highlights!! I LOVE the way it turned out!! 


THANKS SO MUCH for stopping by today and I CAN'T wait to see what you create for the Challenge!! 
Have a FABULOUS WEEK!! 

COUNTRY HUGS-N-KISSES
LARISSA   ๐Ÿ’–

Sunday, March 1, 2020

Paper Smooches March #1 Challenge ~ Anything Goes!!

Pin It
Hello Crafty Friends!! 

Today starts the NEW Paper Smooches March Challenge!! Our challenges are a fun way to get you inspired!! This months theme is-ANYTHING GOES.
Challenge deadline: March 14th, 2018 at 11:59pm PST
Winners will be posted on March 16th. 
Next challenge begins March 15th. 

Here are the rules: 
  1. Create a NEW project (card, tag, layout, journaling page, etc).
  2. You must use at least one Paper Smooches stamps/dies or free digital images- please link to our website: http://www.papersmoochesstamps.com
  3. Post your project on your blog/social media platform and submit a direct link to your post/image using our linking system. 
  4. Please display our banner on your blog post (right click on the banner and save to your computer. If you have any trouble, I am happy to email the image to you, savannahland2 at comcast dot net)
  5. All skill levels are welcome!!! 
  6. You can enter as many times as you like! 
Here's what you are playing for: 3 winners

  • One winner will win a prize pack (pictured below)
  • One winner will receive a $25 Paper Smooches gift certificate
  • One winner will receive a $5 Paper Smooches gift certificate
Thank You Card by Larissa Heskett for Paper Smooches using Sportsball, Seeing Stars, Vanilla Verbiage, Starry Stencil #papersmooches #papersmoochesstars #thankyoucard
Today I've made a Card to THANK the Coach of my son Beckett's Traveling Basketball Team!! They just finished their 7th Grade Season and had a Party to CELEBRATE!! I LOVE the way it turned out!! I LOVE being able to Personalize Cards like this and the Sportsball Set is a FUN one for ALL things Sports related!! I started by Masking off the Area in the top 2/3 of the Card!! THen I Stamped and Embossed the Basketball Images!! I used Copic Markers to color them in using VR00. VR02, YR18 & YR68!! Then I Stamped and Embossed another Basketball and Die Cut it out using the coordinating  Dies!! I wanted to add a POP of Red and Grey as those are our Colors!! So I used the Starry stencil and applied some Candied Apple Red Distress Ink to place the Stars!! I then took the Seeing Stars Stamp Set and Stamped the Little Stars in MFT Grey Grout Ink!! 
I then added some Black Soot Distress Paint Splatters and finished off the design with some Star and Mini Star Silver Confetti for a touch of Sparkle!! Then I Stamped and Embossed the Thank You Speech Bubble using the Vanilla Verbiage Stamp Set and Die Cut it out using the Vanilla Verbiage Icons Dies!! I adhered the Panel to the Cardbase using Foam Tape and then adhered the Basketball and the Thank You Speeche Bubble using Foam Tape for some Dimension!! I LOVE the way it turned out and I KNOW the Coach appreciated it, as ALL of the Boys signed it!! 

THANKS SO MUCH for stopping by today and I CAN'T wait to see what you create for the Challenge!! 
Have a FABULOUS WEEK!! 

COUNTRY HUGS-N-KISSES
LARISSA   ๐Ÿ’–