Showing posts with label Paper Sweeties. Show all posts

Thursday, December 16, 2021

Merry Christmas Cards for the 25 Days of Christmas w/ Paper Sweeties!!

Pin It
HELLO CRAFTY FRIENDS!! 
I'm up for Day 17 of the Paper Sweeties 25 Days of Christmas Celebration!! FULL of AMAZING Inspiration and Surprise SALES!! You won't want to miss a Day of the Festivities!! 

For today's Projects I wanted to share my LOVE of ALL things White & Black Gingham this Holiday Season!! I can't explain it, but I LOVE it ALL and can't seem to get enough of it!! 
So Today I'm sharing a couple different Ideas on ways to use the Black &White Gingham Patterned Paper with the Sugar & Spice
 Sweet Cuts Die Set!! SWOON!! I LOVE how these turned out and it's HARD for me to pick a FAVORITE!! 
Which Design do you like best!!?? 
For my First Card I Die Cut the Sugar & Spice Gingerbread Man from the Black & White Gingham Patterned Paper!! Then I added it to my Kraft Card Panel that I Die Cut using a Stitched Rectangle Die!! I added some Candied Apple Distress Oxide Ink to the Background of the Kraft Cardstock to help make the Gingerbread Man POP against the Kraft Card Panel!! Then I added some Picket Fence and Black Soot Distress Oxid Ink Splatters for some Texture and some Tonic Studios Shimmer Pen Splatters for some Sparkle!! 
I Stamped and Embossed the Merry Christmas Sentiment from the Merry Christmas Ya'll Stamp Set!! I wanted to add some POPS of Red Deco Foil so I laminated some Therm O Web Fancy Foils by Gina K Designs in Radiant Red to a piece of Deco Foil Toner Sheets and then used the Spice Sweet Cuts Die Set to Die Cut the Bow!! I LOVE the BEAUTIFUL touch of Shine it adds to the Design!! I wanted to add some Holly Leaves to the Bow as well so I Stamped and Embossed the Holly Image from the Jingle All the Way Stamp Set and Colored it in using Copic Markers!! Then I used the coordinating Jingle All the Way Die Set to Die Cut the Holly Images out!! I added the Holly to the Leaves and then add a Strawberry Sequin to the center of the Bow!! I finished off the Design by adding some Nuvo Drops in Red Glitter to the center of the Sequin!! 
For my Second Card I created the EXACT same Design only this time I used White Cardstock for the Card Panel and I used Tumbled Glass Distress Oxide Ink for the Background to make the Gingerbread Man POP!! 
Then I added add some of the NEW Therm O Web Glass Slipper Deco Foil to a piece of Deco Foil Toner Sheets and laminated it!! I used the Spice Sweet Cuts Die Set to Die Cut the Bow!! I LOVE the BEAUTIFUL touch of Shine it adds to the Design!! I wanted to add some Holly Leaves to the Bow as well so I Stamped and Embossed the Holly Image from the Jingle All the Way Stamp Set and Colored it in using Copic Markers!! Then I used the coordinating Jingle All the Way Die Set to Die Cut the Holly Images out!! I added the Holly to the Leaves and then add a Strawberry Sequin to the center of the Bow!! I finished off the Design by adding some Nuvo Drops in Red Glitter to the center of the Sequin!!
So there you have it, two different Color Combos, but the same overall Design!! Which one do you prefer!!??  

Please bookmark our site and follow us on social media (links on right sidebar) to keep up to date with everything new from Paper Sweeties!  We’re hopping all month long, so be sure to come back each day to see a new project by one of our talented designers AND a few SURPRISES & SALES!

December 1st: planner team posts

December 2nd: Debbie Marcinkiewicz 

December 3rd – Karen Letchworth
December 4th – Larissa Heskett  <– you are here!

December 5th –  Debbie Marcinkiewicz 

December 6th –  Debbie Marcinkiewicz 

December 7th –  Annie Collins
December 8th – Karen Letchworth

December 9th – Tasha Jorgensen
December 10th – Larissa Heskett  <– you are here!

December 11th –  Debbie Marcinkiewicz 

December 12th – Tasha Jorgensen
December 13th – Linh Van

December 14th –  Annie Collins

December 15th – Maria Patrick

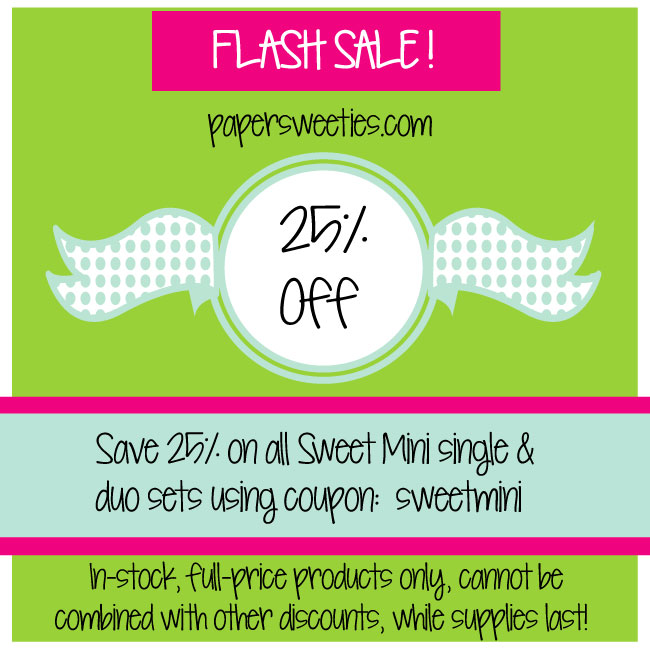
SAVE 25% with our one-day FLASH SALE on the Merry Christmas Y’all stamp set and coordinating die set using coupon: truck.  Sale ends 12/15/21 at 11:59 pm EST.

December 16th – Maria Patrick

December 17th – Larissa Heskett  <– you are here!

December 18th – Maria Patrick

December 19th – Linh Van

December 20th – Linh Van

December 21st – Annie Collins

December 22nd – Tasha Jorgensen

December 23rd – Karen Letchworth

December 24th – Debbie Marcinkiewicz 

December 25th – Debbie Marcinkiewicz 

The Paper Sweeties home office will be closed December 25th – January 1st.  Any orders placed during that time frame will be shipped out on January 2, 2021 in the order that they were received.

THANKS SO MUCH for stopping by today and I hope you'll join us for the rest of the Celebration!! 

Have a FABULOUS WEEK!! 


COUNTRY HUGS-N-KISSES
LARISSA
  ðŸ’—

Friday, December 10, 2021

BLESSED Christmas Card for the 25 Days of Christmas w/ Paper Sweeties!!

Pin It
HELLO CRAFTY FRIENDS!!

Happy Friday!! I'm here for Day 10 of the
If you're NEW, It's a FUN & INSPIRATIONAL 25 Days with a NEW Project being shared Daily!! You can find the Schedule Below!! Here's my project for today!! 
I wanted to create another CAS Style Card for today!! 
I'm using the Merry Christmas Ya'll Sweet Cuts Die Set to Die Cut three Trees from some Patterned Paper and then Stitched them down the Center of my Card Panel, with my Sewing Machine!! Then I also Stitched around the outside of the Card Panel again using my Sewing Machine!! I wanted the look of Tattered Fabric and I LOVE how it turned out!!

Then I Stamped and Embossed the Blessed Sentiment from the Blessed Stamp Set onto the bottom of my Card using some WoW Neutral Shimmer Glitter Embossing Powder!! I finished off the Tree Tops with some Studio Katia Iridescent Stars and I LOVE the way the Iridescent Sparkle from the Stars coordinates with the Iridescent Glitter from the Embossing Powder!! This would be an EASY Card to mass produce, but still packs a HUGE Holiday Feel!! Plus, I LOVE being able to use my Patterned Papers!! 

Please bookmark our site and follow us on social media (links on right sidebar) to keep up to date with everything new from Paper Sweeties!  We’re hopping all month long, so be sure to come back each day to see a new project by one of our talented designers AND a few SURPRISES & SALES!

December 1st: Planner Team

December 2nd: Debbie Marcinkiewicz 

December 3rd – Karen Letchworth

December 4th – Larissa Heskett  <– you're here!!

December 5th –  Debbie Marcinkiewicz 

December 6th –  Debbie Marcinkiewicz 

December 7th –  Annie Collins

December 8th – Karen Letchworth

December 9th – Tasha Jorgensen

December 10th – Larissa Heskett  <– you're here!!

December 11th –  Debbie Marcinkiewicz 

December 12th – Tasha Jorgensen

December 13th – Linh Van

December 14th –  Annie Collins

December 15th – Maria Patrick

December 16th – Maria Patrick

December 17th – Larissa Heskett  <– you're here!!

December 18th – Maria Patrick

December 19th – Linh Van

December 20th – Linh Van

December 21st – Annie Collins

December 22nd – Tasha Jorgensen

December 23rd – Karen Letchworth

December 24th – Debbie Marcinkiewicz 

December 25th – Debbie Marcinkiewicz 

The Paper Sweeties home office will be closed December 25th – January 1st.  Any orders placed during that time frame will be shipped out on January 2, 2021 in the order that they were received. 

THANKS SO MUCH for stopping by and I hope you have a FABULOUS WEEK!! 

COUNTRY HUGS-N-KISSES
LARISSA ðŸŒ²

Saturday, December 4, 2021

CAS Christmas Card for the 25 Days of Christmas w/ Paper Sweeties!!

Pin It

Hello Crafty Friends!! 
We're sharing Holiday Inspiration Projects for 25 days over at Paper Sweeties from December 1st through the 25th!!  Click HERE to check out what the talented Design Teamies have created to help spark your creativity!!
Today I've created a BEAUTIFUL CAS Holiday Card!! Easy to create for any last minute Cards you might need to make, and packs a PUNCH with the White Embossed Card Panel!! It's hard to get the FULL affect in the Photos but in real life it REALLY adds alot of Texture to the otherwise Simple Card Design!! Let's get Started!! 
I Started by Stamping and Embossing the front of my Card Panel with words "Merry, Joy & Noel" from the Merry Stamp Set!! I Stamped with WoW Clear Embossing Ink using my MISTI Stamping Tool in order to just move my Card Panel up and down until the entire Panel was Inked then I used WoW Embossing Powder in Bright White and Heat Set the Panel!! Its hard to see in the Photos, but in real life it adds such an Elegant Feel to the Card!! Then I Die Cutting the Tree from the Stitched Tags #2 Die Set from the Embossed Card Panel!! I wanted to inlay the Die Cut Tree with some Plaid Patterned Paper, as I LOVE the Stitched Detailing around the edges of the Tree!! I used the NEW Photoplay 6x6 Tulla & Norbert's Christmas Party Paper Pad!! I Die Cut the Bow from the set from some Taylored Expressions Gold Glitter Felt and added a Mini Metallic Red Jingle Bell to the center of the Bow for a POP of Color using some Zots Bling Mini Glue Dots!! I LOVE them for attaching Small Elements to my Cards and I KNOW they won't go anywhere during the Shipping Process!! 

Here's another Close up look at the Card!! I just LOVE the CAS Design and I hope I've INSPIRED you today!! Make sure to join me again on Dec. 10th for another Holiday Project!! 

Please bookmark our site and follow us on social media (links on right sidebar) to keep up to date with everything new from Paper Sweeties!  We’re hopping all month long, so be sure to come back each day to see a new project by one of our talented designers AND a few SURPRISES & SALES!

December 1st: Planner Team

December 2nd: Debbie Marcinkiewicz 

December 3rd – Karen Letchworth

December 4th – Larissa Heskett  <– you're here!!

December 5th –  Debbie Marcinkiewicz 

December 6th –  Debbie Marcinkiewicz 

December 7th –  Annie Collins

December 8th – Karen Letchworth

December 9th – Tasha Jorgensen

December 10th – Larissa Heskett  <– you're here!!

December 11th –  Debbie Marcinkiewicz 

December 12th – Tasha Jorgensen

December 13th – Linh Van

December 14th –  Annie Collins

December 15th – Maria Patrick

December 16th – Maria Patrick

December 17th – Larissa Heskett  <– you're here!!

December 18th – Maria Patrick

December 19th – Linh Van

December 20th – Linh Van

December 21st – Annie Collins

December 22nd – Tasha Jorgensen

December 23rd – Karen Letchworth

December 24th – Debbie Marcinkiewicz 

December 25th – Debbie Marcinkiewicz 

The Paper Sweeties home office will be closed December 25th – January 1st.  Any orders placed during that time frame will be shipped out on January 2, 2021 in the order that they were received. 

THANKS SO MUCH for stopping by and I hope you have a FABULOUS WEEK!! 

COUNTRY HUGS-N-KISSES
LARISSA ðŸŒ²

Friday, October 15, 2021

Paper Sweeties October 2021 New Release Rewind!!

Pin It
Hello Crafty Friends!! 

Welcome to the Paper Sweeties October 2021 New Release Rewind!!
This Month were showcasing the NEW 4th Quarter Sweet Kit!!
Here's a look at the NEW Kit and the NEW Sweet Mini Sets included in the Kit!!
**********
SWOON!! How SWEET is this NEW 4th Quarter 2021 Sweet Kit and those Sweet Mini Sets!! I didn't receive the Kit to create with, just the NEW Sweet Mini Stamp Sets!! I decided to go through some of my FAVORITE Doodlebug Products that are also available in the Paper Sweeties Shop and created an ADORABLY Festive Christmas Shaker Card!! 
I Started by Cutting some of the Doodlebug Patterned Paper to fit my A2 Card Panel!! Then I Die Cut 5 Circle Scallop Frames from White Cardstock and adhered them altogether to create a Thick Frame!! I Die Cut another Circle Scallop Frames from some Green Doodlebug Gingham Patterned Paper and adhered it to the top of the Layered Circle Scallop Frames!! Then I used the inside Circle Panel to create my Shaker Window!! I Inked with Tumbled Glass Distress Oxide Inks!! Then I added some Water Splatters for the look of Snow Falling!! I adhered some Acetate to the backside of the Card Panel and then adhered the Layered Circle Scallop Frame over the Die Cut Circle!! I filled the Shaker Window with some Glass Glitter, Iridescent Snowflake Sequins, Tiny Heart Confetti and Trinity Stamps Gingerbread Confetti and Peppermint Candy Clay Embellishments!! SWOON!! I just LOVE to create Shaker Cards!! 
Then I adhered the SWEET Doodle Pops Stocking Stuffers Images to top of the Acetate Shaker Window to finish off the Scene!! I added some White Gel Pen Details to add some Highlights and Personality to the Images!!
Then I Stamped and Embossed the "Winter Wishes" Sentiment to the Gingham Card Panel with WoW Bright White Embossing Powder!!
 
I LOVE the way this turned out and hope I've INSPIRED you with a FUN way to use the NEW Sweet Mini Sets along with several other Products from the Paper Sweeties Shop!! 

Visit the other DT Blogs to see more AMAZING Projects using the NEW Products!! 


THANKS SO MUCH for stopping by today and I hope you  
Have a FABULOUS WEEKEND!! 

COUNTRY HUGS-N-KISSES
LARISSA  💖