Showing posts with label WoW Embossing Glitter Powder. Show all posts

Friday, December 10, 2021

Shaped Snow Angel Gift Tags w/ Newton's Nook Designs!!

Pin It
HELLO CRAFTY FRIENDS!! 
I'm up on the Newton's Nook Designs Blog today to share a Set of SWEET Shaped Snow Angel Gift Tags and Pillow Boxes for some SPECIAL Holiday Gifts!! Think Gift Cards, Jewelry, Sweet Treats the possibilities are ENDLESS!! 

I Started by Die Cutting the NEW Pillow Box Die from Trinity Stamps!! These are SO EASY to create and a PERFECT way to use up some of your FAVORITE Patterned Papers!! 
(TIP: 6x6 Papers are too SMALL to use with this Die, so you'll need 6x8 or larger) 

I'm using Two of my NEW FAVORITE Winter Sets from 
Newton's Nook Designs
 called the Snow Angel Newton Stamp Set along with the coordinating Snow Angel Newton Die Set along with the Puppy Snow Angel Stamp Set and the Puppy Snow Angel Die Set for my Focal Images and paired it with a couple other Sets to finish off the Designs!!
 I Started by Stamping and Embossing the Image, using Versa Fine Black Onyx Ink and Embossing with WoW Clear Gloss Embossing Powder!! Then I used Copic Markers to Color in the Image!! 
Newton: E40, E43, E47 & E99      
Cheeks, Inside of Ears and Paw Pads: R11      
Hat & Scarf: N0 & N3   V00, V15 & V09    
BG10, BG45 & BG49     
Then I used the NEW coordinating Snow Angel Newton Die Set to Die Cut the Image out!! I added some White Gel Pen Details to the Image and then added some Ultra Bond Adhesive Pen to areas of the Ground around the Image and applied some Vintage Glass Glitter for the look of Snow Glittering in the Sunlight!! Then I used the same Snow Angel Newton Die Set to Create my Shaped Gift Tag!! I Scored a Piece of Cardstock and Folded it, then placed the Snow Angel Newton Die Near to Top of the Fold in the Cardstock, leaving some of the Image above the Fold Line and ran it through my Die Cutting Machine!! Then I had a Shaped Gift Tag that I was able to adhere the Colored Image to using some Ultra Bond Adhesive!!
I wanted to add a To: and From: Tag, so I Stamped and Embossed the Snowflake Image from the Jolly Tags Stamp Set and then Die Cut it out using the coordinating Tags Times Two Die Set!! I Stamped with WoW Clear Embossing Ink and Embossed with WoW Persian Indigo Glitter Embossing Powder!! SWOON!! I just LOVE the POP of both Sparkle and Color this Little Tag adds to the Package!! I finished it off with a White Silk Bow and a Metallic Mini Jingle!! Then I Stamped and Embossed the "Warm Holiday Wishes" Sentiment from the NEW Snow Much Cheer Stamp Set with Versa Mark Ink in Black Onyx and WoW Clear Gloss Embossing Powder on the inside of the Shaped Gift Tag!! 
Just makes me HAPPY!! 

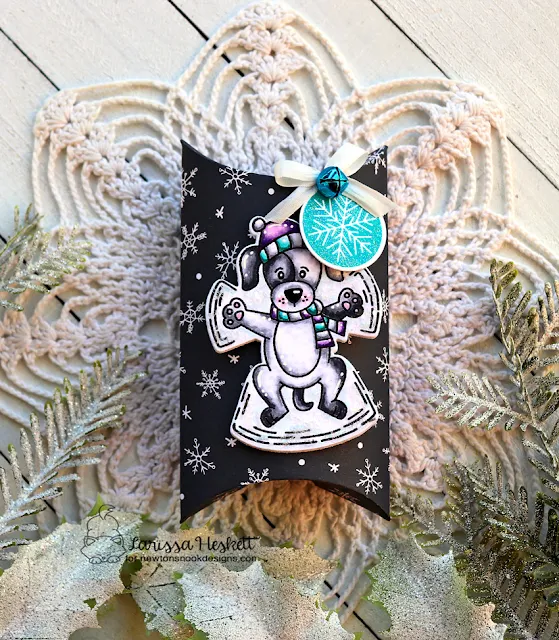
For my Second Project again I'm using the NEW Pillow Box Die from Trinity Stamps!! 

I Started by Stamping and Embossing the Image, using Versa Fine Black Onyx Ink and Embossing with WoW Clear Gloss Embossing Powder!! Then I used Copic Markers to Color in the Image!! 
Puppy: N0, N3, N5 & N8      
Cheeks, Inside of Ears and Paw Pads: R11      
Hat & Scarf: N0 & N3   V00, V15 & V09    
BG10, BG45 & BG49     
Then I used the NEW coordinating Puppy Snow Angel Die Set to Die Cut the Image out!! I added some White Gel Pen Details to the Image and then added some Ultra Bond Adhesive Pen to areas of the Ground around the Image and applied some Vintage Glass Glitter for the look of Snow Glittering in the Sunlight!! Then I used the same Puppy Snow Angel Die Set to Create my Shaped Gift Tag!! I Scored a Piece of Cardstock and Folded it, then placed the Puppy Snow Angel Die Set Near to Top of the Fold in the Cardstock, leaving some of the Image above the Fold Line and ran it through my Die Cutting Machine!! Then I had a Shaped Gift Tag that I was able to adhere the Colored Image to using some Ultra Bond Adhesive!! 
I wanted to add a To: and From: Tag, so I Stamped and Embossed the Snowflake Image from the Jolly Tags Stamp Set and then Die Cut it out using the coordinating Tags Times Two Die Set!! I Stamped with WoW Clear Embossing Ink and Embossed with WoW Totally Teal Glitter Embossing Powder!! SWOON!! I just LOVE the POP of both Sparkle and Color this Little Tag adds to the Package!! I finished it off with a White Silk Bow and a Metallic Mini Jingle!! Then I Stamped and Embossed the "Merry Christmas" Sentiment from the NEW Snow Much Cheer Stamp Set with Versa Mark Ink in Black Onyx and WoW Clear Gloss Embossing Powder!! on the inside of the Shaped Gift Tag!!
Just makes me HAPPY!! 

THANKS SO MUCH for stopping by today!! I hope I've INSPIRED you today on a few different ways to use your FAVORITE Images to create Shaped Tags for some SPECIAL Holiday Gifts!! 
Have a FABULOUS WEEKEND!! 

COUNTRY-HUGS-N-KISSES
LARISSA ❄

Wednesday, November 18, 2020

Newton's Nook Designs November 2020 Winter Release ~ Snowman Roundabout!

Pin It
HELLO CRAFTY FRIENDS!! 
I'm here with Day 3 of the 
Today we're showcasing the NEW "Snowman Roundabout" Stamp Set!! This set coordinates with the Previously Released Circle Frames Die and the Banner Trio Die Set!! 
Let's take a look at the AWESOME New Set!!
How SWEET are these Snowmen from the NEW Snowman Roundabout Stamp Set!!?? I LOVE Snowmen and the possibilities with this Set are ENDLESS!!?? I decided to create a STUNNING Card and Gift Tag/Bag Set to give away this Winter!! I LOVE that it's versatile so it can be used for ANY Occasion too!!  
How SWEET are these Snowmen from the NEW Snowman Roundabout Stamp Set!!?? I've paired it with some WoW Clear Gloss Embossing Glitter, Copic Markers and some Lawn Fawn Patterned Papers!! SWOON!! LOVE how they turned out!! 
Let me walk you through the steps!! 
I Started by Stamping the NEW Snowman Roundabout Stamp onto a Piece of White Distress Watercolor Cardstock using my MISTI Stamping Tool and Vers Fina Black Onyx!! Then I applied some WoW Clear Gloss Embossing Powder!! I heat set it using my WoW Dual Speed Embossing Tool!!
Then I Die Cut the Image out using a Circle Die!! Next I Die Cut the Circle Frames Die from some Lawn Fawn Pattern Paper!! I adhered the Embossed Circle onto the Scalloped  Frame using some Ultra Bond Adhesive after I Colored the Images using Copic Markers: Turquoise: BG10, BG45 & BG49   Green: G00, G13 & G19  Red: R14, R37 & R39   Pink: RV00, R81 & R34   Purple: V01, V15 & V06   Black: C3, C5 & C8   Yellow: Y00, Y15 & YR23   Brown: E43, E49    Orange: YR00 & YR18   Shadows: C2
Then I Stamped the bottom 1/2 of the Card using the same NEW Snowman Roundabout Image using some TE Sea Salt Ink!! I added some Black Soot Distress Splatters and some Shimmer Pen Splatters for some extra Sparkle! Then I Stamped and Embossed the sentiment using Versa Fine Black Omyx Ink and WoW Embossing Clear Gloss Powder!! I used the Turquoise Copic Markers to color in the BRR Images!! I added some PPP Snowflake Sequins and some Teal Pearls to the Center of the Snowflakes and some Simmer Pen to the Snowman Hats, Scarves, Gloves and Noses to add some much needed Sparkle!! 
I Started by creating my Gift Bag from some Lawn Fawn Patterned Paper and then I got started on creating my coordinating Gift Tag!! I Started by Stamping the NEW Snowman Roundabout Stamp onto a Piece of Tim Holtz Distressed Watercolor Paper Cardstock using my MISTI Stamping Tool and Versa Fine Black Onyx Ink!! Then I applied some WoW Clear Gloss Embossing Powder!! I heat set it using my WoW Dual Speed Embossing Tool!!
Next I Die Cut the Tag from the Embossed Image using the Fancy Edges Tag Die Set!! Then I Die Cut the Tags Times Two Die from some TE Salt Water Taffy Cardstock!! I Heat Embossed the Let's Party Sentiment from the Newton Celebrates Stamp Set onto the Tag using some Versa Fine BlackOnyx Ink and WoW Clear Gloss Embossing Powder!! I added some Snowflake Sequins to finish off the Design adhering some Teal Pearls to the center of the Snowflakes!! 
To finish off the Design I created a Scrap Ribbon Bow and adhered it to the top of a White Mini Clothes Pin using a few Bling Zots Adhesive Dots!! Then I used the Mini Clothes Pin to adhered the Tag to the Gift Bag!! PERFECT for almost any Small Gift or a Gift Card this will be ready to use for an ANY Occasion Gift!! 

Would you like to win the “Snowman Roundabout” Stamp Set!!?? This stamp set will be given away to ONE lucky winner!!

Here's how to win: Comment on the NND blog and Design Team blogs (see list below)! The winner will be chosen at random from the collective reveal posts. Make sure to check out each of their blogs and comment for your chance to win. You will not know which blog has been chosen so the more you comment on the better your chances are of winning! You have until Thursday November 19th at 9pm EST to comment  -- winners will be announced on the blog post on Friday, November 20th. 

Check out all the awesome Design Team Blogs below to enter:

Newton's Nook Designs

Ellen Haxelmans

Larissa Heskett

Samantha Mann

Zsofia Molnar

Maria Russell

Andrea Shell

Tatiana Trafimovich

Amy Tsuruta

Amanda Wilcox


THANKS SO MUCH for stopping by today!! 
Come back tomorrow for a look at the 
NEW "Newton's Snowman" Stamp Set + coordinating Dies and Happy New Year Stamp Set!!
Don't forget to check out the Newton's Nook Designs Blog on the 20th to see if you're one of the LUCKY Winners!! 
Have a FABULOUS WEEK!!

COUNTRY HUGS-N-KISSES
LARISSA   ðŸ’—

Monday, August 17, 2020

Newton's Nook Designs August Release ~ Sips & Stories, Mugs & Houndstooth Stencil!!

Pin It
HELLO CRAFTY FRIENDS!! 

I'm here with Day 1 of the 
Today we're showcasing the NEW "Sips & StoriesStamp Set coordinating Sips & Stories Die Set, Mugs and Houndstooth Stencils!! 
Let's take a look at the AWESOME New Set!!
Sips & Stories Stamp and Sips & Stories Die Set by Newton's Nook Designs
Mugs Stencil by Newton's Nook Designs
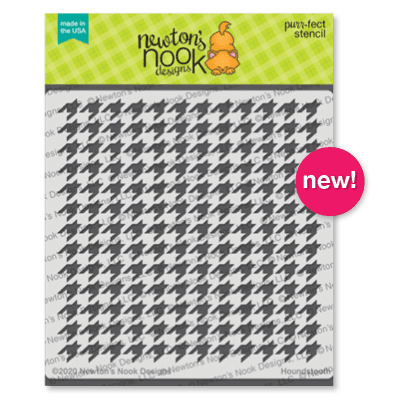
Houndstooth Stencil by Newton's Nook Designs
Happiness is by Larissa Heskett for Newton's Nook Designs using Sips & Stories, Mugs Stencil & Heartfelt Wishes  #newtonsnook #newtonsnookdesigns #sipsandstories #mugsstencil #heartfeltwishes
I Started by Stamping and Embossing the Images from the NEW Sips & Stories Stamp Set and coloring them with Copic Markers!! I wanted to go with a FUN Rainbow Color Scheme!! I used Red: R43, R46 & R89  Orange: YR00, YR02 & YR18  Yellow: Y11, Y15 & YR23   Green: YG11, YG13 & YG17  Blue: B32, B34 & B37  Purple: V0, V15 & V17  White: T1 & T3  Kitten: E40, E42, E44 & E47  Cheeks: R11  Blonde Hair: E21, E26 & E99   Brown Hair: E30, E33 & E37  
Skin: E00, E11 & E13 
I Die Cut the Images out using the coordinating NEW Sips & Stories Die Set!! Then I added some White Gel Pen Details and added them to the Embossed Background I created using a FUN Trinity Stamps    Die!! It actually Embosses the Design of the Living Room into the Cardstock and I LOVE how the Size of the Image works PERFECTLY as far as the scale goes!! SO MANY possibilities with this combination of Products!! 
Happiness is by Larissa Heskett for Newton's Nook Designs using Sips & Stories, Mugs Stencil & Heartfelt Wishes  #newtonsnook #newtonsnookdesigns #sipsandstories #mugsstencil #heartfeltwishes
I wanted to keep the Focus on the Images themselves, so I chose to keep the background White!! I LOVE a good White Space Design and I really like how the Images POP and tell such a SWEET Story all on there own!! Just makes me SMILE thinking about all of the HAPPINESS going on in that Room!! ðŸ“šðŸ’–☕ I also wanted to make the Sentiment POP!! I used my MISTI Stamping tool along with some Therm O Web Purple Tape to mask off the word Happiness and I used my Distress Markers in Candied Apple, Carved Pumpkin, Mustard Seed, Mowed Lawn, Peacock Feathers & Wilted Violet to color the Letters in Rainbow Order and then I huffed on the Stamp and Stamped it onto my Card Panel!! I repeated this process a few times in order to get a really Crisp Image!! Then I coated it with some WoW Clear Gloss Embossing Powder!! I repeated the same Process of Stamping and Masking off the Different Words!! I used Versa Fine Black Onyx Ink and Embossed with WoW Clear Gloss, Candied Apple Distress Ink and Embossed with WoW Red Glitz Embossing Powder and Peacock Feathers and Embossed with Teal Sparkle Embossing Powder!! I LOVE the Visual Triangle with the Rainbow Colors!! It really helps to move your eye across the Card Front!! 
Happiness is by Larissa Heskett for Newton's Nook Designs using Sips & Stories, Mugs Stencil & Heartfelt Wishes  #newtonsnook #newtonsnookdesigns #sipsandstories #mugsstencil #heartfeltwishes

I wanted to create a coordinating Envelope so I picked a TE Cookie Monster Envelope and used the NEW Mugs Stencil to decorate the Flap!! I sprayed the back of the Stencil with some Therm O Web Pixie Spray and then placed it over the Flap of the Envelope after I masked off the rest of the Envelope!! I used the TE Blender Brushes to apply some Peacock Feathers Distress Oxide Ink!! Then I heat set the Ink and Stamped and Embossed the Sentiment from the NEW Heartfelt Stamp Set being showcased tomorrow!! I added some Red Glitter Nuvo Drops to the Hearts on the Mugs for a FUN touch of Sparkle and Shine!! 

Would you like to win theSips & Stories” Stamp Set!!?? 

 This stamp set will be given away to ONE lucky winner!!

Here's how to win: Comment on the NND blog and Design Team blogs (see list below)! The winner will be chosen at random from the collective reveal posts. Make sure to check out each of their blogs and comment for your chance to win. You will not know which blog has been chosen so the more you comment on the better your chances are of winning! You have until Thursday August 20th at 9pm EST to comment  -- winners will be announced on the blog post on Friday, August 21st. 

Check out all the awesome Design Team Blogs below to enter:

Newton's Nook Designs

Ellen Haxelmans

Larissa Heskett

Samantha Mann

Zsofia Molnar

Maria Russell

Andrea Shell

Tatiana Trafimovich

Amy Tsuruta

Amanda Wilcox

THANKS SO MUCH for stopping by today!!  
Don't forget to visit tomorrow for a look at the 
NEW "Paw-tumn NewtonStamp Set + coordinating Dies, "Fall Roundabout" Stamp Set, and "Heartfelt Wishes" Stamp Set!! Don't forget to check out the Newton's Nook Designs Blog on the 21st to see if you're one of the LUCKY Winners!! 
Have a FABULOUS WEEK!!
COUNTRY HUGS-N-KISSES
         LARISSA  💗

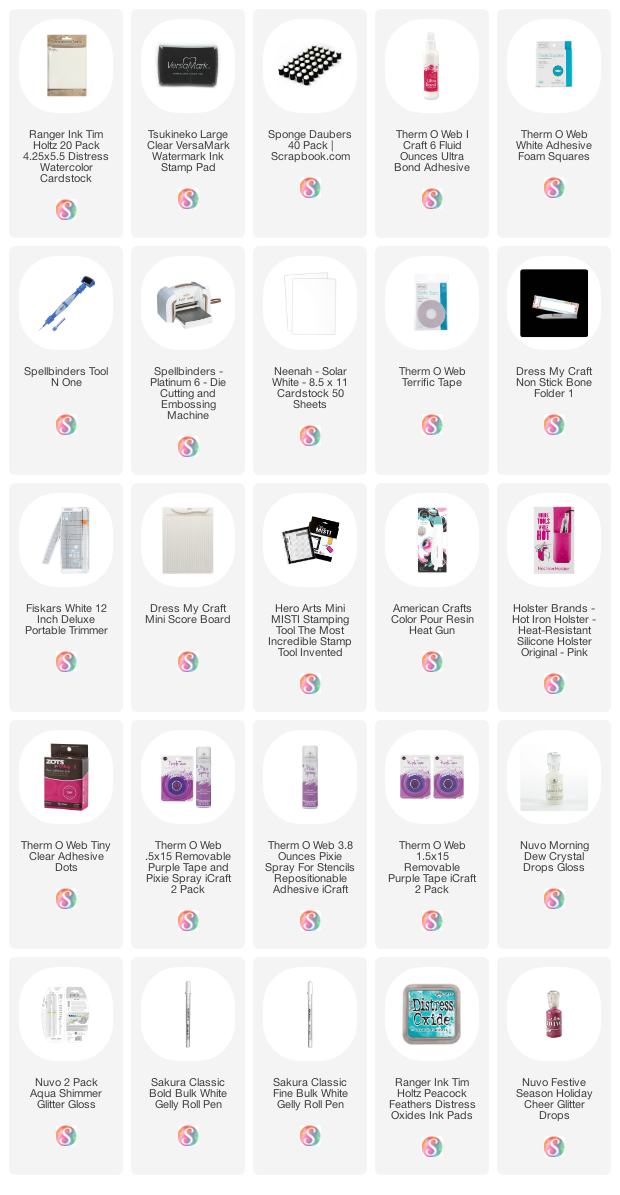
S U P P L I E S
Below you will find links to the supplies used to create this project(s). Click the icon for the store underneath the thumbnails to start shopping. Where available I use compensated affiliate links at no extra cost to you. Your support helps me to keep bringing you new projects. Thank you!!

Friday, July 3, 2020

If Friends were Flowers with Newton's Nook Designs!!

Pin It
Newton

Hello Crafty Friends!!


HAPPY FRIDAY!! I'm up on the Newton's Nook Blog today sharing a Card that I created using almost exclusively Die Cuts!! It's FUN sometimes to just use my Dies and some of my FAVORITE Products to make them come to life!! I started out by creating a Slimline Card Base 8 1/2 x 3 1/2!! I used the NEW Slimline Frames & Portholes Die Set to cut the scalloped panel in the back, cut from Woodgrain Patterned Paper and then I inked the edges with some Gathered Twigs Distress Oxide Ink!! Then I also Die Cut the panel in the front with the three portholes, from some Definition Patterned Paper using the same Die Set!! In between those two layers I added a stitched frame that was Die Cut from some TE Toffee Cardstock using the NEW Slimline Frames & Windows Die Set!! I inked the edges with some Gathered Twigs Distress Oxide Ink!! Then I adhered all of the layers together using some iCraft Ultra Bond Adhesive!! 
Note: The popular NEW NND Slimline Die Sets are currently out of stock but they will have more in soon!! If you'd like to be notified when they are back in stock, you can just enter your email on the Slimline Frames and Portholes or the Slimline Frames and Windows product page!! THANKS!! 
I wanted to add some flowers to my card, so I used one of my FAVORITE Die Sets the Flower Trio Die Set to Die Cut Flowers and Leaves from some Therm O Web Deco Foil Flocking Sheets in Pink Carnation, Ruby Red and Rina K Designs Screamin' Green Neon Flock Sheets!! I inked the Edges of the Die Cuts using Work Lipstick, Aged Mahagony and Lucky Clover Distress Oxide Inks!! I think it really helps to make the Flocking Texture POP, plus it adds some much need dimension!! This step isn't necessary, but I really feel that it adds to the over all design!! For the Flower Centers I Die Cut from a Piece of Cardstock that I added some Deco Foil Transfer Gel Duo to and let it Dry completely!! Then I ran it through my Die Cutting machine with a piece of Opal Deco Foil!! Then I Die Cut the Small Flowers for a STUNNING Iridescent Shine!! I wanted to add some Butterflies, so I stamped them using Speckled Egg Distress Oxide Ink and then added some WoW Ultra Shimmer Embossing Powder to add some Iridescent Sparkle using the Monarchs Stamp Set and cut out with the coordinating Monarchs Die Set!! SWOON!! I LOVE the way they make the Design come to LIFE!! Like looking at a real Flower Garden!! I added some TE Bits and Pieces Drip Drops to the Flower Centers using some iCraft Ultra Bond Adhesive and I LOVE the way that the Iridescent Sparkle ties together with the Iridescent Glitter of the Butterflies and the Iridescent Shine of the Flower Centers!! 
I Inked all of the Portholes with Speckled Egg Distress Ink For the Sentiment I LOVE adding WoW Glitter Embossing to help make one of the word POP!! In this case I chose the word Flowers!! I Stamped and Embossed the Sentiment using some Versa Fine Black Onyx Ink Masking off the parts of the sentiment using some Therm O Web Purple Tape!! Then I Embossed with WoW Embossing Clear Gloss Embossing Powder!! For the Flowers Word I Masked off the Stamp using Purple Tape and Stamped with Versa Mark Ink!! Then I Embossed with some Ruby Red Embossing Glitter!! The Embossing Glitter is a PERFECT match to the Ruby Red Flocked Flowers and creates a FUN Visual Triangle!! I LOVE the way it turned out and it was FUN to create a Card using almost ALL Dies!! 

THANKS SO MUCH for stopping by today and I hope you have a SAFE and BLESSED 4th of July Weekend!! 

COUNTRY HUGS-N-KISSES
LARISSA  💗

Wednesday, February 19, 2020

Newton's Nook Designs February Release ~ Newton's Rain Boots!!

Pin It
Hello!!
SQUEAL!!
         I'm here with Day 3 of the Newton's Nook Designs February Release!! 
       Today we're showcasing the NEW Newton's Rain Boots” Stamp Set + coordinating Dies!! 
Let's take a look at the AWESOME New Set!!
Newton's Rain Boots by Newton's Nook Designs
I've also used a couple of the other NEW Sets already showcased this week!!
The Raindrops Stencil and the Sky Scene Builder Die Set!! 
Here's a close up look just in case you missed them!! 
Raindrops Stencil by Newton's Nook Designs
Sky Scene Builders Dies by Newton's Nook Designs
It's HARD to pick a FAVORITE, but I think if I had too this Image would be it!! Isn't it just the SWEETEST!! Here's a look at the Card I created!! 
Cute Boots by Larissa Heskett for Newton's Nook Designs using Newton's Rain Boots, Raindrops Stencil & Sky Scene Builders Die Set #newtonsnook #newtonsnookdesigns #newtonsrainboots #thermoweb #wowembossing
 I Started by Stamping and Embossing the Images from the Set!! SQUEAL!! They just make me SMILE!! I then used Copic Markers to color them in!! I used (Cat: E40, E42, E44, E47 & E99  Cheeks and Inside of Ears: R11  Rain Boots: BG10, BG45 & BG49  N0, N2 & N4   N4, N6 & N8  Flowers: R43, R46 & R89  N0, N3 & Y11  R00, R22 & Y11  Ducks: Y11, Y15 & YR23  R11  YR02 & YR68) 
Next I Started on the Background Panel!! I knew I wanted to use the NEW Raindrop Stencil, so I sprayed the back of the Stencil with some Therm O Web Pixie Spray and adhered it over my Background Panel!! I Inked with some Tumbled Glass Distress Ink and then applied some Therm O Web Transfer Gel using the Stencil Pal randomly concentrating most of the Gel on the Right hand side of the Card Panel!! I removed my stencil and set the Panel aside to Dry!! Here's a Close up look as I know it's hard to see in the Front Facing Picture!! 
Cute Boots by Larissa Heskett for Newton's Nook Designs using Newton's Rain Boots, Raindrops Stencil & Sky Scene Builders Die Set #newtonsnook #newtonsnookdesigns #newtonsrainboots #thermoweb #wowembossing

I LOVE the subtle look that the Gel gives so that the SWEET Images remain the Focal Point of the Design!! Next I Inked the background with some Tumbled Glass Distress Oxide Ink, leaving some White areas for interest!!  Then Die Cut 3 of the Clouds from the NEW Sky Scene Builder Set and colored them some Hickory Smoke Distress Oxide Ink using an Ink Dauber!! I placed the Panel in my MISTI Stamping Tool and used a Static Tool to remove any dampness from the area where I Stamped and Embossed the Sentiment!! I used WoW Clear Gloss Embossing Powder and masked off the "Cute Boots" part of the sentiment and Embossed it with some of the   WoW Embossing Glitter!! I LOVE the addition of the Sparkle!! I Die Cut 2 of the Land Border Dies for the Layered Grass and Inked them using Peeled Paint and Lucky Clover Distress Oxide Inks!! 
Cute Boots by Larissa Heskett for Newton's Nook Designs using Newton's Rain Boots, Raindrops Stencil & Sky Scene Builders Die Set #newtonsnook #newtonsnookdesigns #newtonsrainboots #thermoweb #wowembossing
I adhered the Grass Layers and the Clouds down to the Background Panel using some iCraft Ultra Bond Adhesive and then I adhered the Flowers and adhered the Images using some Foam Tape!! Some White and Black Gel Pen Details add character to the Images and then I added some Nuvo Drops in Sunshine Glitter to the center of the Flowers and Nuvo Drops in Morning Dew to the Buckle and Bottom of the Rain Boots and to the Beaks and Feet of the Ducks for some Dimension!! I just LOVE the way this turned out and I CAN'T WAIT to see what you create with this SWEET Set!! 

Would you like to win the “Newton's Rain Boots Stamp Set!!?? 
This stamp set will be given away to ONE lucky winner!!
Here's how to win: Comment on the NND blog and Design Team blogs (see list below)! The winner will be chosen at random from the collective reveal posts. Make sure to check out each of their blogs and comment for your chance to win. You will not know which blog has been chosen so the more you comment on the better your chances are of winning! You have until Thursday February 20th at 9pm EST to comment  -- winners will be announced on the blog post on Friday, February 21st.

Check out all the awesome Design Team Blogs below to enter:

THANKS SO MUCH for stopping by today!! Please come back tomorrow for a look at the NEW "Easter LilyStamp Set + coordinating "Easter LilyDies and the "Hello SpringStamp!!  
Don't forget to visit the Newton's Nook Designs Blog on the 21st to see if you're one of the LUCKY Winners!! 
Have a FABULOUS WEEK!!

COUNTRY HUGS-N-KISSES
LARISSA  =)