Showing posts with label Winnie & Walter. Show all posts

Friday, March 30, 2018

A Couple Challenge w/ Winnie & Walter!! =)

Pin It
w&w_rerun_logo


HELLO!!
I'm stopping in to share a couple cards that I have made for the W&W Rerun #28 Challenge and the March Color Combo Challenge w/ Heather!!

I was inspired by both the Card Shay made and the Card that Caren made!! I wanted to Stamp and Mask to create my own Design!! I also used Water Color to color my Images!! I've used the BEAUTIFUL In Bloom: Addie's Garden and In Boom: Anna's Flora along with the Essentials: Noelle Cutaways Die Set!! Then sentiment was Stamped and Embossed using the Big, the Bold, and the Happy Stamp Set!! A Few Studio Katia Iridescent Crystals finishes off the Designs!!
 
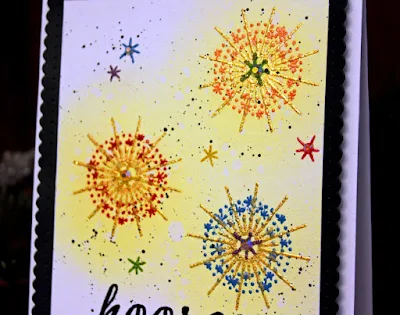
I also made this Card that was inspired by the Card that Kate made!! I wanted to create a Rainbow of Fireworks in the Sky and I Stamped and Embossed the Sentiment at the bottom of the Card!! I used the Sparkle Stamp Set along with the Essentials Audrey Cutaways Die Set!! The Sentiment is from the Party Stamp Set!! I used a RAINBOW of Embossing Powders and a WoW Gold Glitter Embossing Powder!! Then I added some Iridescent Crystals from Studio Katia for the Centers!! I REALLY LOVE the Sparkle of this Card in real Life and I plan on giving it to my Father-In-Law for his Birthday which is close to the 4th of July!! 
 
THANKS SO MUCH for stopping by and have a FABULOUS and BLESSED EASTER WEEK/WEEKEND!! 

I'm also Linking Up

Simon Says Stamp Wednesday Challenge: Anything Goes

Grab our badge:
Word Art Wednesday Challenge #328-#329: Anything Goes

COUNTY HUGS-N-KISSES
LARISSA   =)

Monday, April 20, 2015

1st Gossip Column Challenge w/ Winnie & Walter!! =)

Pin It

The Gossip Column with Taheerah Atchia | No. 1 Colour CrushesWinnie    The Gossip Column with Taheerah Atchia | No. 1 Colour CrushesWinnie


Hello!!
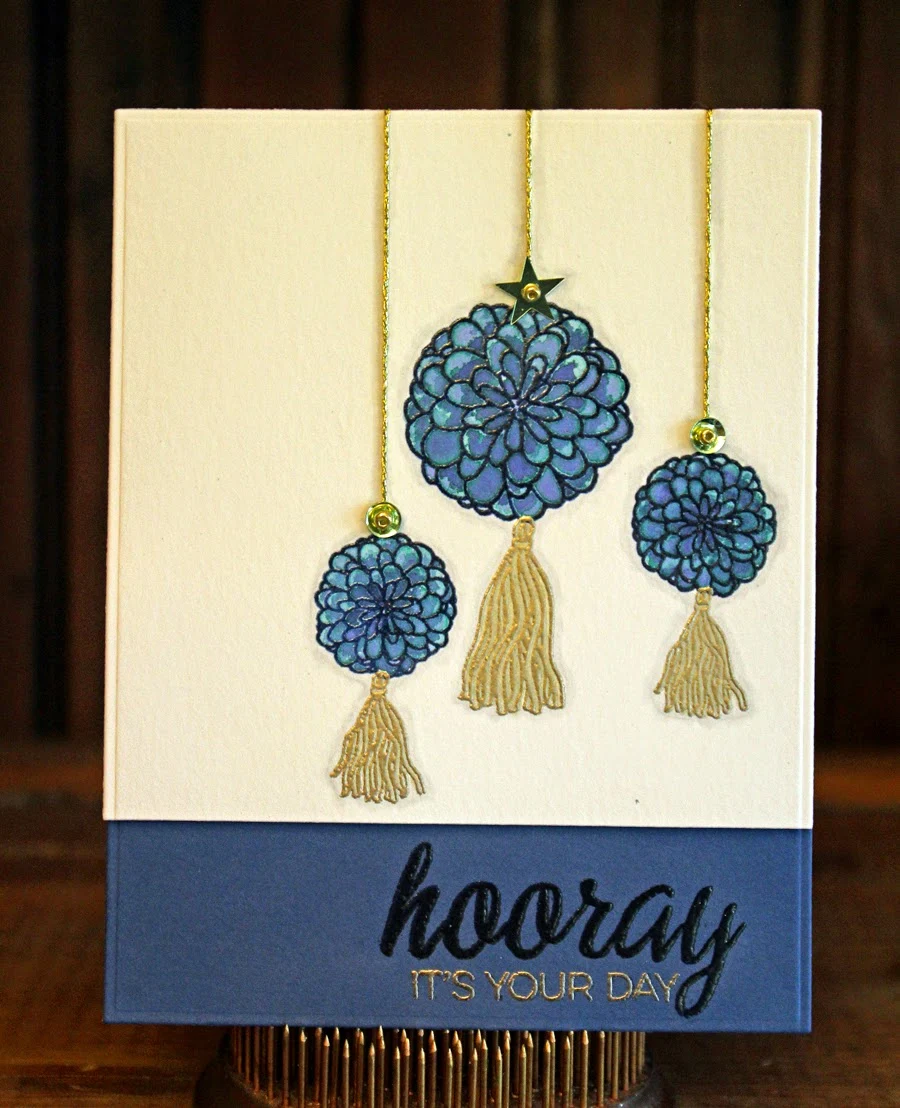
I'm stopping in to share the Card I've made for the 1st Gossip Column Challenge over on the Winnie & Walter Blog!! I was drawn by several of the Images and the Different Blue Colors along with the Toasted Almond Color!! I decided to used one of the Newly Released The Party Stamp Set and I Stamped and Embossed my design onto some Tim Holtz Distress Water Color Paper!! I used the New Lawn Fawn Navy Ink along with some Ranger Platinum Embossing Powder!! In the one Dress above it shows the Shine on the Strips and it made my think to use the Platnium Embossing Powder as a Play on that Shine and then I used the Distress Marker in Linen to color in the Tassels!! I used the Lawn Fawn Ink and just added some Water in order to Water Color the Pom-Poms and I just LOVE how BEAUTIFUL this Color is!! WOWOWOWOWOW!! All these different shades were achieved by just using the Lawn Fawn Ink!! I'm in LOVE!! SWOON!! =) I added some Platinum Embroidery Thread and a strip of MFT Navy Cardstock that I inked using the same Lawn Fawn Navy Ink and the Ranger Platinum Embossing Powder!! A couple Sequins and my Card was done!!

THANKS SO MUCH for stopping by and I hope you have a FABULOUS WEEK!!
COUNTRY HUGS-N-KISSES
LARISSA   =)

Wednesday, March 25, 2015

Winnie & Walter Sparkle & Shine Chllange Card!! =)

Pin It


Hello!!
I'm stopping in to share the Card that I have made for the Second Sparkle and Shine Challenge!! This time its a Sketch Challenge and I LOVE the way my card turned out!! Beings Winnie & Walter were sponsoring the Challenge I thought I'd use the New The Party Stamp Set I bought along with the Essentials: Katharine Cutaways Die Set!! I used the Stamp Set and Stamped and Clear Embossed the Images using Versa Fine Black Onyx Ink and Ranger Ultra Fine Clear Embossing Powder onto some Distress Water Color Paper and then I used some Distress Markers to Water Color all of the Images!! I went with some of the Winnie & Walter Colors too, it just seemed to fit!! =) I also wanted to add a FUN element to the Balloons!!?? I have seen the AMAZING Confetti Balloons on Pinterest and thought it would be SO AWESOME to try and make them into Confetti Balloons using Mini Sequins!! So I pulled out my Mini Sequins and SQUEAL!! I LOVE them!! I Water Colored the Images in the colors that I wanted and then I added some Versa Mark Ink using a Versa Mark Marker!! I then coated them using so Judikins Sticky Stuff Embossing Power and then I was able to add the Mini Sequins with out them falling off and without having to worry about adhesive being noticeable!! I then covered them with some Clear Embossing Powder and in order to get the dimension/thickness that I wanted I used a Wink of Stella Clear Glitter Marker over the top of the Dried Embossing Powder in order to add more Embossing Powder and to add some Added Sparkle at the same time!! =) I repeated this Process about 5 times!! I wish you could see the results in REAL life, they are just SO SPARKLY and BEAUTIFUL!! =) I also did the Bow on the Package the same way just minus the Mini Sequins!! For alittle added interest to the background I stamped some Star Confetti and then added some Crystal Clear 4mm Sequins from Pretty Pink Posh!!
THANKS SO MUCH for stopping by and have a FABULOUS WEEK!!

COUNTRY HUGS-N-KISSES
LARISSA  =)

Wednesday, February 11, 2015

Newton's Nook Designs February Release ~ Bunny Hop!! =)

Pin It

 
Hello!!
Are you ready for the Newton's Nook Designs February Release!!??
I think you're just going to LOVE it!! =) Today we are showcasing the New Set called "Bunny Hop"!!
Bunny Hop - 3x4 Easter Bunny Butt  Stamp set by Newton's Nook Designs
As soon as I saw this Sweet Little Set I KNEW I just had to create a Front and Back Side to this SWEET Little Bunny!! It was SUPER EASY too!! All I did to create the Front View of the Bunny was to mask off the tail with some Washi Tape before I inked up my stamp!! I then Inked up my Bunny Image and then removed the Washi Tape before I stamped it!! I then took one of the Newton Images from the Sets that will be shared tomorrow and masked off everything except for the Face using Washi Tape again!! I inked up the Face and removed the Washi Tape and lined it up in the center of my Bunny Image and stamped the Face!! Then I just took my .3mm Copic Liner Pen and drew the little Mouth coming down from the Nose and then I decided to add some Eyelashes too beings I wanted it to be a Girl Bunny!! =) I then stamped and fussy cut some extra Bunny Tails for the other Bunny Images and used Foam Tape to pop them up!!I used my Copic Markers to Color in my Images and then I used a Wink of Stella Clear Glitter Marker to add some Sparkle!!
I just LOVE the way it turned out!! To create my Card Front Panel I used a New Winnie & Walter Katharine Cutaways Die and I just LOVE the Pierced Detail around the Edge of the Panel!! I then used a New Easter Egg Dies Set from Paper Smooches to create a Window in the Front of my Card!! I wanted to create a Sweet Little Scene inside the egg so I stamped the Grass Image from the Newton's Nook Designs Wild Child Stamp Set in Peeled Paint Distress Ink and added some more ink to the rest of my hill using a Foam Sponge!! I Fussy Cut the Grass Image out so that I could layer the Bunnies in amongst the Grass!! Then I Stamped and Embossed a few Egg Images and colored them in using my Copic Markers and the Wink of Stella Clear Glitter Marker to add some Sparkle!! I Fussy Cut them out and added them to the Grass in front of my Bunny Images!! I also decided she needed a Flower in her Hair so I stamped and Embossed the Little Flower Image and colored it with my Copic Markers and Fussy Cut it and added it to her Hair!! I decided to Stamp and Emboss my Sentiment on the Front of my card and my card was done!!

So what do you think!!?? Isn't this just the Sweetest Little Stamp Set!!?? =)
SQUEAL, I KNEW you'd LOVE it!!
I hope you'll stop by to see what the rest of the Amazing DT Members have created!!
Would you like to win Bunny Hop”?This set will be given away to TWO Lucky Winners!! 
Here's how to win: 
Comment on the NND blog and Design Team and Guest blogs (see list below)! Two winners will be chosen at random from the collective blogs release posts. Make sure to check out each of their blogs and comment for your chance to win. You will not know which blog has been chosen so the more you comment on the better your chances are of winning! You have until Thursday, February 12th at 9pm CST to comment  -- winners will be announced on the blog post on Friday, February 13th. 
Check out all the awesome Design Team Blogs below to enter:
THANKS SO MUCH for stopping by today and I hope you'll stop back by tomorrow for a Look at the New Naughty Newton Stamp Set and for another chance to win!! WHOOP WHOOP!! =)
Have a Fabulous Week!!
 
COUNTRY HUGS-N-KISSES
LARISSA  =)

Saturday, January 31, 2015

Gradient Challenge with Vanessa ~ Winnie & Walter !st Birthday Bash Challenges!! =)

Pin It


HELLO!!
I wanted to share this picture of our Sunrise here in Nebraska this morning!! It reminded me of this Challenge so I just had to share it with all of you!! =)
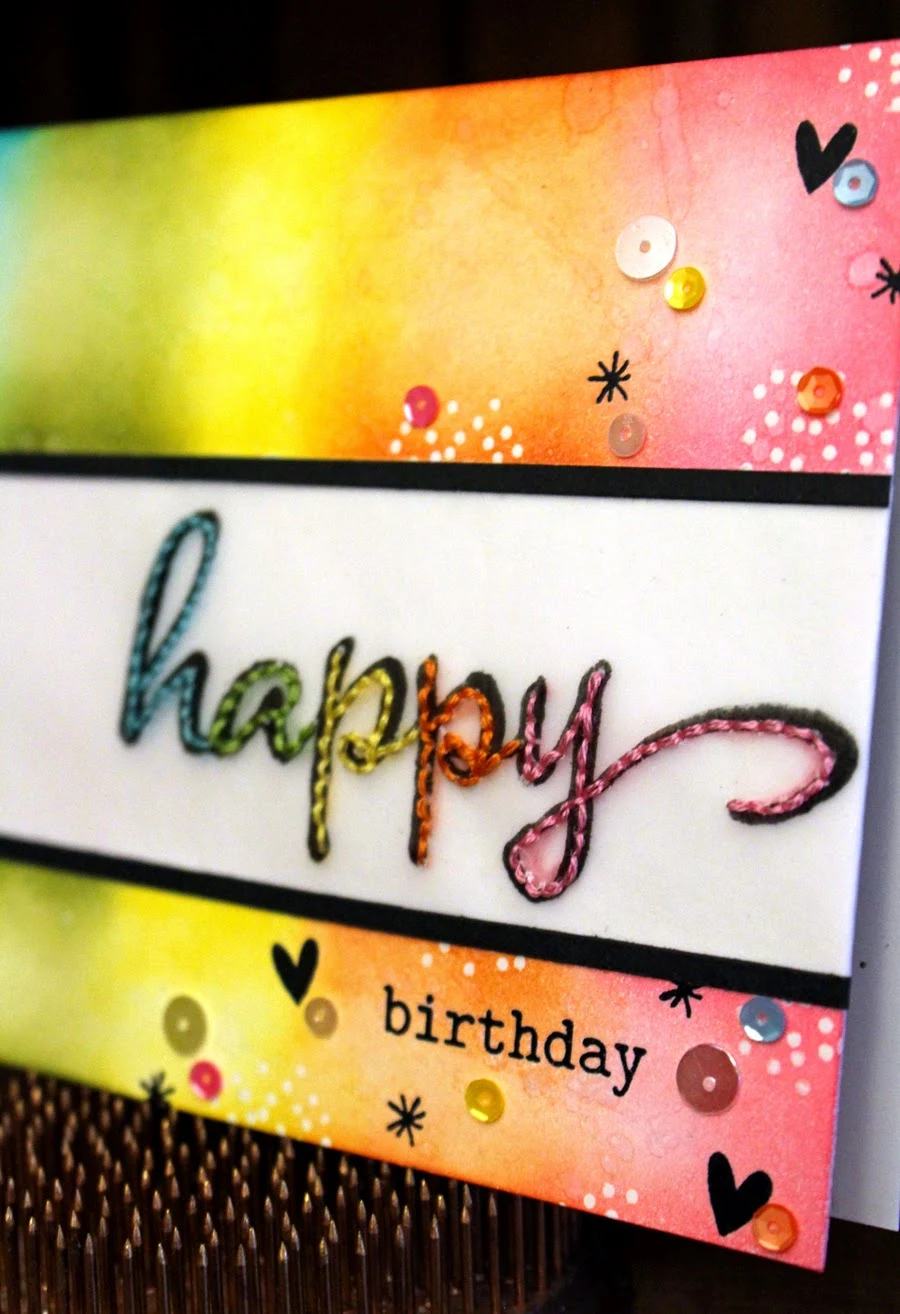
I wanted to stop in and share a few cards I have been creating for the Winnie & Walter 1st Birthday Bash Celebration!! =) I'm actually NEW to them, but I had purchased 2 of their Bold Sentiment Stamp Sets during the Holiday Sales so when I saw the FUN Challenges they were having I just KNEW I had to try and play along!! I made this card for the Gradient Challenge with Vanessa!!  I stamped my Sentiment using Versa-Fine Black Onyx Ink and then used Hero Arts Clear Embossing Powder to Emboss it onto a strip of Vellum!! I have been taking the Clean and Simple Card Making 4 with OnlineCardClasses.com and Jennifer McGuire shared a REALLY FUN Stitching Technique where she did some stitching to add Dimension!! I thought it would be FUN to try this idea on a Sentiment rather than an Image and I LOVE the way it turned out!! I also thought it would be FUN to do it in the Winnie & Walter Colors kinda mimicking a Rainbow Design!! I reversed the order though, just because I knew I wanted to have my stitched sentiment and some confetti coming from the Right side of my card and I thought having the Darker colors on the left side would help to balance out my card!! I think it did too!!?? I used the W&W The Big, the Bold, and the Happy Stamp Set!!
The Big, the Bold, and the Happy
I used a Piercing Tool to pierce a design and then used Embroidery Thread to follow my design!! I then embossed some Hearts and some Confetti and then I used Distress Ink in the Peacock Feathers, Peeled Paint, Mustard Seed, Spiced Marmalade, and Picked Raspberry!! I used a Gradient affect for each of the colors and then sprinkled some water onto the panel to add extra dimension!!


I added some of my Pretty Pink Posh 4mm Sequins and a few Clear Crystal Sequins in both 4mm & 6mm Simon Says Stamp!! Then I added my Stitched Vellum Sentiment Panel to my Card Base and added really thin Black Cardstock Strips for a seamless Design!! I LOVE LOVE LOVE the way it turned out!! I'd also like to try this only next time trying to add just a touch of the Distress Ink Colors for a more clean look!! =)

THANKS SO MUCH for stopping by and I hope you have a FABULOUS WEEKEND!!

COUNTRY HUGS-N-KISSES
LARISSA   =)

Mood Board Challenge with Lea ~ Winnie & Walter 1st Birthday Bash Challenges!! =)

Pin It


HELLO!!
I wanted to stop in and share a few cards I have been creating for the Winnie & Walter 1st Birthday Bash Celebration!! =) I'm actually NEW to them, but I had purchased 2 of their Bold Sentiment Stamp Sets during the Holiday Sales so when I saw the FUN Challenges they were having I just KNEW I had to try and play along!! I made this card for the Mood Board Challenge with Lea and I'm also entering it to the Shaker Challenge with Julie!!  I stamped my Sentiment using Versa-Fine Black Onyx Ink and then used Judikins Sticky Stuff Embossing Powder to Emboss it onto the front of my Card Front!! I have been taking the Clean and Simple Card Making 4 with OnlineCardClasses.com and Jennifer McGuire shared a REALLY FUN Embossing Techniques where she did some Simple Embossing to add Dimension!! I thought it would be FUN to try this idea on a Stamped Sentiment rather than a Die Cut Sentiment and I LOVE the way it turned out!! I also added some Vintage Glass Glitter to the Stamped and Embossed Sentiment instead of just Embossing Powder!! It turned out SO BEAUTIFUL!! =)
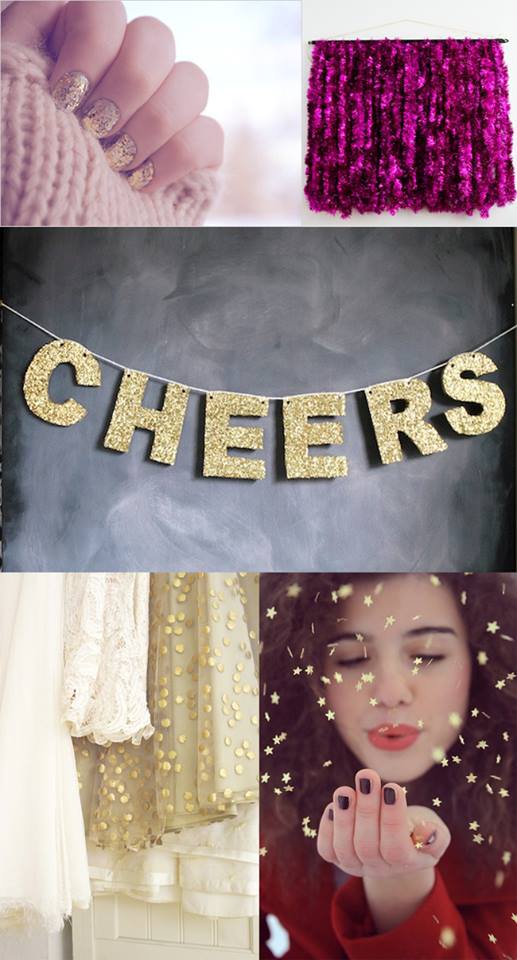
I used the FUN Mood Board that Lea shared for my jumping off point!!
WWBdayChallengeMoodBoard
I KNEW I wanted to have a Chunky Glittered Sentiment and then I decided to create a Stitched Die Cut Star Design on the front of my Card Base with some Lil' Inker Designs Stitched Star Dies!!
I then used acetate to back them and added Foam Tape to create a Shaker Card!! I LOVE how it turned out!!


THANKS SO MUCH for stopping by and have a FABULOUS WEEKEND!!  =)

COUNTRY HUGS-N-KISSES
LARISSA   =)

Winnie & Walter 1st Birthday Bash Celebration ~ Shaker Card Challenge w/Julie!! =)

Pin It


HELLO!!
I wanted to stop in and share a few cards I have been creating for the Winnie & Walter 1st Birthday Bash Celebration!! =) I'm actually NEW to them, but I had purchased 2 of their Bold Sentiment Stamp Sets during the Holiday Sales so when I saw the FUN Challenges they were having I just KNEW I had to try and play along!! For my First Card I have made a Shaker Card for the Shaker Card Challenge with Julie!! I used my Peerless Water Colors to water color this BEAUTIFUL Background!! Then I die cut the Cross Stitched Heart Die from Memory Box and die cut a small heart Window in the top left side for a shaker window!! =) EEKKKK!! I just LOVE the way it turned out!! I stamped my Sentiment using Versa-Fine Black Onyx Ink and then used Hero Arts Clear Embossing Powder to Emboss it!! I used the W&W The Big, the Bold, and the Happy Stamp Set!!
The Big, the Bold, and the Happy
I added some of my Pretty Pink Posh 4mm Sequins and a few Clear Seed Beads from Prima to my small window that I covered with acetate and then added foam tape too!! Then I added more foam tape all over the back of my heart and added it to my car base!!


THANKS SO MUCH for stopping by and I hope you have a FABULOUS WEEKEND!!

COUNTRY HUGS-N-KISSES
LARISSA   =)