Showing posts with label Wow Glitter Embossing Powder. Show all posts

Thursday, April 23, 2020

CAS-ual Fridays Stamps April Release 2020 ~ Musical Elements Chipboard!!

Pin It
HELLO!! 

Welcome to Day 5 of the CAS-ual Fridays Stamps April Release 2020 ~ Musical Elements Chipboard!! 
Here's a look at the NEW Products!!

I wanted to pair the NEW Musical Elements Chipboard with the Love Notes Stamp Set!! I thought it would be FUN to create a Rainbow Glitter Embossed Background using different WoW Embossing Glitters and I absolutely LOVE the way it looks!! This would be PERFECT for Birthday cards too, just change out the sentiment!! I used Red Glitz, Sunset Boulavard, Peal Gold Glitter, Emerald City and Shrinking Violet!! Then I added some Black Soot Distress Paint Splatter!! 

I Die Cut two Circles for the Focal one from Black Cardstock and one from White Cardstock that I Inked with Tumbled GLass Distress Ink!! I wanted to Emboss one of the LARGE Musical Elements Chipboard Notes, so I inked it with Versa Mark Ink and Embossed it with the Pearl Gold Glitter Embossing Powder!! Then I Stamped and Embossed one of the Noted for the Love Notes Stamp Set with some of the Sunset Boulavard Embossing Powder and heat set it on the Ink Circle Die Cut!! I adhered the Large Musical Element Chipboard with some Ultra Bond Adhesive and then Stamped and Embossed the Sentiment onto a Black Cardstock Banner with WoW Bright White Embossing Powder!! I adhered them both to the Card front and then finished it off by adding some Glod Jewels!!  

For TONS of AMAZING Inspiration make sure to visit the CAS-ual Fridays Stamps Blog and shop the NEW, Old and Sale Products in the CFS Shop!! You can also use my discount code LARISSASENTME to SAVE 15% off anything in the Shop!! 
Plus get entered to WIN the ENTIRE NEW Release worth over $80.00!! Good Luck!!
Would you like to win the entire release!!?? Click HERE to visit the Spread Joy Not Germs Blog Hop post and follow the steps to get yourself entred!! You have until midnight April 24th to enter and the winner will be announced on April 26th!! While you're there you might want to hop along as there is OVER 50 Prizes to be WON!!

THANKS SO MUCH for stopping by today and I hope you'll join us tomorrow for a Look at the NEW LOVE Ribbon Stencil!!   

COUNTRY HUGS-N-KISSES
LARISSA  💖

Sunday, April 19, 2020

CAS-ual Fridays Stamps April Release 2020 ~ Rainbow Bridge, Pawsome Stencil, Paw Prints Chipboard

Pin It

HELLO!! 

Welcome to Day 1 of the CAS-ual Fridays Stamps April Release 2020Rainbow Bridge, Pawsome Stencil, Paw Prints Chipboard!! Here's a look at the NEW Products!!


Here's a Look at the Card I created using ALL of the NEW Products together!! 
I stared by Stenciling with the NEW Pawsome Stencil!! I sprayed the back with Pixie Spray and then placed it over my Card Panel and Inked it with some Vintage Photo Distress Oxide Ink!! Then I Stamped and Embossed the Heart Image from the NEW Rainbow Bridge!! I Stamped with Versa Mark Ink and Embossed with WoW Red Glitz Glitter Embossing Powder!! I LOVE the way it Sparkles!! I Fussy Cut it out and Inked the edges with Candied Apple Distress Oxide Ink!! Then I Stamped and Embossed the sentiment onto the Bottom of the Card and added some Black Soot Distress Paint Splatters!! 
I want to add one of the NEW Paw Prints Chipboard Hearts, but I wanted it to be Red Glitter to match the Stamped and Embossed Heart!! So I Pressed it into the Versa Mark Ink and then Coated it with the WoW Red Glitz Embossing Powder and Heat Set it!! I repeated the Process 3 times for a Nice Coating of Glitter and I added a Couple Sparkling Clear Sequins and my Card was finished!! I LOVE the way it turned out!! 

THANKS SO MUCH for stopping by today and I hope you'll join us tomorrow for a Look at the NEW Jacks Stencil and Jacks Chipboard!! Don't forget to Leave a Comment on the CAS-ual Friday Stamps Blog for a chance to WIN to ENTIRE Release!! Have a FABULOUS WEEK!! 

COUNTRY HUGS-N-KISSES
LARISSA  💖

Thursday, April 16, 2020

April Showers with Newton's Nook Designs!!

Pin It
 HELLO!! 
I'm up on the Newton's Nook Designs Blog today with this April Showers Card that just screams Spring!! I LOVE this Sentiment and I wanted to make it the focal along with creating a BEAUTIFUL Plaid that's FULL of personality all on its own!! So lets get started with the Process!!
 I Started with the NND Argyle Stencil Set layer #1 and I Sprayed the back of it with some Therm O Web Pixie Spray!! I then adhered it to my Card Panel and used some Purple Tape for some extra stability!! I then used and Inking Tool and Inked up the Design using Tumbled Glass Distress Oxide Ink!! 
 Next I used the Plaid Stencil Set placing the Stencil #1 over the Card Panel and Inking with a combination of both Tattered Rose and Abandoned Coral Distress Oxide Inks!! 
 Then I placed the #2 Plaid Stencil over the Card Panel and Inked with Milled Lavender Distress Oxide Ink!! 
 I then placed the #2 Argyle Stencil over the Card Panel and used the Therm O Web Metalix Gel in White Pearl along with a Stencil Pal!! I LOVE the Pearlescent shine of this Gel!! 
While the Gel was still wet, I sprinkled on some of the Chunky Lawn Fawn Glitter and then set it aside to Dry completely!! Once it was Dry I took a Large Brush and brushed away all of the extra Glitter and put it back into the Jar!! I think the Sparkle of the Glitter really adds to the over all design!! 
I Stamped and Embossed the April Showers Stamp Set with Versa Fine Black Onyx Ink and WoW Neutral Shimmer Glitter Embossing Powder!! I LOVE the way that the two Iridescent Glitters tie into one another!! SWOON!! That Sparkle just makes me HAPPY!! Then I added the Framework Frame that I Die Cut from some Lawn Fawn Plaid Patterned Paper!! The Colors a PERFECT match and the Smaller Scale Plaid works well with the Larger Scaled Plaid!!  Then I used the little garland of flowers from the Woodland Spring Stamp Set, coloring the image twice and using the coordinating Woodland Spring Die Set to cut them out and placed one on top and one on bottom of the framed image. The PERFECT embellishment to finish off the Design!!

THANKS SO MUCH for stopping by today and I hope you have a FABULOUS WEEK!! 
COUNTRY HUGS-N-KISSES
LARISSA  💖
S U P P L I E S
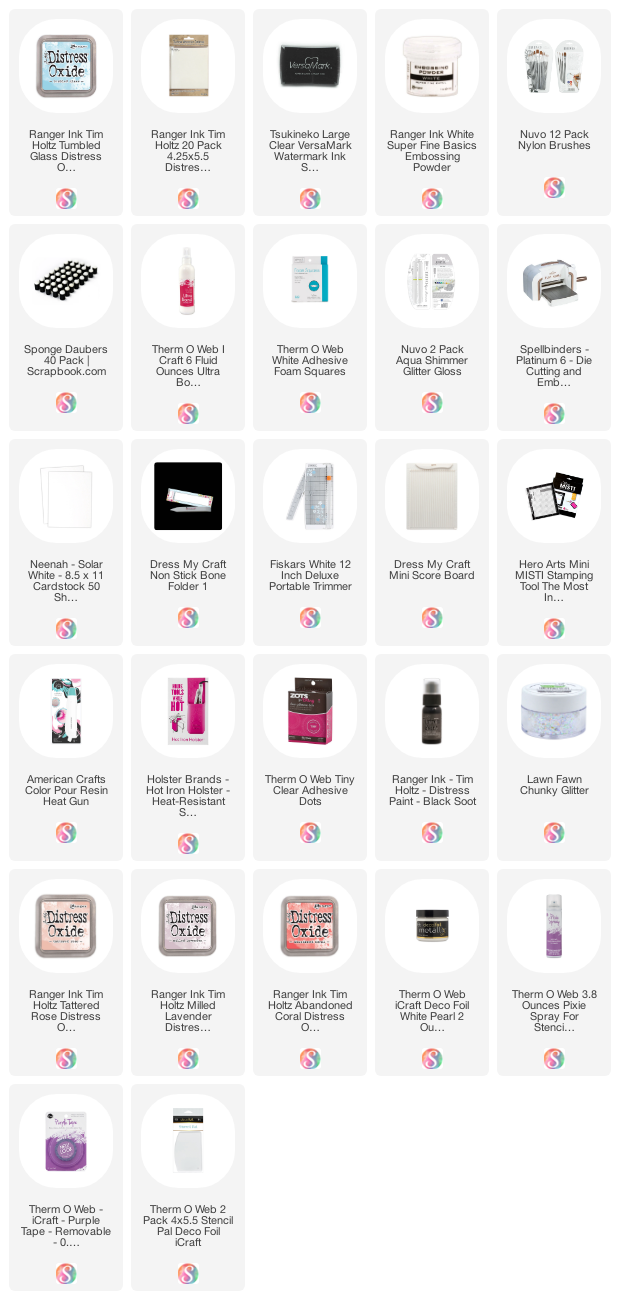
Below you will find links to the supplies used to create this project(s). Click the icon for the store underneath the thumbnails to start shopping. Where available I use compensated affiliate links at no extra cost to you. Your support helps me to keep bringing you new projects. Thank you!!

Saturday, October 5, 2019

2019 World Card Making Day Challenge and Giveaway with CAS-ual Fridays Stamps!!

Pin It

No photo description available.
HELLO CRAFTY FRIENDS!!  
I'm here today with CAS-ual Fridays Stamps for a FUN 
2019 World Card Making Day Challenge!! 
We're CELEBRATING this AMAZING Community of Card Makers with a Challenge and an AMAZING Prize Package!! I hope you'll join us and Play along for a chance to WIN!!
I started by Die Cutting a Piece of the NEW Therm O Web Deco Foil Flock Sheets in Pink Carnation that I adhered to some Cardstock using the Easy Cut Adhesive Sheets and then ran it through my Die Cutting Machine to Burnish it!! I then used the Heart A2 Panel Fri-Die to Die Cut the Flock and I just LOVE the Texture!! I used some Distress Oxide Ink in Picked Raspberry to ink up the edges and I LOVE the way it makes the whole Panel POP!! 
Next I cut a Piece of Patterned Paper to go behind the Panel!! I've been HOARDING this Patterned Paper and thought this would make for the PERFECT card to send to a Friend I'm thinking about, who just lost her mother unexpectedly a few weeks ago!! I wanted to send another card to let her know I've been thinking about her and that she's in my thoughts and prayers!! I Stamped and Embossed the sentiment from the Peaceful Garden Stamp Set onto a Banner Strip and Embossed with some WoW Neutral Shimmer Glitter Embossing Powder!! I LOVE the way it SPARKLES!! 
I added Foam Tape that I cut down onto the back of the Heart A2 Panel and then adhered it the the Patterned Paper!! Added some more Foam Tape to the Banner along with some Twine that I tied into a Bow!! Then adhered it onto the Panel!! A sprinkling of Pretty Pink Posh Iridescent Gems finishes off the Design!! 

THANKS SO MUCH for stopping by today and I hope you'll join in the FUN for a Chance to both be INSPIRED, and to WIN some AWESOME Prizes!! 
HAPPY World Card Making Day!!

COUNTRY HUGS-N-KISSES 
LARISSA   =) 

Friday, September 6, 2019

Happy Howl-oween with Newton's Nook Designs!!

Pin It

HELLO CRAFTY FRIENDS!! 

HAPPY FRIDAY!! 
I'm up on the Newton's Nook Designs Blog today sharing a FUN Happy Howl-Oween Card!! If you followed during the Release you might have seen my Card that I shared using the CUTE NEW Image from the "Happy Howl-oween" Stamp Set!!?? 
If not here's a look at that Project!! 
I LOVE being able to STRETCH the use of my Products and sometimes I KNOW not every crafter feels comfortable Coloring Larger more intricate Images!! So I wanted to show that you can use those Images as is and then create a BOLD background using whatever medium you may like to use!! SO MANY OPTIONS right!!?? Even just using a Die Cut Panel would be FUN for a Simple Background especially if you're wanting to make SEVERAL of the same design!! I LOVE the look don't you!!??
Happy Howl-Oween Card by Larissa Heskett for Newton's Nook Designs using Happy Howl-Oween Stamp and Die Set, Fence Die, Cascading Stars Stencil and Grass & Hills Stencil
So for my Card today I wanted to share a SIMILAR Design, meaning I used almost the EXACT same Products!! I changed up the Design a little by adding the Fence Die Cut behind the Image and then I added some Stamped and Embossed Bats and a Few of the SWEET Candy Images also from the same Set!! It's NEAT to compare the two to see what your preference is and maybe there's room for BOTH of the different designs just depending on your time and how many of each Card Design you were needing to create!! 
Happy Howl-Oween Card by Larissa Heskett for Newton's Nook Designs using Happy Howl-Oween Stamp and Die Set, Fence Die, Cascading Stars Stencil and Grass & Hills Stencil
 I used Distress Oxide Inks in Scattered Straw, Carved Pumpkin and Shaded Lilac for the Sky using the Cascading Stars Stencil!! For the Ground I used Peeled Paint and Black Soot along with the Hills & Grass Stencil!! I Stamped and Embossed the Sentiment using some WoW Neutral Sparkle Glitter Embossing Powder and I LOVE the added Sparkle it gives to the Card!! A Sprinkling of Iridescent Stars were added to the background too for even more Sparkle and Shine!! 
After Stamping and Embossing the Images I used Copic Markers to Color them in!! 
(Witch Puppy: E40, E42, E43, E44 & E47  Pumpkin Puppy: C00, C0, C2 & C4  Cheeks: ROO  Pumpkin: YR00, YR14 & YR18  Purple Images: V01, V04, V06 & V09  Yellow Images: Y11, Y15 & YR23  Green Images: YG61, YG63 & YG67 Witches Cape: N0, N2, N4 & N8  Fence Die Cut: C0 & C2 Blending out with a Colorless Blender) 
I used a Black Glaze Pen for the BOTH Puppy Noses and Eyes and the Spider and added some White Gel Pen Details for Highlights!! I added some Blizzard Glitter Nuvo Drops for some Dimension and Shine to the Stars and Band on the Witches Hat and to the Moon on the Treat Bag along with some Morning Dew Nuvo Drops for the Broom Handle to help make it look more 3D!! I used Therm O Web 3-D Foam Squares to POP the Images up and Then I framed the whole panel with a postage edged frame from our Framework Die Set in some Passion Punch & Oreo TE Cardstock and created my Cardbase from some TE Build a Scene Halloween Patterned Paper!!

THANKS SO MUCH for stopping by and I hope I've given you some Inspiration today on another FUN way to use those SWEET Images that you have that may seem a little daunting on how to color at first glance!!?? Give them a TRY, I KNOW you'll be HOOKED just like I am!! 

Have a FABULOUS WEEKEND!! 

COUNTRY HUGS-N-KISSES 
LARISSA   =) 

Tuesday, June 25, 2019

CAS-ual Fridays Stamps June Release 2019 ~ Hearts A2 Panel Fri-Die!!

Pin It


HELLO!!
Welcome to Day 4 of the 
CAS-ual Fridays Stamps June Release Week!!
Today we're showcasing the NEW Hearts A2 Panel Fri-Die!! 

I've create a FUN Deco Foil Flock Card with some Stenciling to make it appear 3-D!! I really LOVE all of the Texture and the subtle look of the Stenciling!! 
I Started by using the NEW Hearts A2 Panel Fri-Die as a Stencil to stencil the Hearts onto my Cardbase using some Distress Oxide Ink in Spun Sugar!! 

Then I Die Cut the Hearts A2 Panel from a piece of Therm O Web Deco Foil Flock Sheets in Think Pink that I had attached to a piece of Therm O Web Easy Cut Adhesive Sheets making it adhesive on the back side!! I used that piece as a stencil first before removing the front covering to use as the stencil to add some Tumbled Glass Distress Ink to the background of the Design!! 


I wanted to add some texture so I used the Tin Roof Stencil along with some Distress Oxide Ink in Peacock Feathers and inked over the Background to add a FUN pattern!! I REALLY LOVE how it turned out!! 
I then removed the top coating of the Deco Foil Flock Sheets and then adhered it to the Stenciled Cardbase!! I used some of the Die Cut Hearts to add back into the stenciled Heart openings and added some Tonic Studios Blizzard Glitter Nuvo Drops ontop to add some Sparkle!! SWOON!! I LOVE the way it dried!! Then I added a Few Iridescent Sequins and some Lite Pink Jewels to the Center!! A Sentiment Strip that I stamped and embossed with a sentiment from the Bushy Tailed Stamp Set using Distress Oxide Ink in Spun Sugar and WoW Neutral Ultra Shimmer Embossing Powder to match the Sparkle of the Nuvo Drop Hearts and added some Twine to the end with a Bow to finish it off!! This card is PACKED with Texture and Sparkle and I LOVE how it turned out!! 


For TONS of AMAZING Inspiration make sure you stop by the rest of the AMAZING DT Blogs to see what they've created!! Also make sure to visit the CAS-ual Fridays Stamps Blog for a chance to WIN and shop the NEW Products in the CFS Shop!! You can also use my  discount code LARISSASENTME to SAVE 15%!! WHOOP WHOOP!! 


THANKS SO MUCH for stopping by today and I hope you
have a FABULOUS WEEKEND!!

COUNTRY HUGS-N-KISSES
                          LARISSA  =)

Thursday, May 16, 2019

Paper Sweeties May Release Rewind!! =)

Pin It
HELLO CRAFTY FRIENDS!!

Welcome to Day 3 of the Paper Sweeties 
May Release 2019!! 
I created a SWEET Hello Card for today using the *NEW* stamp set called "Basket Add On: Thinking of You" Stamp Set and the coordinating "Basket Add On: Thinking of You" Sweet Cuts Die Set which are now available in the Paper Sweeties Shop!! 
 Here's a look at the the NEW Sets this Month if you're just joining me today!! 
I wanted to create a SWEET Scene using the Keep Calm and Drink Coffee Sweet Cuts Die!! I Die Cut it from some of my NEW favorite Patterned Paper Collection "Gingham Farm" by My Mind's Eye!! SWOON!! I LOVE the ENTIRE Collection!! I die Cut 3 more Coffee Cup images form Black Cardstock and layered them all together to create a dimensional Cup!! Then I Stamped and Embossed the Images form the NEW Basket Add On: Thinking of You Set and the Sweet Ladybug Image from the Cute as a Bug Stamp Set!! I Colored them all with Copic Markers!! 
(Flowers: R43, R46 & R89  Leaves: G40, G43, & G46   Ladybug: R43, R46, R89, N6, N4, N2, BG000, BG11   Sign: N2, E25 & E29) 

I used Distress Oxide Inks in Tumbled Glass and Peeled Paint to ink up the background and then I Stamped and Embossed the "Hello" Sentiment onto the sign using some WoW Clear Glitter Embossing Powder!! Its a little touch, but in person it really adds alot to the SWEET Scene!!  I used a Woodgrain patterned Paper (also from the Gingham Farm Collection) for my Card Panel and added some White Gel Pen and Glitter Gel Pen Details to finish of the Design!! I LOVE the way it turned out and KNOW it'll bring a SMILE to someones Face!! 

For even MORE Inspiration please visit the rest of the AMAZING Design Team Blogs!!

THANKS SO MUCH for stopping by and I hope you come back tomorrow for a look at the NEW Products!!
Have a FABULOUS WEEKEND!!

 COUNTRY HUGS-N-KISSES
LARISSA

Friday, February 8, 2019

Happy Bird-Day Card w/ Newton's Nook Designs!!

Pin It

Newton
HELLO & HAPPY FRIDAY!! 
I'm up on the Newton's Nook Blog today sharing this Bright and Cheerful Happy Bird-day Card!!
Happy Bird-Day Card by Larissa Heskett  using Newton's Nook Designs  Winter Birds, Newton Celebrates, Birthday Essentials and Frames & Flags Die Set  My Mind's Eye Well Hello 6X6 Patterned Paper, WoW Neutral Shimmer Glitter Embossing Powder
I used the Winter Birds Stamp Set to create a colorful birthday card! I started out by Stamping and Embossing  the image of the Chickadee from the Winter Birds Stamp Set but instead of coloring it in traditional colors I changed it up by making the SWEET Chickadee Bird shades of Pink to coordinate with the Well Hello Pattered Paper Pad I used by My Mind's Eye!! As soon as I saw this Pad I just KNEW I had to have it and it coordinates SO WELL with SEVERAL of the AMAZING NND Stamp Sets!! Think about that next time your looking at NEW Pads to buy!! 
I added some Cracked Pistachio Distress Paint Splatters to the Pattered Paper Card Base for some added texture and sat it aside to dry!! Then I die cut the SWEET Chickadee Bird using the coordinating Winter Birds Die Set!! To make this even MORE FUN I colored a Party Hat from the Newton Celebrates Stamp Set and cut it out with the Newton Celebrates Die Set to add it onto the Chickadee Birds head!! I added the Bright and Cheerful Chickadee Bird to my card, adding some Wild Honey Distress Ink behind him on a circle die cur!! For my card base I used the bold bird themed patterned paper!! Then I added the "celebrate" sentiment from our Birthday Essentials Stamp Set, Stamping and Embossing it onto a banner from our Frames & Flags Die Set using Versa Fine Black Onyx Ink and WoW Neutral Shimmer Glitter Embossing Powder!! I added s sprinkling of Blue Iridescent Sequins from my stash and I think it finishes it off PERFECTLY!! I LOVE the way it turned out and WHO wouldn't want to receive a Bird-Day Card like this!!?? 
THANKS SO MUCH for stopping by today and I hope you have a FABULOUS WEEKEND!!

COUNTRY HUGS-N-KISSES
LARISSA  =)