Showing posts with label Spellbinders. Show all posts

Friday, April 21, 2023

Spellbinders April Stitching Die of the Month!!

Pin It
HELLO CRAFTY FRIENDS!! 

I'm here today to share a Couple Projects using the Spellbinders April Stitching Die of the Month Membership!! 
SWOON!! If you haven't seen ALL of the AMAZING Inspiration using this Set, hopefully this post will give you even more Ideas!! I LOVE how VERSITALE this Set it and I have some NEW Ideas using them to create a BEAUTIFUL Large Stitched Flower!! 

I Started by Die Cutting the different Layers of the Petals, Die Cutting 2 of Each Petal!! Then I Stitched the different Layers and adhered them together using some Double Sided Adhesive!! I adhered the Different Layers together using Foam Tape for some added Dimension as well as turning the Petals Up to add even more Dimension!! I rotated the Layers in order to achieve the FUN Flower Shape!! 

I Die Cut a Circle for the Center of the Flowers and used some WoW Glitter Embossing Powder to add some Sparkle and Shine to the Circle Center adhering it to the Flower using Double Sided Adhesive!! 
I Hot Foiled the Sentiment "Happy Birthday" from the Sentimental Ampersand Hot Foil & Die Set to the Fluted Classics Rectangle Die that was Die Cut from some Spellbinders Snowdrift Cardstock using some Copper Hot Foil and the Glimmer Hot Foil System!! SWOON!! I LOVE the way the Copper Hot Foil matches the Sparkle of the Sunflower Center!! It's just BEAUTIFUL!! 
I adhered the Stitched Sunflower and the Sunflowers Leaves that were cut using the Zinnia Etched Die Set from Patterned Paper to the Hot Foiled Fluted Classics Rectangle Die using some Double Sided Adhesive!! Then adhered the Panel to the Patterned Paper Card Panel using Foam Tape for Dimension!!

I repeated the same process only changing the Colors and Patterns of the Stitched Flower and Leaves!! 
I Die Cut a Circle for the Center of the Flowers and used some WoW Glitter Embossing Powder to add some Sparkle and Shine to the Circle Center adhering it to the Flower using Double Sided Adhesive!!

I Hot Foiled the Sentiment to the Fluted Classics Rectangle Die that was Die Cut from some Spellbinders Snowdrift Cardstock using some Matte Gold Hot Foil and the Glimmer Hot Foil System!! SWOON!! I LOVE the way the Matte Gold Hot Foil matches the Sparkle of the Flower Center!!
It's just BEAUTIFUL!!
 

I adhered the Stitched Flower and the Flower Leaves that were cut using the Zinnia Etched Die Set from Patterned Paper to the Hot Foiled Fluted Classics Rectangle Die using some Double Sided Adhesive!! Then adhered the Panel to the Patterned Paper Card Panel using Foam Tape for Dimension!!


I Created this last card the EXACT same way as the Last one, just changing the Patterned Paper!! I LOVE this Design as you can create ANY Flower Color Combo you'd like to coordinate with you Patterned Paper choice!!

Again I used WoW Glitter Embossing Powder to Cover the Circle Flower Center!! SWOON!! I LOVE the touch of Sparkle!! 

These Stitched Flowers are SO FUN to create!! I can using them for several different things including Party Decorations or a Banner for a Party!! I LOVE how Large they are and the FUN possibilities with the Color Combinations!! 

So there you have a NEW Idea on how you can use the Spellbinders April Stitching Die of the Month Membership!! I hope I've INSPIRED you today and I hope you'll check out ALL of the AMAZING Inspiration in the April 2023 Club Inspiration Roundup using the Spellbinders April Kits of the Month!! There are SO MANY FUN Products and there's still time to get the Kits this Month!! 

THANKS SO MUCH for stopping by today and I hope you have a FABULOUS WEEK!! 

COUNRTY HUGS-N-KISSES
LARISSA  ๐Ÿ’—

Monday, April 17, 2023

Thank You Card w/ Spellbinders!!

Pin It

Hello Crafty Friends!! 

I'm here today to share a Card using Spellbinders March Stitching Die of the Month~ Nested Layered Stitched Petal!! SWOON!! I LOVE this Die Set as there are SO MANY ways to use it!! If you follow me, then you KNOW that I LOVE to create Shaker Cards and I really wanted to show how you can create an Infinity Shaker Card even with the Stitched Die Cuts!! 

I also LOVE Daisies, so I've incorporated the Beautiful Daisies from the NEW Umbrella Bloom Etched Die Set!!
I Die Cut the Main portion of the Nested Layered Stitched Petal Die from some Spellbinders Indigo Cardstock and then I Stitched the Design with some Light Seagreen 964  Included in the Spellbinders DMC Color Essentials Floss Bundle that matches the Spellbinders Waterfall Cardstock that I used for the Die Cut and Pierced Background Panel!! 

Once everything was Stitched then I Die Cut the Beautiful Daisies from the NEW Umbrella Bloom Etched Die Set using some Spellbinders Snowdrift Cardstock for the Flowers and some Spellbinders Peridot Cardstock for the Leaves!! I adhered all of the Flowers to the center of the Stitching using some Therm O Web Zots Bling Adhesive Dots!! Then I adhered some Trinity Stamps Lumionous Yellow Baubles to the Center of all of the Daisies as well as the Large openings in the Center of the Pierced Design!! 

Next I created the Infinity Shaker Card Panel adhering the Die Cut and Pierced Background Panel that was Stamped with the the "Thank You" Sentiment in some Navy Ink, to some Snowdrift Cardstock and then using a Waffle Flower Infinity Shaker Panel to adhere to the Panel, leaving the Top open so I could add ALL of my BEAUTIFUL Shaker Elements!! I added some Iridescent Mini Butterfly (24 Color/Set 3D Butterfly Nail Glitter Sequins) along with some Taylored Expressions Tiny Diamonds-Pastel and some Sequins in White, Navy (both Matte and Metallic)!! I Closed the Top of the Panel and the Infinity Shaker is READY to SHAKE!! I LOVE the Mix and the Sparkle, Shine and Playfulness it adds to the Card Design!!

I Adhered the Stitched Panel to the top of the Infinity Shaker Panel and the Card Panel was adhered to a White Cardstock A2 Cardbase!! I LOVE the way it turned out!! 
So there you have it a BEAUTIFUL Infinity Shaker Card using the Spellbinders March Stitching Die of the Month-Nested Layered Stitched Petal!! I LOVE this set as there are SO MANY ways to use them!! Infinity Shaker Cards are just one idea!! I'll be back soon to share another Idea!! THANKS SO MUCH for stopping by today and I hope you have a FABULOUS WEEK!! 


COUNTRY HUGS-N-KISSES
LARISSA  ๐Ÿ’—

Thursday, January 19, 2023

Spellbinders Clubs Blog Hop January 2023 ~ NEW Stitching Die Club + Giveaways!!

Pin It


HELLO CRAFTY FRIENDS!! 

I'm here today with Spellbinders for the January 2023 Clubs Blog Hop!! The Kits are SUPER Popular as they are an AMAZING Value!! Please note, the Large Die, Stitching Die, and 3D Embossing Folder of the Month Clubs are Sold Out for January!!  You will be able to Join these Clubs Next Month, in February though!!  Be sure to Join, and DON'T MISS OUT on the NEW Designs!!   
You should have arrived from the AMAZING Jess Gerstner Blog!!
 
I've created 2 Cards for today showing a couple different Ideas on how you can use the NEW Stitch Club Dies for January!!
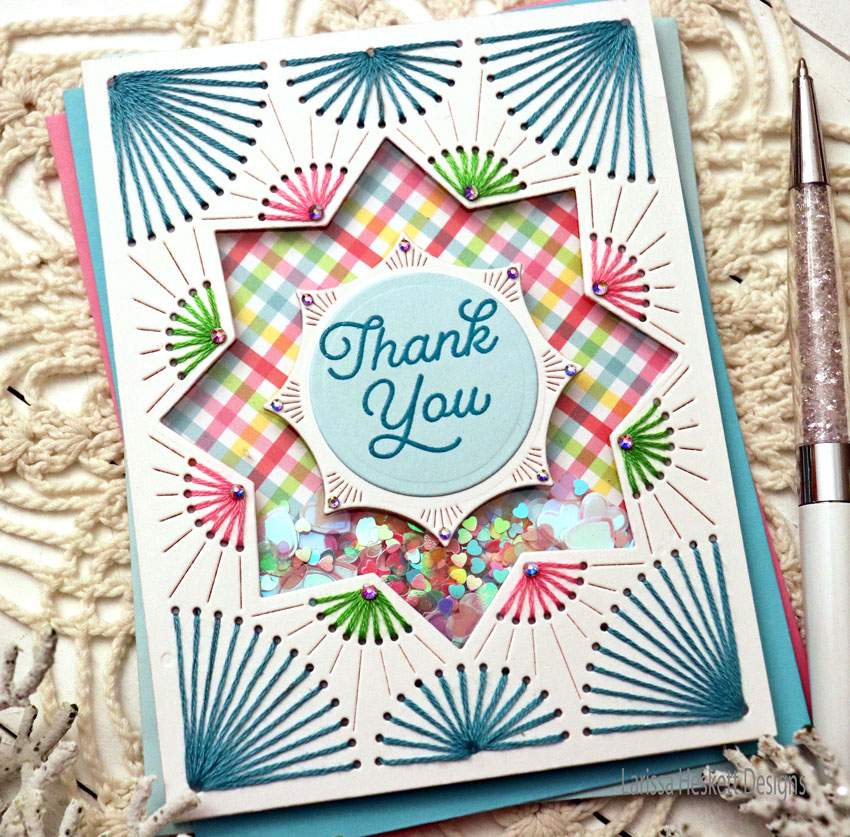
 I Started with this Card Design using a Rainbow Color Pallet!! I used DMC Threads and LOVE hoe Bright and Cheerful this Card turned out!!   

I Stamped and "Thank You" Sentiment from the Sentimental Greetings Stamp Set that coordinates with the Stitching Die Set for this Month!! 

Then I added some of the Aurora AB Color Essentials Gems for a touch of Sparkle and I LOVE how it finished off the Design!! 

For my Second Card I've created a Shaker Card and I LOVE ALL of the possibilities with Set to create Shakers!! 

I Stamped and "Thank You" Sentiment from the Sentimental Greetings Stamp Set that coordinates with the Stitching Die Set for this Month!!

Then I added some of the Aurora AB Color Essentials Gems for a touch of Sparkle and I LOVE how it finished off the Design!!

I added some TS Embellishments for the Shaker Elements and I LOVE how FUN it is to Shake!! 

This Card Design would be PERFECT for almost ANY Occasion, just by switching out the Sentiment!! 
So there you have a Couple of Cards using the NEW Stitching Die Club!! I hope I've INSPIRED you today!!??
If you create something please be sure to tag us on Social Media using the #spellbinders #SpellbindersClubKits #NeverStopMaking and @spellbinders because we LOVE to see what you've Created!! 
Giveaway:
To celebrate this release, we are Giving Away a $25 Gift Certificate to 3 Lucky Blog Readers – selected from the comments on our blog. Giveaway closes on Sunday, January 22nd, 11:59 pm MST. The winner will be announced in this blog hop post the following Wednesday. The winner is responsible for shipping costs, duties, and taxes. Please note, store credit (gift certificate) cannot be applied to Club Subscriptions. Store credit can be applied to shop past Club products, Club extras and regular releases!! 


THANKS SO MUCH for stopping by today!! I hope I've INSPIRED you with some different ideas on ways to use the NEW Stitch Die Club of the Month Set and if you want to Join make sure to get signed up!!
Your NEXT STOP: the AMAZING Teri Duncan

Have a FABULOUS WEEKEND!! 

COUNTRY HUGS-N-KISSES
LARISSA ๐Ÿ’—

Thursday, November 3, 2022

For You ~ Layered Stitched Diamond Card w/ Spellbinders!!

Pin It
HELLO CRAFTY FRIENDS!! 
I'm here today to share a SWEET Welcome Baby Card using the NEW Limited Edition Layered Stitched Diamonds Etched Dies from Spellbinders!! This Set is such a VERSATILE Set as there are so many different ways you can use it with all of the different Dies included in the Set!! There's even a FUN coordinating Limited Edition Layered Stitched Diamonds Clear Stamp Set!! It's Sold Out, but make sure to click the "Notify Me" Tab and you'll be notified once its back in stock!! 

I Started by Die Cutting the Diamonds from some Patterned Paper!! I LOVE Die Cutting from Patterned Paper as it makes me think of the Prints you'd see if you were Stitching with Fabrics!! Then I used DMC Floss to Stitch all of the Diamonds!! I LOVE looking at Pinterest for Quilt Pattern Ideas!! There are so many Patterns to choose from, I played around and I LOVE the Idea of Layering some of the Diamonds for a Dimensional Design!!
 I adhered all of the Diamonds in place and then I added some Aura AB Gems to the center of the Stitched Diamonds for some added Sparkle and Shine!! I Stamped and Embossed the "For You" Sentiment and then added it to the Card using Foam Tape!! I LOVE the way it turned out and I hope I've INSPIRED you today on ways that you can use the NEW Limited Edition Layered Stitched Diamonds Etched Dies from Spellbinders!!

BONUS!!  
I'm also sharing a Couple other Projects today using the same Die Set over on the Spellbinders Blog HERE!! So make sure to visit and leave me some LOVE!! I'd GRATELY APPRECIATE it, as its my first Guest Designer Blog Post for them!!

THANKS SO MUCH for stopping by today and I hope you have a FABULOUS WEEK!! 

COUNTRY HUGS-N-KISSES
LARISSA  ๐Ÿ’™

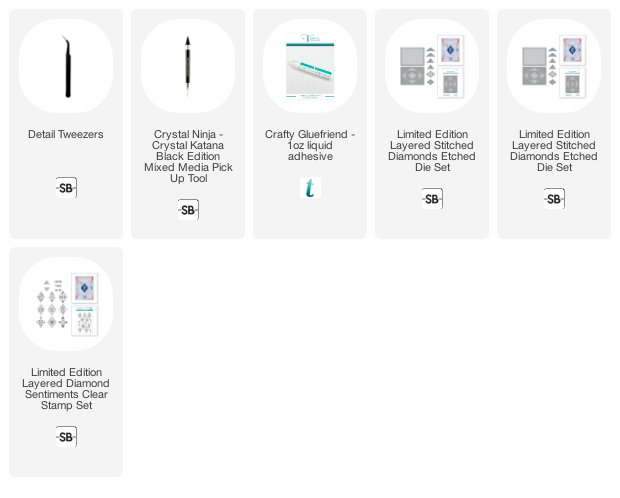
S U P P L I E S Below you will find links to the supplies used to create this project(s). Click the icon for the store underneath the thumbnails to start shopping. Where available I use compensated affiliate links at no extra cost to you. Your support helps me to keep bringing you new projects. Thank you!! ๐Ÿ’“

Thursday, July 28, 2022

Spellbinders in July Celebration 2022!!

Pin It
Hello Crafty Friends!! 

I'm here today as a Part of the Spellbinders in July Celebration!! SQUEAL!! If you haven't seen the NEW Release you'll WANT to go and check it out!! I'm in LOVE, and have MORE Ideas than I do time to create!! LOL!! ALWAYS the BIGGEST Problem in my situation!! 
I'm sharing 3 STUNNING Cards today using the NEW Stitched Petals Diamond Background Die along with the Christmas Blooms Etched Die Set and the Mini Blooms and Sprigs Etched Die Set to add some Dimensional Florals!! 
I Started by Die Cutting some Wood Grain Patterned Paper using the NEW 
Stitched Petals Diamond Background Die!! Then I Stitched the Pattern using some Floss in 115, 3348 & 800896!! 

Here's a Close up of the Floss Number and the Stitched Design!! 

Next I Die Cut the Poinsettia Flowers from the Christmas Blooms Die Set from some Phonebooth Color Essentials Cardstock and then Inked the Centers with some Mahogany Distress Ink for some Dimension!! 

After adhering the Die Cut Poinsettia Blooms to the Stitched Panel using Multi Medium Matte Adhesive I then added some Metallic Red Sequins to the Center of the Poinsettia Blooms again using Multi Medium Matte Adhesive and then added some of the Aura AB Color Essential Gems to finish off the Design and I LOVE how the Panel turned out!! 
I Stamped and Embossed the "Happy Birthday" Sentiment from the Birthday Unboxing Sentiments Stamp Set using Versa Mark Ink and Spellbinders White Embossing Powder onto some of the NEW Mahogany Color Essentials Cardstock!! Then I Die Cut the Sentiment Strip using the Mini Slimline A Etched Die Set and adhered it to my Card Panel using some Foam Tape for some Dimension!! 

I Adhered the Card Panel to a Cardbase made from some of the NEW Mahogany Color Essentials Cardstock!! I LOVE how the Stitched Card Panel POPS of the Cardbase!! 

Here's a Close Up look at ALL of that STUNNING Dimension and Stitched Details!! The Sparkle from the Metallic Sequins and Aura Gems just really makes the Design!! 
I also LOVE that you can change the Sentiment and this Card Design can be used for the Holidays, or an Anniversary or even a Thinking of You or Thank You Card!! 
I Started by Die Cutting some Gingham Patterned Paper using the NEW Stitched Petals Diamond Background Die!! Then I Stitched the Pattern using some Floss in 966, 33 & 800896!!
Here's a Close up of the Floss Number and the Stitched Design!! 
Next I Die Cut the Poinsettia Flowers from the Christmas Blooms Die Set from some Purple Mist Color Essentials Cardstock and then Inked the Centers with some Seedless Preserves Distress Ink for some Dimension!!
After adhering the Die Cut Poinsettia Blooms to the Stitched Panel using Multi Medium Matte Adhesive I then added some Iridescent Sequins to the Center of the Poinsettia Blooms again using Multi Medium Matte Adhesive and then added some of the Spectrum AB Color Essential Gems to finish off the Design and I LOVE how the Panel turned out!!
I Adhered the Card Panel to a Cardbase made from some of the Onyx Color Essentials Cardstock!! I LOVE how the Stitched Card Panel POPS of the Cardbase!! 

Here's a Close Up look at ALL of that STUNNING Dimension and Stitched Details!! The Sparkle from the Metallic Sequins and Aura Gems just really makes the Design!! 
SWOON!! I LOVE the way this Card turned out and I think its FUN to show how you can stitch on Patterned Paper to get a completely FUN look!! ENDLESS POSSIBILITIES!! 
Now for a BONUS Card!! I wanted to show how even though this is a Christmas Die, the Design is such that it can be used for ANY Design!! I personally LOVE Mums in the Fall and thought it would be FUN to create some Fall Mums on this Card using the Mini Blooms and Sprigs Die Set!! SWOON!! Isn't it STUNNING!!?? Who's ready for Fall!!??  
I Started by Die Cutting some White Cardstock using the 
NEW Stitched Petals Diamond Background Die!! Then I Inked the Background of the Panel with some Tattered Rose Distress Oxide Ink and some Fossilized Amber Distress Ink to add a POP of Color to the Background Panel!! Then I  Stitched the Pattern using some Floss in 69, 6211 & 800334!!
I repeated the SAME Steps to assemble the Card only using the Mini Blooms and Sprigs Die Set to Die Cut the Blooms from some of the Barely Peach Color Essentials Cardstock!! I wanted a FULLER Bloom so I Die Cut 2 Blooms for each!! I Inked the Bottom Layer with some Mahogany Distress Ink and the Top Bloom with some Tattered Rose Distress Ink, then adhered them together!! 
I added some Peach Sequins to the Center of the Blooms and then added some of the Aura AB Color Essential Gems to finish off the Design!! I adhered the Card Panel onto a Pomegranate Color Essentials Cardbase and my Card is ready to send to someone SPECIAL this Fall!! 

So there you have it, 3 STUNNING Cards using the 
NEW Stitched Petals Diamond Background Die along with the Christmas Blooms Etched Die Set and the Mini Blooms and Etched Die Set to add some Dimensional Florals!! I LOVE how VERSITAL this Designs is and how just by changing up the Floss Colors and the Floral Dies you use, you can create for ANY Season!! Also, just by changing the Sentiment you can Create for ANY Occasion too!! 
I hope I've INSPIRED you and if you give this Card Design a try I hope you'll TAG me on Social Media as I'd LOVE to see what you create!! THANKS SO MUCH for stopping and I hope you have a FABULOUS WEEKEND!! 

COUNTRY HUGS-N-KISSES
LARISSA  ๐Ÿ’–

S U P P L I E S Below you will find links to the supplies used to create this project(s). Click the icon for the store underneath the thumbnails to start shopping. Where available I use compensated affiliate links at no extra cost to you. Your support helps me to keep bringing you new projects. Thank you!! ๐Ÿ’“