Showing posts with label Halloween. Show all posts

Friday, September 23, 2016

Inky Paws Challenge #36 - Halloween w/ Newton's Nook Designs!! =)

Pin It
Newton's Nook Designs Inky Paws Challenge #36 - Halloween Theme
HELLO & HAPPY FRIDAY!! 
 
Today is the start of a New Newton's Nook Designs Inky Paws Challenge!! I LOVE LOVE LOVE the Inspiration Photo and the theme Inky Paws Challenge #36 - Halloween!! decided to make a FUN Treat Bag using the New Lawn Fawn Scalloped Treat Bag!! I used some Older My Mind's Eye Halloween Patterned Paper to Die Cut the Box and then Stamped and Embossed the Image from the New  Newton's Boo-tiful Night Stamp Set!! I used my Zig Clean Color Real Brush Markers to Watercolor the Image and then attached it to the Front of the Treat Box!! SQUEAL!! I LOVE LOVE LOVE the way it turned out!!


Hope you're INSPIRED!!?? I CAN'T WAIT to see what you create!! SO MANY possibilities!!
THANKS SO MUCH for stopping by and I hope you have a FABULOUS WEEKEND!!
COUNRY HUGS-N-KISSES
LARISSA   =)


Tuesday, August 16, 2016

Paper Sweetis August Release Rewind!! =)

Pin It
302

Hello!!
I'm her today to share the New Paper Sweeties August 2016 New Release Rewind!!
SQUEAL!! You're going to LOVE LOVE LOVE the New Products for this month and I CAN'T WAIT to share what I've made using the New Window Sweet Cuts Die Set!! Here's another look at ALL of the AMAZING Products being Released for this Month!! =)
PS-176
SC-176
PS-177
SC-177
Today I'm switching Gears and sharing some FUN ways to use the New Window Die for Treat Bags/Boxes!! SQUEAL!! Just IMAGINE ALL of the different ways you can use this AMAZING Die!! I've made just Three Different Samples, but the POSSABILITIES are ENDLESS!! =)
 
I've used SEVERAL Older Paper Sweeties Stamps and Dies to create ALL of these!! There are SO MANY Occasions you can CREATE these for and by using your Stash and what you have on hand you can alter them to fit the Supplies you have!! =)
I hope you feel INSPIRED and that you'll go and check out the rest of the AMAZING DT Blogs to see what they've created!!
Larissa Heskett
Lilian Forsyth  <--- WELCOME TO THE TEAM --->  
Lisa Bzibziak Mackie Robertson
Nancy Salkeld

THANKS SO MUCH for stopping by today and I hope you'll come back tomorrow for the New Paper Sweeties August 2016 New Release Rewind!!
Have a FABULOUS WEEKEND!! =)
COUNTRY-HUGS-KISSES
LARISSA  =)

Sunday, October 19, 2014

Paper Smooches SPARKS Anything Goes Challenge!! =)

Pin It


Hello!! 
I'm here to share the card I've made for the New Paper Smooches SPARKS Challenge ~ Anything Goes!! =)  With Halloween only two weeks away I thought it would be FUN to create a Halloween Card!! I started with some Sweet My Mind's Eye Halloween Paper and the I've used the PS Holly Jolly and Ghoulfriends Stamp Sets along with the Ghoulfriends Icons Dies to create my FUN card Design!! I've added some Orange Martha Stewart Glitter and some Vintage Silver Glitz Ritz Glitter to a few of the Streamers for some Extra Dimension and I LOVE the look in real life!! I stamped a shadow using the PS Shadows Stamp Set to ground my image and then I stamped my Ghost onto some Spider Web Patterned Paper with Versa-Mark and Heat Embossed it using Clear Embossing Powder!! I added some Cream Ink over the mouth and let it dry!! Then I added Clear Wink of Stella Glitter Marker Pen over his Teeth and some Wiggly Eyes for another touch of Dimension and FUN!! I stamped and Heat Embossed the Sucker using Clear Embossing too onto some Chevron Patterned Paper and then I colored in the stick and edged my images after die cutting them out a Black Soot Distress Marker!! I added my Images using Foam Tape and then adhered my Card Front Panel using Foam Tape to a Black Card Base!!


I just LOVE the way it turned out!! What do you think!!??

I hope you'll check out the REST of the Paper Smooches SPARKS DT Blogs and that you'll join us in the FUN for the Challenge this week!! You'll have until The deadlineSaturday, October 25th at 11:59pm PST.

Katie
Larissa--you're here!

Lori
Lynn
Savannah


THANKS SO MUCH for stopping by today and have a Fabulous Week!!

COUNTRY HUGS-N-KISSES
LARISSA  =)

Friday, October 17, 2014

Halloween Week with Paper House Productions!! =)

Pin It

If you're here for the Newton's Nook Designs October Release Please Scroll Down!!  =)

Halloween Wekk

Hello!!

I'm here for the Halloween Week Spooktacular over on the Paper House Productions Blog and I'm sharing the Sweet/Spooky Halloween Banner I've made for my Entry Way Hallway!! =)
I have a Ladder that hangs on the wall and I decorate it for the different Seasons, Holidays!! I wanted a Banner that I could hand for Halloween which is only 2Weeks away!! I started by Die Cutting some Banner Bases using a Lawn Fawn Stitched Large Rectangle Die from some Paper House Productions Halloween Patterned Paper!! I just LOVE this Collection of papers as there are some Designs with Glitter and I LOVE Glitter!! =) I then Die Cut some Stitched Circles using the Lawn Fawn Stitched Circle Die from Cream Cardstock!! For the Letters I've used the Memory Box Letter Dies that I cut from Black Cardstock and ran through my Xyron Sticker Machine and then covered in some Glitz Ritz Fine Black Glitter!! I LOVE this super Fine Glitter!! =) I adhered the Black Glitter Letters to the centers of the Cream Stitched Circle Dies and then Glued them to the Centers of the Stitched Rectangle Banners!! I used a couple Different Packages of 3-D Paper House Production Stickers to Decorate my Banner and Bring it to Life!! I LOVE that there are SO MANY options available just by changing out the Stickers that you use!! =) These Banners would even make Great Gift ideas either to make or for you to put together as a Kit for someone!! =) The Holidays are coming FAST and this would be the PERFECT time to think about things that you could make or give as gifts!! =)
I then punched my Holes and Adhered some Paper Reinforcements so that my Banner would be more sturdy!! I used some Sheer 7/8 Black Ribbon as my Banner Hanger and then I took some 1in. Purple Ribbon and some Green Tulle Ribbon and an 3/8 Oragne Ribbon into 4 in. strips and tied them in between all of the Banners to create a FUN Junk Ribbon Banner look and I LOVE the way it turned out!!


What do you think!!?? These pictures don't do this Banner total justice as these Stickers are So Detailed!! I just LOVE them!! =) The Glitter bats on the Paper just adds that EXTRA Touch and I hope you'll consider making one of these for your Home or to give as a Gift!! It took me about 30 minutes to sketch out my design once I had all of the elements together I thought I wanted to use!! Then by the time I got everything Die Cut and glued together it probably only took about 3 hours to put it altogether!! =)  (I'm operating with only one arm so this might be subject to change if your ALL there!! HAHAHAHA!! )
THANKS SO MUCH for stopping by today and I hope you'll go and Visit the Paper House Productions Blog to see what the rest of the Amazing DT has create to share this week!! =)
Have a Fabulous Weekend!!

COUNTRY HUGS-N-KISSES
LARISSA  =)

Friday, October 10, 2014

Halloween Treat Bags with Newton's Nook Designs!! =)

Pin It

Newton's Nook Designs

Hello Sweet Blog Friends!! =)
I'm up on the Newton's Nook Design Blog today and I want to create some Sweet Little Treat Bags for Beckett's Halloween Party at School!! Can you believe Halloween is only 3 Weeks away!!?? So I started by Die Cutting my little Treat Bags using the Cutest little Treat Bag Die from Reverse Confetti!! I just LOVE that Border!! I then took my Newton's Nook Design Stamps (Hang In There, Newton's Pumpkin and Spooky Street) and drew up some ideas for ways I could use them!! I decided it would be FUN to create a Pumpkin using the Bat and the Spider Web Images from Newton's Pumpkin Stamp Set and create a "Winking Face"!! I just LOVE how it turned out!! SQUEAL!! I added some Wink Of Stella Clear Glitter Pen to the Stamped Images and the Felt to and then added a Black Enamel Dot for the Center of the Eye!! I used my PTI Dies to finish the Pumpkin Smile and Nose cutting them from Black Felt!! I free hand cut a Stem and then used another PTI Leaf Die to cut the Leaves from some Green Felt!! I wanted to make a Halloween Scene for one of the Bags so I used a Reverse Confetti Star Die for the Night Sky and then Stamped and Fussy Cut some Pumpkins for a neat little scene also from the Newton's Pumpkin Stamp Set!! My last Bag is a Frankenstein Bag!! I die cut a Nose from some Black Felt using a Paper Smooches Candy Die and then Stamped the Eye Brows using the Moon Image from the Spooky Street Stamp Set and the Mouth from the Hang In There Stamp Set!! I added some Stitch Lines to the mouth with a Marker and then colored over everything with a Wink of Stella Clear Glitter Marker!! I added a Few White Buttons that I added Wiggly Eyes to and I LOVE the look!! =) For the Hair I just Die Cut the top of the Bag again from some Black Cardstock and then added some Black Glitter!! These little Bags are Perfect for the Little Coloring Books and Colored Pencils and the LED Balloons we are giving to each of his Classmates!! We have been giving these LED Balloons to his Classmates for the last 3 years and they are just AWESOME for Halloween Night while the Kiddos are Trick-Or-Treating!! They can carry them and be seen for a couple blocks!! That way there should be NO WORRIES about traffic or losing them in the Craziness of running from house to house!! =) Its FUNNY too how many people comment on them through out the night!! So what do you think!!??


Hope this gives you some Ideas for ways to use your Stamps that my be outside the Box!!?? I LOVE getting more out of my Stamps!! =) THANKS SO MUCH for stopping by and I hope you have a FABULOUS WEEKEND!! =)

COUNTRY-HUGS-N-KISSES
LARISSA  =)

Sunday, October 5, 2014

PTI Make It Monday Mason Jar White Pumpkin Witch!! =)

Pin It

Mimglassjarsstamping_meliphillips1

Hello!!
I hope your Weekend was  AMAZING!!?? Mine was FAST!! We had LOTS going on and it has been chilly and raining so most of our outside activities were interestingly not ruined!!?? It was actually nice to see the rain and we were able to keep warm by bundling up and then got to break out the Hot Chocolate!! =) We celebrated my Grandma's 80th Birthday today too which isn't officially until tomorrow, but it was SO AWESOME to get to see most of my Cousins and their Families and then I'd have to say I'm probably one of the LUCKIST because I was also BLESSED with the MOST AMAZING Aunts and Uncles!! =) My dad has all Brothers and they all married AMAZING Woman and I TRULY LOVE them!! I'm really close to a COUPLE of them my Aunt Cindy who is my God Mother and has ALWAYS been SURPER Special to me and then my Aunt Kerry who OMG if only there were a THOUSAND of her the world would be a BETTER Place!! LOL!! I spent most of my day talking to her and I just LOVE her!! She has 6 girls with my Uncle Steve and these girls are ALL so BEAUTIFUL inside and out!! =) I LOVE my FAMILY!! We have a couple NEW Babies in the family and then my sister Kylee is due again in January so we will be growing again by one more!! =) SO EXCITED!! Seems like the babies are always passed around and held by everyone so needless to say I got my baby fix for the week!! =)

Anyway, I wanted to stop in a share a Picture of the
SWEETEST Little Witch Pumpkin Mason Jar that you have EVER seen!! =)  LOL~I may be just alittle bit bias!! =) I saw the AWESOME New Make It Monday Challenge over on the Paper Trey Ink Blog and I just had to Play along!! =) The UBER Talented and Equally SWEET Melissa Phillips was the host this week and I just LOVE her Project that she shared!! She made an AWESOME video you can watch over on the PTI Blog if your interested!! =) It took me ALL Week to get it done though with my Left Hand and then ALL of my follow up apt.'s I had all week but I'm SO in LOVE with how it turned out and I hope you LOVE it too!! So here is what I've made for the
Make It Monday #182: Mason Jar Stamping Challenge!! I was Inspired by these Pumpkin Pictures that I came across on Pinterest!! =)

40 Awesome Fall Pumpkin Centerpieces: 40 Fall Pumpkin Centerpieces With black wooden dining table chair stool and golden pumpkin table decor – Momtoob     Pumpkin Has a great vintage look, would be wonderful to recreate - LED candle inside a faux ghost carving pumpkin?
Coastal, Beach + Nautical Decor + Interiors, Driftwood + Shell Decor, Crafts, Art + more     20 Projects to fall into Fall
Glitter Glam Pumpkins & D.I.Y. Pedestals {with supplies from Dollar Tree!  Cray-zay!}  via thinkingcloset.com    Glitter Monogrammed Pumpkin and a tutorial on using Silhouette double-sided adhesive | unOriginalMom.com


I started by painting my Mason Jar using some Mathra Stewart White and Fog Satin Acrylic Paint!! I had to paint two coats to get the coverage I wanted and I actually wanted some texture beings I was wanting to look like a White Pumpkin (my FAVORITE)!! I then sanded the edges to make it look distressed and then I took the PTI Polka Dot Basics Stamp Set and stamped the Little Dots in Versa Mark Ink and then added my WOW Gold Glitter Embossing Powder too and I LOVE the Gold Polka Dots on the White Pumpkin Mason Jar Base!! I then took the PTI Shape Up Series:  Pumpkin die and die cut the Nose and the Mouth from some Black Felt for my Pumpkins Face (I had to cut down the mouth alittle bit to make it fit the scale of my Jar better though) I decided to use Buttons for my eyes after I found these Black Oval Buttons with Bling around the edges at Hobby Lobby this week in the Clearance bin for 25 cents WHOOP WHOOP talk about a score!! =) I think I cleaned out almost the ENTIRE bin and I think the lady checking my out on Wednesday was like WOW what are you going to do with ALL of these Buttons!!?? I told her I crafted with them and I don't think she got it, but I LOVE them and I can't wait to share them in my up coming projects!! =) Then I wanted to make a Hat for my Witch Pumpkin and after looking through my PTI Dies, I  decided on the PTI-Tissue Paper Favors #1 Die and I had to trim it down just alittle and then I folded up the edges for the Brim of the Hat!! I added some Gold Glitter Tissue Tape from My Mind's Eye and then a Sweet Little Prima Printed Flower that I added some Paint and Ink to Distress it some and then I added a different Gold Button to the Center!! (yep you guessed it another 25 cent find) =)  I wanted to make a Junk Bow too so I used  some Cream Tulle Ribbon for my Wrap Ribbon and several different Ribbons for my Bow!! I die Cut a PTI Tremendous Tags Die Set and then Stamped my Pumpkin from the PTI Halloween Treats & Sweets Stamp Set!! I Colored my Pumpkin in and then Stamped the Boo Sentiment from the PTI Mr. Bones  Stamp Set in Versa Mark Ink and then added my WOW Gold Glitter Embossing Powder!! I then took the same Circle Stamp and Stamped some Circles on the Tag in Versa Mark and then added some WOW Clear Matt Dull Regular Embossing Powder for a FUN textured look without the Shine!! I mask off the Pumpkin Image though because I didn't want it covered!! I LOVE how it turned out!!
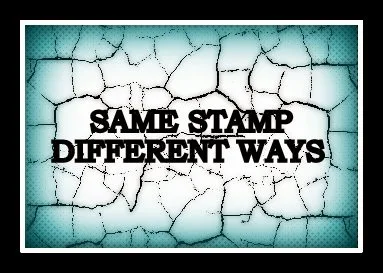
I'm also entering this into the WOW Embossing Powder Challenge which was to use the same stamp in a Different Way over on the WOW Blog!! =)

Click here to enter our challenge and win some Wow! Embossing Powders!!

THANKS SO MUCH for stopping by today and I hope you have a FABULOUS WEEK!! =)

COUNTRY HUGS-N-KISSES
LARISSA  =)

Papertrey Ink - Tissue Paper Favors #1 Die     Papertrey Ink - Tremendous Tags Die
Tremendous Treats: Halloween Stamp Set     Mr. Bones Stamp Set

Papertrey Ink - Shape Up Series: Pumpkin Die Collection (set of