Showing posts with label Hugs and Kisses Stamp Set. Show all posts

Sunday, March 14, 2021

Paper Sweeties March 2021 Featured Products Inspiration Day #2!!

Pin It

HELLO!! 

Welcome to Day 2 of the Paper Sweeties March 2021 Featured Products Inspiration!! 
I wanted to create another Shaker Card today using SEVERAL Sets, but one of my FAVORITE add on Sets is the Sweeties Pets Stamp Set, along with the coordinating Sweeties Pets SWEET CUTS!! 
Here's my Card for today!! 
I've used the SWEET Emma Stamp Set and the coordinating Emma Die Set to create my Doll!! 
SQUEAL!! Isn't she just the SWEETEST!!??
 Then I dressed her in the Outfit!! I used some Gingham Patterned Paper and a plain Pink Cardstock to layer the outfit together!! I LOVE the dimension it gives to her outfit!! The Shirt and Shoes were stamped from the Life is a Picnic Stamp Set and the Jumper is from the Sweetie Pie Stamp Set!! I colored everything with Copic Markers!! 
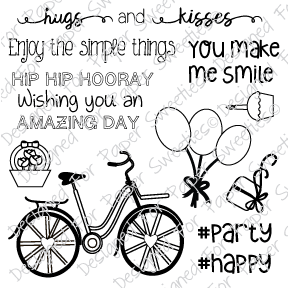
I Stamped and Embossed the Puppy from the Sweeties Pets Stamp Set and used the coordinating Dies to Cut her out!! Copic Markers were used to Color her in!! The Bicycle was stamped and embossed onto my Card front from the Hugs and Kisses Stamp Set and Colored with Copic Markers!! I also added some Hearts and Circles; Stamping and Embossing them with WoW Bright White Embossing Powder on the Card front of the card from the Be Happy Stamp Set!! I LOVE being able to combine several sets together to create my own scene!!

Please continue to hop along and visit the AMAZING Design Team blogs to be inspired by their AMAZING projects:

A MONTH LONG SPECIAL 
 BUY 3 DOLL AND/OR OUTFIT STAMP SETS 
GET ONE FREE!!  
(This sale does NOT include Sweet Cuts Dies) 
  Customer must leave name of FREE set they want in comment section of order form on the Paper Sweeties Website during Checkout!!
There's NO LIMIT to how many sets you can earn for FREE - 
You'll get 1 FREE stamp set for every 3 that you Buy!! 


THANKS SO MUCH for stopping by today and come back tomorrow for another FUN Project!!  
Have a FABULOUS WEEK!!

COUNTRY HUGS-N-KISSES
LARISSA 💗

Sunday, February 16, 2020

Paper Sweeties Look Back Inspiration Day #3!!

Pin It
HELLO!!  
I'm here with Paper Sweeties for a Look Back Inspiration Day #3!! This month we're taking a look back at some of my FAVORITE Paper Sweeties Products!! I'm showcasing the!!

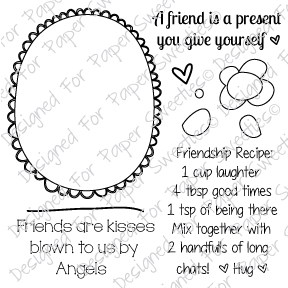
I've made a FUN Shaker Card and I've used the New A Friend Is Stamp Set & Hugs and Kisses Stamp and Coordinating Die Sets!! I've also used some of the SWEET Sugar Sprinkles Sequins for the Shaker Elements!!

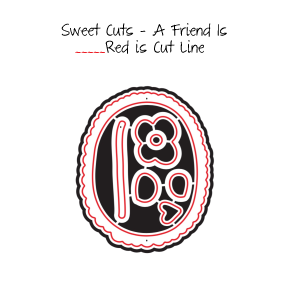
I started by Stamping the AWESOME New Sentiment to create a FUN background for my Card in ColorBox Suede Dye Ink!! I wanted some Splatters so I used some of the Colorbox ColoriQue by Lisa Marie Jimenez in Black Diamond!! I LOVE the look it gives in Real Life!! Then I Die Cut the Scalloped Frame into the Front of my Card to create my Shaker Window!! I Stamped and Embossed the Scalloped Frame Image and then Die Cut it out!! I wanted it to POP up off the Shaker Window so I layered 5 Die Cuts together to make it thick!! Then I Glued it to the Front of the Shaker Window that I Embossed the Sentiment #Party onto using Embossable Acetate!! 

I filled the Shaker Window with the Paper Sweeties Flower Sequins and some Clear Seed Beads!! I Stamped and Embossed SEVERAL of the Flower, Leaf and Heart Images using ColorBox Black Pigment Ink and covered it with ColorBox Clear Embossing Powder and Die Cut them using the Coordinating Dies!! I Colored them with Copic Markers and then I added some Tonic Studio Morning Dew Nuvo Drops to the Centers of the Flowers and the Hearts after coating all with some of the Tonic Studio Aqua Shimmer Pen in Glitter Gloss!! SQUEAL!! The finished results just make me HAPPY!! =) Some White Gel Pen details and my card was done!! I LOVE LOVE LOVE the way it turned out!!


For more AMAZING Inspiration please make sure to stop by the other DT Blogs!! 

THANKS SO MUCH for stopping by today and I hope you have a FABULOUS WEEK!!

COUNTRY HUGS-N-KISSES
LARISSA   =)

Friday, August 23, 2019

Paper Sweeties 7th Birthday Blog Hop w/ Pink & Main!!

Pin It


Hello!!
I'm here with Paper Sweeties today for a FUN Blog Hop with Pink & Main to help CELEBRATE Paper Sweeties 7th Birthday!! I have several projects to share for today and each one has its own personality!! I ENJOY the part of the FUN/CHALLENGE, when using products that have already been picked for you and you have to use them and create projects with them!! Well here's what I've created for today's Blog Hop!! 

My First Project HAD to be a Treat Box!! I LOVE making these and use them ALOT so I like having them on hand for when the occasion arises!! I started by using the Paper Sweeties Treat Box and Die Cut it from some of the Pink & Main It's a Party 6x6 Patterned Paper Pad!!
Here's a Photo to show how to use this Die Set even with 6x6 Patterned Papers!! It's alittle larger than most 6x6 patterns on the pads, but the Fold Side can be cut from the edge and will NEVER be seen as its adhered to the inside of the Treat Box!! So don't ever feel like you CAN'T use this Die Set with ALL of your 6x6 Papers!! If I'm honest that's ALL I use!!! I hardly ever buy 12x12 Patterned Papers unless I see a specific pattern I like!! I Die Cut 2 of these panels and then used some Gina K Designs Terrific Tape to adhere it together!! I cut a Rectangle to fit the front of the Treat Box and then added Distress Oxide Ink in both Scattered Straw and Peacock Feathers around the edges!! I used the NEW Cupcake and Sprinkles Stamp and Die Set and created a Sweet Cupcake!! Yummy enough to eat right!!?? 
I used Copic Markers to Color the Top and Wrap using colors that coordinate with the Patterned Paper!!  (Cupcake: RV00, RV11 & RV34  YR00 &YR18  Wrap: BG00, BG45 & BG69  Flowers: RV00, RV11 & RV34  Y11 & YR23  Leaves: YG21, YG25 & G07) I created the base of the Cupcake from some TE Cardstock and then used some Glitter Paper to Stamp and Emboss the Detail Layer and Die Cut it out and adhered it to the Cupcake Base!! I wanted to create a Candle so I decided to use a part of the Patterned Paper from the It's a Party Paper Pad!! Then I added a Pink & Main Birthday Boy Glossy Dots to the top for the Flame!! Tied a Twine Bow and added a Bubble Gum Seam Binding Bow, along with Stamping and Embossing the Sentiment from the Pink & Main Birthday Script Stamp Set onto a Tag Die Cut from the Paper Sweeties Beautiful Little Wishes Sweet Cuts Die Set using some VersaFine Black Onyx Ink and Embossing it with WoW Neutral Shimmer Glitter embossing Powder!! Added the extra Lil' Flower Image from the set and my Treat Box Gift Tag and the Design was complete!! 
I used more of the Patterned Paper from the Pink & Main It's a Party 6x6 Patterned Paper Pad as the background for my next Card inking the edges with some Weathered Wood Distress Oxide Ink!! Then I Die Cut the Paper Sweeties Circle Scalloped Frame Sweet Cuts Die from some Therm O Web Deco Foil Toner Sheet and Foiled it with some Turquoise Deco Foil!! It matches the Patterned Paper PERFECTLY!! I Inked the inside Circle with some Tumbled Glass Distress Oxide Ink and then adhered it to my Card Panel using Gina K Designs Foam Tape!! I Stamped and Embossed the Cupcake Image from the NEW Cupcake and Sprinkles Stamp and Die Set and created a Sweet Cupcake!! Yummy enough to eat right!!?? 
I used Copic Markers to Color the Top and Wrap using colors that coordinate with the Patterned Paper!!  (Cupcake: RV00, RV11 & RV34  YR00 &YR18  Wrap: BG00, BG45 & BG69  Flowers: RV00, RV11 & RV34  Y11 & YR23  Leaves: YG21, YG25 & G07) I created the base of the Cupcake from some TE Cardstock and then used some Glitter Paper to Stamp and Emboss the Detail Layer and Die Cut it out and adhered it to the Cupcake Base!! I wanted to create a Candle so I decided to use a part of the Patterned Paper from the It's a Party Paper Pad!! Then I added a Pink & Main Birthday Boy Glossy Dots to the top for the Flame!! I Stamped and Embossed the Present Image from the Paper Sweeties Hugs & Kisses Stamp Set!! I used the Copic Markers in Y11 & YR23!! Then I Die Cut the TE Sea Salt Cardstock from the Paper Sweeties Sweet Borders Die Set!! I Stamped and Embossed the Sentiment using some Versafine Black Onyx Ink and Embossing with WoW Neutral Shimmer Glitter Embossing Powder!! I LOVE how all of the SPARKLE adds to the Design of the entire Card!! 
For my last Card I wanted to create more of a Masculine Design!! Although, I think this could work for a Female too!! These are some of my FAVORITE Colors, so I'd LOVE a card like this!! Depends on the recipient I suppose!!?? I started by using more of the Patterned Paper from the Pink & Main It's a Party 6x6 Patterned Paper Pad as the background for my last Card!! I die cut a Frame from some TE Blueberry Cardstock and then Stamped and Embossed the Anchor Image from the Paper Sweeties Beach Therapy Stamp Set onto the Card Panel using some Versa Mark Ink and Embossing with Ranger Ink Navy Metallic Embossing Powder!! I used my 1/2" Purple Tape to tape the edges off as I wanted to keep the border White!! 
I then used my Copic Markers to Color in the Anchor Images!! I used B32, B34 & B39 then added some shading around the Anchors using C3 & C00!! I LOVE the way it turned out and how well it matches the Patterned Paper!! I also wanted some dimension, so I decided to POP UP one of the Anchors beside the Happy Birthday Sentiment!! I used the coordinating Beach Therapy Sweet Cuts Set and added some Burlap Twine to make it look more realistic!! 
I used the Pink and Main Happy Birthday Dies for my Sentiment!! I Foiled some Deco Foil Toner Sheets with the Deco Foil in Gold Shattered Foil and then Die Cut the Happy!! I also Die Cut it again from some TE Mustard Cardstock and layered them altogether to create a 3-D Die Cut!! I Die Cut the Shadow Layer from some Vellum and then adhered them together!! I used Foam Tape to POP UP the sentiment and I LOVE how the Card turned out!! I hope I've INSPIRED you today with some different ideas on how to use these Images and that you'll create something to share with us as we CELEBRATE Paper Sweeties 7th Birthday!! Use the #papersweeties on Instagram so we can see what you create or share with us on the Paper Sweeties FAN FB Page!! CAN'T WAIT to see what you Create!! 

Hop along with the talented designers from Paper Sweeties and Pink & Main to spark your creativity!!
Visit the Pink & Main blog to see what their design team has created for today’s hop!
**********
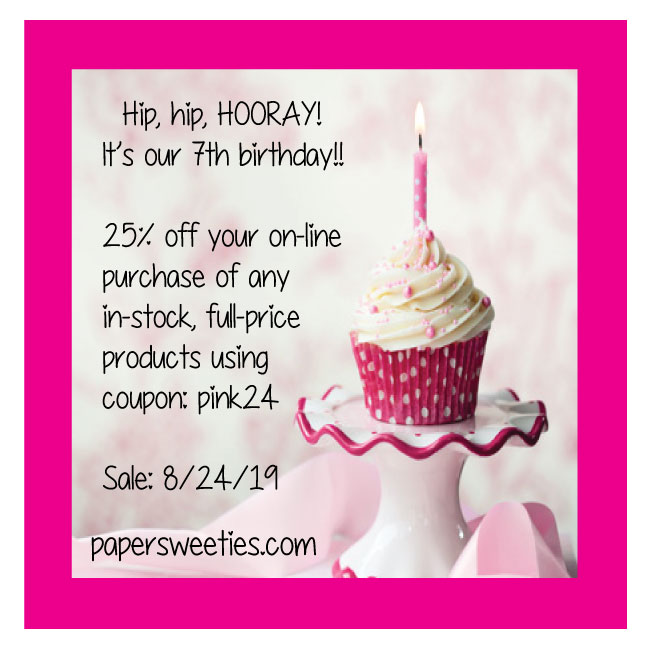
TODAY ONLY, TREAT yourself to 25% off your entire full-price order through our website using the coupon below … sale ends 8/24 at 11:59 pm EST!
And, we are continuing our month-long celebration by offering HUGE 50% OFF DISCOUNTS on ALL Paper Sweeties dolls, doll dies and doll outfits using coupon below:

THANKS SO MUCH for stopping by and I hope you ENJOY ALL of the AMAZING Inspiration on the Blog Hop!! Have a FABULOUS WEEKEND!!

COUNTRY HUGS-N-KISSES
LARISSA   =)

Friday, February 16, 2018

Paper Sweeties February 2018 Blast from the Past Favorites Day 3!! =)

Pin It


HELLO!! 
I'm here with Paper Sweeties for the
Paper Sweeties February 2018 Blast from the Past Favorites Day 3!!
Let's take a look at the Products I chose to FEATURE today!! I've used the

 
 I Started by Stamping the Sentiment "A Friend is a Present you Give to yourself" in MFT Grey Grout Ink, to create the Bottom 1/3 of my Card!! Then I Die Cut a Stitched Banner from the Sweet Borders Sweet Cuts Die Set from some Reverse Confetti Cardstock!! The I Inked the Top 2/3 of the Card with some Tumbled Glass Distress Ink!! Added some Water Splatters for some Texture and then added some ColoriQue by Lisa Marie Jimenez by Clearsnap Black Diamond Paint Splatters!! I Stamped and Embossed all of the Images and colored them with Copic Markers!! The SWEET Little Puppy is from the Planner Series: Appointments Stamp Set!! I added some Tonic Studios Aqua Shimmer Pen and some Morning Dew Nuvo Drops!! I adhered it all together using my Xyron Mega Runner and some 3m Foam Tape to add dimension!!
 For even MORE Amazing Inspiration I hope you'll stop by the DT Blogs to see what they've created!!  
Debbie Marcinkiewicz – Paper Sweeties
                                                                   Jinny Newlin  
 
THANKS SO MUCH for stopping by today and I hope you have a FABULOUS WEEKEND!!

I'm also Linking up

Inspired by all the Little Things #79

 
Grab our badge:
 
 
COUNTRY HUGS-N-KISSES
LARISSA   =)

Wednesday, August 16, 2017

Paper Sweeties August 2017 Release Rewind!! =)

Pin It


HELLO!!  
Welcome to the Paper Sweeties August 2017 Release Rewind!!
This month is Paper Sweeties 5th ANNIVERSARY!!
SQUEAL!! It's going to be an AMAZING Month FULL of Inspiration, New Goodies and Chances to WIN!! =)
Today I'm Showing a look at the New August Release that is available now in the Paper Sweeties Boutique!! We'll be showcasing the New Release on August 14th-16th, so I hope you'll join us for ALL of the FUN!!
Today I've used ALL of the Products together to create my SWEET Friend Card!!
 I Started by Stamping the Sentiment "A Friend is a Present you Give to yourself" in MFT Grey Grout Ink, to create the Bottom 1/3 of my Card!! Then I Die Cut a Stitched Banner from the Sweet Borders Sweet Cuts Die Set from some Reverse Confetti Cardstock!! The I Inked the Top 2/3 of te Card with some Tumbled Glass Distress Ink!! Added some Water Splatters for some Texture and then added some ColoriQue by Lisa Marie Jimenez by Clearsnap Black Diamond Paint Splatters!! I Stamped and Embossed all of the Images and colored them with Copic Markers!! The SWEET Little Puppy is from the Planner Series: Appointments Stamp Set!! I added some Tonic Studios Aqua Shimmer Pen and some Morning Dew Nuvo Drops!! I adhered it all together using my Xyron Mega Runner and some 3m Foam Tape to add dimension!!
                          ---> SPECIAL 5th ANNIVERSARY ANNOUNCEMENT <---
In honor of our 5th birthday, we are giving all of our valued customers the opportunity to earn SPECIAL GIFTS in August - whooo hooo!  Everyone who places a $25 order through our website (before tax, shipping and discounts) will receive a complimentary VIP 'Thank You' stamp set!  Everyone who places a $50 order through our website (before tax, shipping and discounts) will receive a complimentary VIP 'Thank You' stamp set AND coordinating Sweet Cuts die!!

 For even MORE Amazing Inspiration I hope you'll stop by the DT Blogs to see what they've created!!  
Debbie MarcinkiewiczPaper Sweeties


We'd love for you to play along with the 'anything goes' Paper Sweeties August Challenge #58 at Paper Sweeties - for a chance to win a $25 SHOPPING SPREE!  What fun inspiration we have this month -- will you create a card, layout, sweet treat or something else?
 
 
THANKS SO MUCH for stopping by today and I hope you have a FABULOUS WEEK!!
 
COUNTRY HUGS-N-KISSES
LARISSA   =)

Tuesday, August 15, 2017

Paper Sweeties August 2017 Release Party!! =)

Pin It


HELLO!!  
Welcome to the Paper Sweeties August 2017 Release Party!!
This month is Paper Sweeties 5th ANNIVERSARY!!
SQUEAL!! It's going to be an AMAZING Month FULL of Inspiration, New Goodies and Chances to WIN!! =)
Today I'm Showing a look at the New August Release that will be available in the Paper Sweeties Boutique today on August 15th 2017!! We'll be showcasing the New Release on August 14th-16th, so I hope you'll join us for ALL of the FUN!!
Today I've created a SWEET Card FULL of texture, but first lets take a look at ALL of the New Products!!


Isn't the Release AMAZING!!??
Plus, don't forget about the AWESOM Offer!!
 
                          ---> SPECIAL 5th ANNIVERSARY ANNOUNCEMENT <---


In honor of our 5th birthday, we are giving all of our valued customers the opportunity to earn SPECIAL GIFTS in August - whooo hooo!  Everyone who places a $25 order through our website (before tax, shipping and discounts) will receive a complimentary VIP 'Thank You' stamp set!  Everyone who places a $50 order through our website (before tax, shipping and discounts) will receive a complimentary VIP 'Thank You' stamp set AND coordinating Sweet Cuts die!!
 
 I've used both of the New Sets for my Project today along with the Square Scallop Frames Sweet Cuts!! I wanted an Embossed Card Base so I used the Swiss Dots Embossing Folder and Embossed my Card Base!! I Die Cut my Scalloped Frame twice, one from Black Cardstock and once from White!! After Stamping and Embossing my Images, I colored them with Copic Markers, then added some Tonic Studio Aqua Shimmer Pen and Nuvo Drops to the Center of the Flower!! I Stamped and Embossed my Sentiment and Inked up by Scene Background/Grass with Ranger Istress Inks in Tumbled Glass and Peeled Paint!! Created my 3-D Scene and used Foam Tape to pop the Scalloped Frame up on my Card Front!! I LOVE LOVE LOVE the way it turned out!!

For even MORE Amazing Inspiration I hope you'll stop by the DT Blogs to see what they've created!!  
Debbie Marcinkiewicz – Paper Sweeties
 
We'd love for you to play along with the 'anything goes' Paper Sweeties August Challenge #58 at Paper Sweeties - for a chance to win a $25 SHOPPING SPREE!  What fun inspiration we have this month -- will you create a card, layout, sweet treat or something else?
 
 
THANKS SO MUCH for stopping by today and I hope you'll come back tomorrow for the Paper Sweeties August Release Rewind as we share another look at all of the New Release Products with you!!  Have a FABULOUS WEEK!!
 
COUNTRY HUGS-N-KISSES
LARISSA   =)