Showing posts with label ColorBox. Show all posts

Sunday, February 16, 2020

Paper Sweeties Look Back Inspiration Day #3!!

Pin It
HELLO!!  
I'm here with Paper Sweeties for a Look Back Inspiration Day #3!! This month we're taking a look back at some of my FAVORITE Paper Sweeties Products!! I'm showcasing the!!

I've made a FUN Shaker Card and I've used the New A Friend Is Stamp Set & Hugs and Kisses Stamp and Coordinating Die Sets!! I've also used some of the SWEET Sugar Sprinkles Sequins for the Shaker Elements!!

I started by Stamping the AWESOME New Sentiment to create a FUN background for my Card in ColorBox Suede Dye Ink!! I wanted some Splatters so I used some of the Colorbox ColoriQue by Lisa Marie Jimenez in Black Diamond!! I LOVE the look it gives in Real Life!! Then I Die Cut the Scalloped Frame into the Front of my Card to create my Shaker Window!! I Stamped and Embossed the Scalloped Frame Image and then Die Cut it out!! I wanted it to POP up off the Shaker Window so I layered 5 Die Cuts together to make it thick!! Then I Glued it to the Front of the Shaker Window that I Embossed the Sentiment #Party onto using Embossable Acetate!! 

I filled the Shaker Window with the Paper Sweeties Flower Sequins and some Clear Seed Beads!! I Stamped and Embossed SEVERAL of the Flower, Leaf and Heart Images using ColorBox Black Pigment Ink and covered it with ColorBox Clear Embossing Powder and Die Cut them using the Coordinating Dies!! I Colored them with Copic Markers and then I added some Tonic Studio Morning Dew Nuvo Drops to the Centers of the Flowers and the Hearts after coating all with some of the Tonic Studio Aqua Shimmer Pen in Glitter Gloss!! SQUEAL!! The finished results just make me HAPPY!! =) Some White Gel Pen details and my card was done!! I LOVE LOVE LOVE the way it turned out!!


For more AMAZING Inspiration please make sure to stop by the other DT Blogs!! 

THANKS SO MUCH for stopping by today and I hope you have a FABULOUS WEEK!!

COUNTRY HUGS-N-KISSES
LARISSA   =)

Monday, May 28, 2018

Unicorn Blooms Birthday Card using Reverse Confetti Products!! =)

Pin It


SQUEAL!!
Stopping in to share a Card I've made using the Reverse Confetti Banner In Bloom Stamp Set and the coordinating Banner In Bloom Die Set along with my FAVORITE Lacy Scallop Frame Die Set and Images from the Unicorn Wishes Stamp Set and the coordinating Unicorn Wishes Die Set!! I'm playing along with the NEW Stock your Stash Challenge!! The theme was Birthday and I needed a SPECIAL Card for a SWEET Friend!! So I wanted it to have a Magical, but Grown Up feel!! 

I started by Stamping and Embossing the Flower Cluster Images to create a FUN Background!! After Coloring the Images with Copic Markers I added some Gold Paint Splatters!! I Die Cut the Lacy Scallop Frame Die Set from some Reverse Confetti Midnight Cardstock!! I Stamping and Embossing the Banner In Bloom Image and Die Cutting it out!! Colored it with Copic Markers and then Embossed the Sentiment with some ColorBox Gold Glitter Embossing Powder!! I wanted the Flowers to REALLY POP so I added some Tonic Studios Aqua Shimmer Pen!! In real Life its just SO BEAUTIFUL with the way that it Shimmers when the Light Hits it!! =) Next I Stamped and Embossed two Unicorn Images and Die Cut it out using the coordinating Dies!! I wanted some Dimension so I Decided to Fussy Cut the Nose, Mane and Tail, the Horn and the heart so I could layer them on top of the Unicorn Image for a 3-D look!! I even cut an extra flower from the Banner In Bloom Image so I could add a Flower to the Unicorns Ear!! I used Tonic Studio Aqua Shimmer Pen and some Nuvo Drops for even more Sparkle and Dimension!! I Die Cut a Scallop Lace Circle and Inked it with some Tumbled Glass Distress Ink and water splatters!! Created my Scene and my Card was Done!! 

I'm also linking up 


COUNTRY HUGS-N-KISSES
LARISSA    =)


Monday, March 19, 2018

DIY Jar Vases for Spring Flowers, with ColoriQue by Lisa Marie Jimenez!! =)

Pin It
 

HELLO!!
Happy Monday my BEAUTIFUL Friends!!
Who's READY for SPRING!!?? (See my hand raised; Me, Me, Me)
It's Snowing as I write this post, but I'm hoping to INSPIRED you to make it feel more like Spring with a Few DIY Jar Vases that could be used for any Occasion!! I'll be using mine as our Center Pieces for our Easter Celebration!!
I'm up over on the Lisa Marie Jimenez Blog for ColoriQue!! You can find my Post here.
I'm sharing a few Sneak Peeks and I hope you'll go visit to find out more about how I created them!!


THANKS SO MUCH for stopping by and I hope you have a FABULOUS WEEK!!

I'm also linking up


Simon Says Stamp Wednesday Challenge: Easter Inspired

Grab our badge:
Word Art Wednesday Challenge #326-#327: Anything Goes 


COUNTRY HUGS-N-KISSES
LARISSA   =)

Tuesday, September 5, 2017

Galaxy I Love You to the Moon & Back Wall Hanging w/ ColoriQue, Walnut Hollow and U-Paint Crafts!! =)

Pin It

Colorique by Lisa Marie Jimenez

HELLO!!
I'm up on the ColoriQue Blog today with a SUPER SWEET Galaxy I Love You to the Moon & Back Wall Hanging!! I've used the AMAZING ColoriQue Inks along with some products from Walnut Hollow and U Paint Crafts!! They were so generous and I had a BLAST crating with their Products!!  I received the Rustic Frame from Walnut Hollow and I received the U-Paint Crafts metal moon from the Sun and Moon set.

Greyson has ALWAYS wanted a Wall Hanging for his Bedroom!! That is how my Project Idea came to life!! Here's a Picture of him holding the Finished Wall Hanging!!
For MORE info on how I created this SUPER SWEET Galaxy I Love You to the Moon & Back Wall Hanging, I hope you'll stop by the ColoriQue Blog and leave me some LOVE!!  =)
THANKS SO MUCH for stopping by and have a FABULOS WEEK!!

I'm also playing along with several Challenges


The Stars in my Wall Hanging are Stamped and Embossed
 
workitwedbanner
The Stars in my Wall Hanging are Stamped and Embossed
 
Grab our badge:


COUNTRY HUGS-N-KISSES
LARISSA     =)

Thursday, August 17, 2017

Rainbow Flowers Card w/ Reverse Confetti and OCC Rainbow Maker!! =)

Pin It
This is my 3rd Post for today!! If you're looking for my Newton's Nook Design Release Post or my Calling All Sistahs Reminder Blog Post please scroll down!! THANKS!! =)
https://www.onlinecardclasses.com


SQUEAL!!
Stopping in to share a Card I've made using the NEW Reverse Confetti Banner In Bloom Stamp Set and the coordinating Banner In Bloom Die Set along with my FAVORITE Lacy Scallop Frame Die Set!!

I'm playing along with the New Online Card Class Rainbow Maker and I thought Blooms in Rainbow would be BEAUTIFUL!!
I'm using an Old Reverse Confetti Sketch for You to Try #50 as my Jumping off Point for this Card Design!!

If you've NEVER played before there's a NEW Sketch each month for a chance to WIN!! I don't always get to play, but I find I do LOVE LOVE LOVE to use the Sketches shared to create Cards when I do get a chance to Play!! =)
Here's what I came up with!!
I started by Stamping and Embossing the Flower Cluster Images to create a FUN Background!! After Coloring the Images with Copic Markers I added some Gold Paint Splatters!! I Die Cut the Lacy Scallop Frame Die Set from some Reverse Confetti Midnight Cardstock!! I finished off the Card Design by Stamping and Embossing the Banner In Bloom Image and Die Cutting it out!! Colored it with Copic Markers and then Embossed the Sentiment with some ColorBox Gold Glitter Embossing Powder!! I wanted the Flowers to REALLY POP so I added some Tonic Studios Aqua Shimmer Pen!! In real Life its just SO BEAUTIFUL with the way that it Shimmers when the Light Hits it!! =)
 
I'm also linking up to the

Simon Says Stamp Wednesday Challenge: Add a Sentiment
 
 
Grab our badge:
 
I hope you feel INSPIRED and that you'll check out the NEW Online Card Class and the FUN Reverse Confetti Sketch for You to Try Challenges for a chance to WIN!!
THANKS SO MUCH for stopping by and have a FABULOUS Weekend!!

COUNTRY HUGS-N-KISSES
LARISSA   =)

Tuesday, August 8, 2017

Repurposed Vintage Owl Necklace!! =)

Pin It

Colorique by Lisa Marie Jimenez

HELLO!!
SQUEAL!!  I'm SO EXCITED because today is my FIRST Post over on the
Lisa Marie Jimenez Blog!!
We were CHALLENGED to Repurpose something we found and give it a NEW Life!!
I found this Vintage Owl Necklace and thought it would be FUN to create a Home Décor Project!!


To see my Final Project and more info on how I created my FUN Home Décor Project, please visit me over on the Lisa Marie Jimenez Blog!!

THANKS SO MUCH for stopping by and have a FABULOUS WEEK!!
 
COUNTRY HUGS-N-KISSES
LARISSA   =)

Tuesday, August 1, 2017

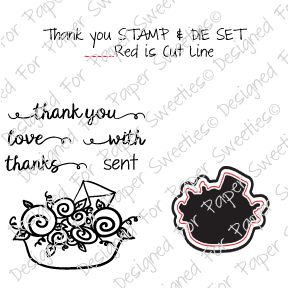
Paper Sweeties August 2017 Challenge #58!! =)
Pin It


HELLO!!  
Welcome to the Paper Sweeties August Challenge #58!!
This month's inspiration board in honor of Paper Sweeties 5th ANNIVERSARY!!
SQUEAL!! It's going to be an AMAZING Month FULL of Inspiration, New Goodies and Chances to WIN!! =)
Today I'm Showing a Sneak Peek of the New August Release that will be available in the Paper Sweeties Boutique on August 15th 2017!! We'll be showcasing the New Release on August 14th-16th, so I hope you'll join us for ALL of the FUN!!
I've made a FUN Shaker Card and I've used the New A Friend is & Hugs and Kisses Stamp and Coordinating Die Sets!! I've also used some of the SWEET Sugar Sprinkles Sequins for the Shaker Elements!! I CAN'T WAIT to share what I've made with them!!

I started by Stamping the AWESOME New Sentiment to create a FUN background for my Card in ColorBox Suede Dye Ink!! I wanted some Splatters so I used some of the Colorbox ColoriQue by Lisa Marie Jimenez in Black Diamond!! I LOVE the look it gives in Real Life!! Then I Die Cut the Scalloped Frame into the Front of my Card to create my Shaker Window!! I Stamped and Embossed the Scalloped Frame Image and then Die Cut it out!! I wanted it to POP up off the Shaker Window so I layered 5 Die Cuts together to make it thick!! Then I Glued it to the Front of the Shaker Window that I Embossed the Sentiment #Party onto using Embossable Acetate!! I filled the Shaker Window with the Paper Sweeties Flower Sequins and some Clear Seed Beads!! I Stamped and Embossed SEVERAL of the Flower, Leaf and Heart Images using ColorBox Black Pigment Ink and covered it with ColorBox Clear Embossing Powder and Die Cut them using the Coordinating Dies!! I Colored them with Copic Markers and then I added some Tonic Studio Morning Dew Nuvo Drops to the Centers of the Flowers and the Hearts after coating all with some of the Tonic Studio Aqua Shimmer Pen in Glitter Gloss!! SQUEAL!! The finished results just make me HAPPY!! =) Some White Gel Pen details and my card was done!! I LOVE LOVE LOVE the way it turned out!!
For even MORE Amazing Inspiration I hope you'll stop by the DT Blogs to see what they've created!!  
Debbie Marcinkiewicz – Paper Sweeties
Michele Henderson
Michelle Bala
Nancy Salkeld
August guest designer: Tasha RJ

---> SPECIAL ANNIVERSARY ANNOUNCEMENT <---

In honor of our 5th birthday, we are giving all of our valued customers the opportunity to earn SPECIAL GIFTS in August - whooo hooo!  Everyone who places a $25 order through our website (before tax, shipping and discounts) will receive a complimentary VIP 'Thank You' stamp set!  Everyone who places a $50 order through our website (before tax, shipping and discounts) will receive a complimentary VIP 'Thank You' stamp set AND coordinating Sweet Cuts die!

I'm also Linking up to the
 
I CAN'T WAIT to see what you Create!!  
THANKS SO MUCH for stopping by today and I hope you have a FABULOUS WEEK!!
 
COUNTRY HUGS-N-KISSES
LARISSA   =)