Showing posts with label Deco Foil Transfer Gel Duo. Show all posts

Thursday, September 14, 2023

Newton's Nook Designs September Release ~ Release Day!!

Pin It

 HELLO CRAFTY FRIENDS!!

Welcome to RELEASE DAY of the Newton's Nook Designs September Release!! Today I'm sharing a Project I made using the NEW Halloween Apothecary Stamp Set and the coordinating Labels Hot Foil Plate that we showcased on Day 1 HERE!! 

I Started by Inking a Card Panel using Hickory Smoke Distress Oxide Ink and then I Inked a Moon Image using Mustard Seed Distress Oxide Ink and added some Water Splatters for some Texture!!
Then I used the Flying Bats Stencil and applied a Thin Layer of Therm O Web Deco Foil Transfer Gel Duo!! I removed the stencil and set the Card Panel aside to dry completely!! Once Dry, I Foiled with some Deco Foil!!
SWOON!! I LOVE the look!! 

Next I Hot Foiled the NEW Labels Hot Foil Plate with some Deco Foil Hot Foil in Gold Stardust!! Then I Stamped and Embossed the image from the NEW Halloween Apothecary Stamp Set!! I adhered it onto the Card Panel using Foam Tape!! Then I added some Clay Bat Sprinkles!!  

Then I adhered the Foiled Panel onto a Framework Die Cut Frame from some Black Cardstock!! Then I adhered the Frame onto a White Cardbase using some Foam Tape for Dimension!! 
So there you have it, a FUN Foiled Card that can be used for several different occasions using the AMAZNG NEW Products!! I hope I've INSPIRED you today and I can't wait to see what you create!! 

If you've MISSED the chances to WIN, make sure you HOP along and leave comments on ALL of the Blog Posts!! You have until tonight, September 14th @9pm ET!! 

Here's how to win: Comment on the NND blog and Design Team blogs (see list below)! The winner will be chosen at random from the collective reveal posts. Make sure to check out each of their blogs and comment for your chance to win. You will not know which blog has been chosen so the more you comment on the better your chances are of winning! You have until Thursday September 14th at 9pm ET to comment  -- winners will be announced on the blog post on Friday, September 15th. 

Check out all the awesome Design Team Blogs below to enter:

Newton's Nook Designs

Ellen Haxelmans

Larissa Heskett

Samantha Mann

Diane Morales

Farhana Sarker
Tatiana Trafimovich

Amanda Wilcox


EVERYTHING is AVAILABLE NOW in the Newton's Nook Store!! 
HAPPY SHOPPING Friends!! I CAN'T WAIT to see what you create!! 


THANKS SO MUCH for stopping by today!! Make sure to leave me comments from ALL of the Release Week Posts for your chance to WIN!!
Then check out the Newton's Nook Designs Blog on Friday, September 15th to see if you're one of the LUCKY Winners!! 

Have a FABULOUS WEEK!!

LARISSA HESKETT ๐Ÿ’–

Friday, November 4, 2022

Fall Pumpkins Hello Fall Card w/ Newton's Nook Designs!!

Pin It
HELLO CRAFTY FRIENDS!! 

I'm up on the Newton's Nook Designs Blog sharing this FUN Hello, Fall Card sharing how you can use the NEW Jack-O-Lantern Stencil Set to create some Fall Pumpkins!! I LOVE being able to STRETCH my Products and this is a REALLY FUN Technique!! 
If you LOVE Texture and adding Dimension this will definitely be a Technique you want to try!! 
I Started with a Piece of Newton's Nook Designs Autumn Paper Pad and then Sprayed the Jack-O-Lantern Stencil with some Pixie Spray and adhered it over the Plaid Paper!! I pressed it firmly into place and then applied a Thin Layer of Deco Foil Transfer Gel Duo using my Stencil Pal!! I Removed the Stencil and then let the Gel Dry Completely!! It will be completely Clear once its Dry!! 

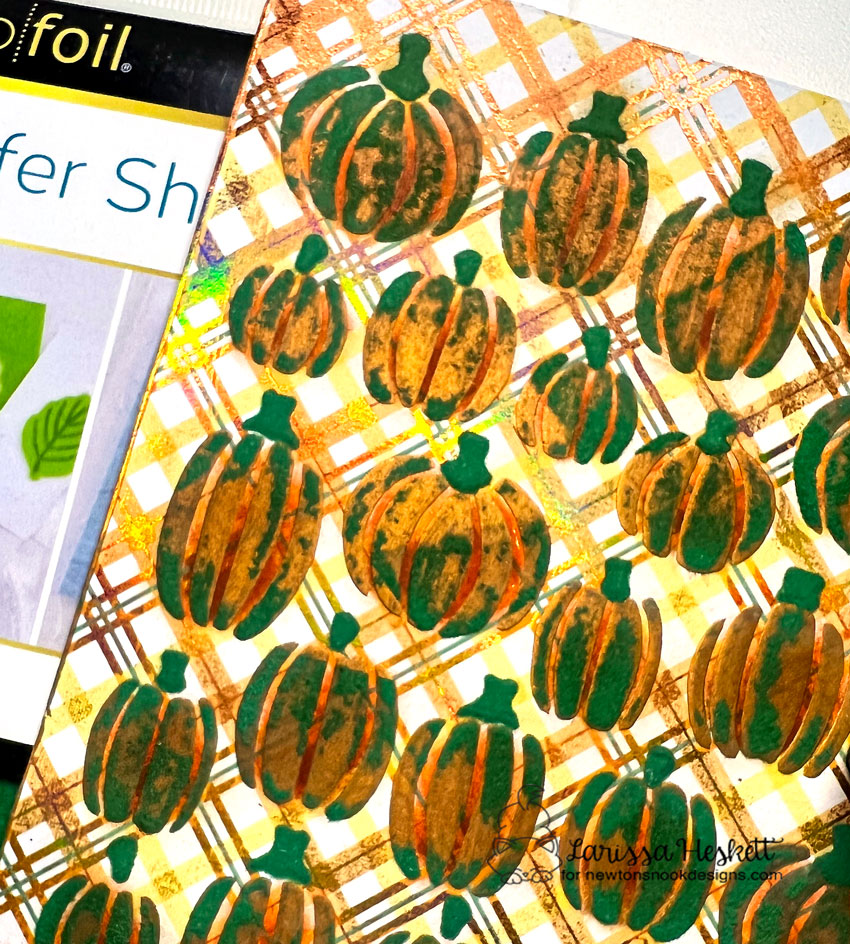
Once Completely Dry I then took a Piece of Peach Princess Deco Foil over the Gel and ran it through the MINC Laminating Machine!! SWOON!! Just look at the Iridescent Shine and I also LOVE the Texture as the Pumpkins are raised off the Patterned Paper!! Then I Inked over the Pumpkins with some Carved Pumpkin and Gathered Trigs Distress Inks!! It really makes them POP off the Panel!! 
Next I Inked the Stems with the Second Jack-O-Lantern Stencil, using Gathered Twig Distress Ink and then I applied some of the Deco Foil Transfer Gel Duo and again set it aside to Dry Completely!! 
Once Dry Completely I then placed a Piece of Emerald Green Deco Foil Flock Sheets over the top and ran it through my Die Cutting Machine!! There are MANY Options here!!
TIP: If you don't want the Pumpkins Flocked Green, then just Run the Flock over the Stems ONLY!! You can simply just place the Flock over and press over with your Finger or a Burnishing Tool and the Flock will Transfer to the Stems!! I personally LOVE that they are Flocked as I LOVE the realistic Texture on some of the Pumpkins straight from the Garden!! Then I applied some Gathered Twigs Distress Ink over the Flocked Pumpkins and Stems to add even more Dimension and Texture to the Pumpkins!! 
Here's a Close up look at the Pumpkins!! SWOON!! How FUN is that Texture, Sparkle and Shine!!?? I LOVE the finished results SO MUCH!! It would be FUN to try this Technique with other Color ways too as Pumpkins are FUN in a Rainbow of Colors RIGHT!!??
This Angle shows the Shine of the Foil better!! I may be bias, but Techniques like this just make me HAPPY!! I LOVE being able to create something Life like and FULL of Texture and Dimension!! MAKES ME HAPPY!! 
Then I adhered the Stenciled, Foiled and Flocked Panel onto a Die Cut Scalloped Frame from some Kraft Cardstock using the Frames & Flags Die Set!! I Inked the Edges with some Gathered Twigs Distress Ink and then placed the Panel onto an A2 White Cardstock Base!! 
 I Stamped and Embossed the Hello, Fall Sentiment from the Heartfelt Fall Stamp Set with Versa Fine Black Onyx Ink and Embossed with WoW Clear Gloss Embossing Powder onto a Stitched Circle from the Circle Frames Die Set and then Colored the Sentiment using an E84 Copic Marker!! Then I inked with with some Carved Pumpkin Distress Ink to add some Warmth to the Sentiment Circle!! I Layered the Sentiment with another Circle Die Cut from Kraft Cardstock and added it to the Card Panel using Foam Tape!!

I LOVE the way this Card turned out as it represents EVERYTHING I LOVE about Fall Pumpkins!! SWOON!! 
THANKS SO MUCH for stopping by today and I hope you have a FABULOUS WEEK!! 

COUNTRY HUGS-N-KISSES
LARISSA  ๐Ÿ‚

Monday, June 13, 2022

Newton's Nook Designs June Release 2022 ~ Beach Bound, Summertime Paper Pad & Palm Tree Line Stencil!!

Pin It

HELLO CRAFTY FRIENDS!!
 
I'm here with Day 1 of the 
Today we're showcasing the NEW "Beach Bound" Stamp Set + coordinating Beach Bound Die Set, Summertime Paper Pad and the Palm Tree Line Stencil!!
Let's take a look at the AWESOME NEW Products!!
Newton's Nook Designs Beach Bound Stamp Set and coordinating Beach Bound Die Set
Newton's Nook Designs Summertime 6x6 Paper Pad
Newton's Nook Designs Palm Tree Line Stencil

Special Delivery of Sun & Fun Card by Larissa Heskett for Newton's Nook Designs using Palm Tree Line Stencil, Beach Bound Stamp Set and  Frames & Flags Die Set
I wanted to create a CAS Style Card but I'm dressing it up by adding some Touches of Deco Foil and Deco Foil Flock to add some Shine and Dimension and I just LOVE how it turned out!! You could use this Design for ANY Occasion just by changing the Sentiment!! 
I Started by spraying the Backside of my Palm Tree Line Stencil with Pixie Spray!! 
Then I Placed it over my Card Panel centering the Palm Trees in the Center and pressed it firmly into place!! I used some Tape to mask off parts of the Stencil I didn't want to Ink and then I inked the Images using Distress Oxide Inks in Vintage Photo, Peeled Paint and Lucky Clover!! 
Next I placed the Stencil over the Inked Images and applied some Deco Foil Transfer Gel Duo using a Stencil Pal and then let the Gel Dry completely!! 
Once the Deco Foil Transfer Gel Duo was completely Dry I used some Deco Foil in Rainbow Shattered Glass and rubbed it over the Palm Leaves to add some STUNNING Shine!! Then I Cut a Piece of Tuscan Gold Deco Foil Flock Sheets and Rubbed it over the Deco Foil Transfer Gel Flock Side facing down onto the Gel and Rubbed it to add some AWESOME Flocked Texture to the Palm Tree Trunks!! I wanted the Flocking to appear Darker so I placed the Stencil back over the Palm Tree Trunks and then Inked with some Black Soot Distress Ink and I LOVE the Contrast it adds!! 
SWOON!! Just LOOK at all of that Shine and Flocked Texture!! It makes me SO HAPPY!! Plus, I think its such a FUN touch to add to a CAS Style Design!! 
Special Delivery of Sun & Fun Card by Larissa Heskett for Newton's Nook Designs using Palm Tree Line Stencil, Beach Bound Stamp Set and  Frames & Flags Die Set
Next I Stamped and Embossed the "Special Delivery of Sun & Fun!" Sentiment using Versa Fine Black Onyx Ink and Embossed with WoW Clear Gloss Embossing Powder!! Then I Die Cut a Deco Foil Toner Sheet that I Foiled with Lily Pad Deco Foil using the Frames & Flags Die Set and adhered the Card Panel to the Foiled Scalloped Frame and adhered it to an A2 Cardbase!! 
Special Delivery of Sun & Fun Card by Larissa Heskett for Newton's Nook Designs using Palm Tree Line Stencil, Beach Bound Stamp Set and  Frames & Flags Die Set
Here's a Close up look at the Final Design!! AMAZING Right!!?? Again this Card could be created for ANY Occasion, just by changing out the Sentiment!! 

Would you like to win the “Beach Bound” Stamp Set!!?? 
This stamp set will be given away to ONE lucky winner!!

Here's how to win: Comment on the NND blog and Design Team blogs (see list below)! The winner will be chosen at random from the collective reveal posts. Make sure to check out each of their blogs and comment for your chance to win. You will not know which blog has been chosen so the more you comment on the better your chances are of winning! You have until Thursday June 16th at 9pm ET to comment  -- winners will be announced on the blog post on Friday June 17th. 

Check out all the awesome Design Team Blogs below to enter:

Newton's Nook Designs

Donna Idlet

Ellen Haxelmans

Tina Herbeck

Larissa Heskett

Samantha Mann

Zsofia Molnar

Maria Russell

Farhana Sarker

Tatiana Trafimovich

Amanda Wilcox


THANKS SO MUCH for stopping by today!! Make sure to leave me comments ALL Week for your chance to WIN!! I read EVERYONE and they MEAN more to me than you'll ever know!! 
 Make sure to check out the Newton's Nook Designs Blog on Friday, June 17th to see if you're one of the LUCKY Winners!! 
Have a FABULOUS WEEK!!

LARISSA HESKETT ๐Ÿ’™

Friday, September 3, 2021

Wishing You a Spooky Halloween w/ Newton's Nook Designs!!

Pin It
HELLO CRAFTY FRIENDS!! 

I'm up on the Newton's Nook Designs Blog today sharing this FABOOLOUS Glow-in-the-Dark Halloween Card FULL of Texture and Shine!!
I'm using the Creepy Cameos Stamp Set and Creepy Cameo Die Set along with the Ghost Stencil and Framework Die Set!! Let's get Started!! 
I Started by Creating the AWESOME Dimensional Cameo Frame!! I Mixed a combination of Gina K Designs Black Glitz Glitter Gel and Metallix Gel together and then applied a Thin Layer to a Piece of Distress Watercolor Cardstock using my Stencil Pal!! Then I set it aside to Dry Completely!! Then I Die Cut the Cameo Frame!! 
Then I Stamped and Embossed the Sentiment from the Creepy Cameos Stamp Set using Versa Mark Embossing Ink and WoW Glow-in-the Dark Embossing Powder!! SWOON!! In real Life it's SO FUN!! 
(On a Side Note, Photographing Glow-in-the-Dark Images are HARD!! If you have any pointers I'd LOVE the hear them!! THANKS in advance!!) 
Here's a Close up look at the Sentiment inside the STUNNING Glitter Glitz Frame!! 
Next I worked on the Stenciled Card Panel!! 

I Started by Spraying the back Side of the Ghost Stencil with Therm O Web Pixie Spray!! Then I adhered it to the Black Cardstock Card Panel and pressed it firmly into place!! Then I applied a Thin Layer of Deco Foil Transfer Gel Duo using a Stencil Pal!! Then I set it aside to Dry completely!! 
Once Dry, I added a Piece of White Latte Deco Foil Flock over the top of the DRY Deco Foil Transfer Gel and ran it through my Die Cutting Machine to burnish the Flock into the Deco Foil Transfer Gel!! Then I removed the Deco Flock backing and SQEUAL!! The Flocked Ghosts POP off the Card Panel!! 

I replaced the Ghost Stencil over the Flocked Ghost Images and then Inked with some Twisted Citron Distress Ink, using an Ink Dauber and Inking at the Bottom of the Ghost Images to add that Glow-in-the-Dark look!! I LOVE how the little touch of Ink really makes the Ghost Images POP of the Card Panel!! 

I adhered the Stencil and Flocked Card Panel onto an Orange Cardstock Panel!!
Then I adhered it to a Deco Foil Toner Sheet that was Foiled with some Brustus Monroe Green Static Deco Foil and then Die Cut it using the Framework Die Set!! I adhered it to an A2 Cardbase and my Card was Finished!! 
✱✱✱The Creepy Cameos Stamp Set and Creepy Cameo Die Set are part of the NND Retiring SALE and will only be available while supplies last so if you like these products, make sure you get them while you can and don't forget to see what else is retiring in our retiring sale category!!✱✱✱

THANKS SO MUCH for stopping by today!! I hope I've INSPIRED you on some FUN Techniques to use with your NND Products to create some AMAZING Halloween Cards to Bring a Glow-in-the-Dark BOO to someone SPECIAL!! 
Have a FABOOLOUS WEEKEND!! 


COUNTRY HUGS-N-KISSES
LARISSA  ๐Ÿ‘ป

S U P P L I E S
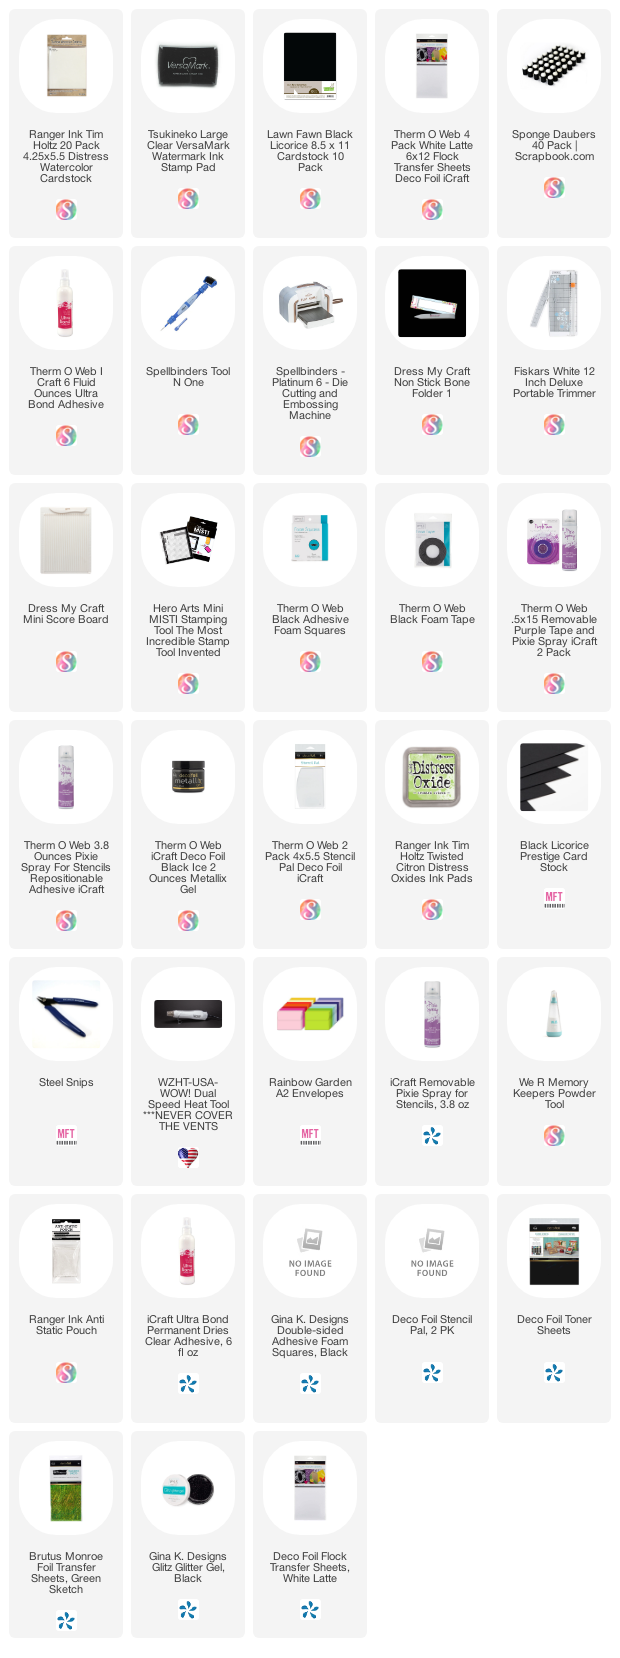
Below you will find links to the supplies used to create this project(s). Click the icon for the store underneath the thumbnails to start shopping. Where available I use compensated affiliate links at no extra cost to you. Your support helps me to keep bringing you new projects. 
Thank you!! ๐Ÿ’“

Friday, July 16, 2021

Newton's Nook Designs 8 Year Celebration ~ Cupcake Themed Mini Release!!

Pin It
HELLO CRAFTY FRIENDS!! 
Today I am excited to be part of  the 8 Year Anniversary Celebration with Newton's Nook Designs!! To celebrate this AWESOME Milestone, Newton’s Nook Designs has released adorable NEW Cupcake themed products, which I will be sharing on my projects today. There are prizes too!! Read all the way to the end of this post to find out how you can WIN!!
Here's a Look at the NEW Products!! 

So FUN and SURE to make ANY Celebration SPECIAL!! 
Here's what I've created for today!! 
For my First Card I'm using the NEW Cupcake Stencil Set!! SWOON!! This New Cupcake Stencil Set is a Set of 3 Stencils that you can Layer to create the SWEETEST Cupcake Images!! There are SO MANY Possibilities!! I Started by spraying all of them on the back with Pixie Spray, to help hold them in place while Inking them!! 
I Started by Inking the Cupcake Bases using some Lawn Fawn Hippo Ink, using an Ink Blending Brush!! Next I Inked the Cupcake Tops!! I wanted to to create different Colors, so I used 3 different Inks!! I used Lawn Fawn Jelly Fish for the White Cupcakes (it's hard to see in the Phot but in real life they look AMAZING) Then I used Catherine Pooler Inks in Pucker Up and Cummberbund for the other 2 Cupcake Tops again using my Blending Brushes!! 
For the third Layer of the Stencil I used Therm O Web Deco Foil Transfer Gel Duo and my Stencil Pal to apply a thin Coat!! Then I placed a Piece of Gina K Designs Twinkling Pink Fancy Foil over the completely Dried Gel and ran it through my Laminating Machine!! SWOON!! I LOVE the added touch of the Glittering Sparkle from the Foil in real Life!! 
Next I Die Cut the Scalloped Frame from some Turquoise Cardstock using the Frames & Flags Die Set!! I adhered the Stenciled Card Panel on top and then I Stamped and Embossed the "Birthday Wishes" Sentiment from the Heartfelt Blooms Stamp Set using Versa Mark and WoW Bright White Embossing Powder onto a Banner Trio Die Cut from some more Turquoise Cardstock!! Then I adhered it to the Card Panel using Foam Tape!! A Few Trinity Stamps Fairy Rocks Rhinestones finishes off the Design with the perfect added Sparkle!! 

For my next Card I Started by Stamping and Embossing the Card Panel to create my own Patterned Paper using the Tiny Images from the NEW Newton's Cupcake Stamp Set!! Then I added some Black Soot Distress Paint Splatters for some added Texture!! 

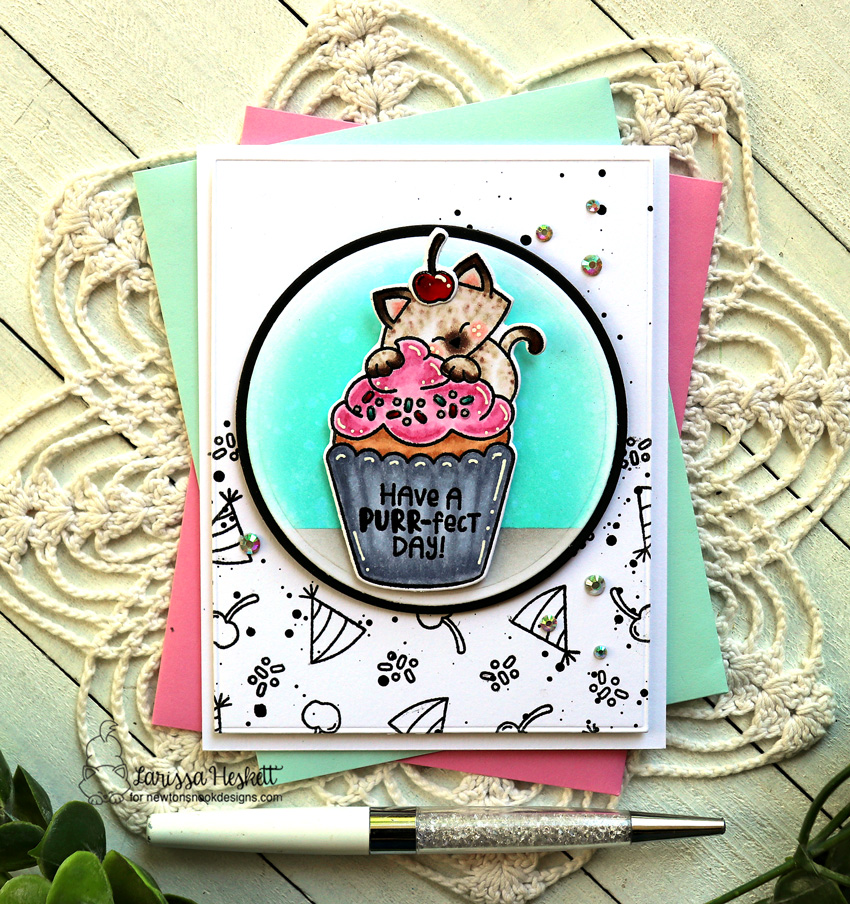
Next I worked on the Focal Image!! SQUEAL!! How SWEET Is Newton Hugging that Cupcake!! If you know me, you KNOW that Cupcakes are my FAVORITE Sweet Treat!! In fact when my boys request for me to make something SWEET for Birthdays or Snacks its usually my Homemade Filled and Frosted Cupcakes + Homemade Vanilla Bean Ice Cream!! YUMMY!! Makes e READY for a Summer Celebration!! ๐Ÿ˜‹

I Started by Stamping and Embossing the Newton's Cupcake Images!! Then I used Copic Markers to color them!!
Newton: E40, E42, E43, E44, E47 & E99    
Cheeks & Inside of Ears: R11   Cherry: R14, R37 & R39 
Cupcake: E30, E31 & E33    
Frosting: RV00, R81, R83 & R85     
Cupcake Liner: N00, N0, N2 & N4

I Die Cut the Images out using the coordinating NEW Newton's Cupcake Die Set and then I Stamped and Embossed the Sentiment from the Set!! I also added White and Black Gel Pen Details for Highlights and then adhered them to a Circle Die Cut Focal!! I Inked with Salvaged Patina and Hickory Smoke Distress Oxide Inks to create the Scene!! 
Then I adhered it to the Card Panel using Foam Tape!! I added some Trinity Stamps Fairy Rocks Rhinestones for some added Sparkle and then adhered the Card Panel to an A2 White Cardstock Cardbase!! I just LOVE the way it turned out and I look forward to using this SWEET Set to coordinate with some of my Homemade Cupcakes to give as SWEET Birthday Treats to my LOVED ones!! 

Would you like to win a $50 store credit to the Newton’s Nook Designs Online Shop!!?? We will choose TWO lucky winners!! Here's how to win: 

Comment on the NND blog and Design Team blogs! (see list below) The winner will be chosen at random from the collective posts. Make sure to check out each of their blogs and comment for your chance to win. You will not know which blog has been chosen so the more you comment on the better your chances are of winning! You have until Monday, July 19th at 9pm ET to comment  -- winners will be announced on the blog post on Tuesday, July 20th!!

Check out all the awesome Design Team Blogs below to enter:

Newton's Nook Designs

Tina Herbeck

Larissa Heskett

Samantha Mann

Zsofia Molnar

Maria Russell

Farhana Sarker

Tatiana Trafimovich

Samantha VanArnhem

Amanda Wilcox


THANKS SO MUCH for stopping by today!! I hope I've INSPIRED you and I hope you'll CELEBRATE Newton's Nook Designs 8th Year by taking advantage of the SALE!! 
I hope you have a FABULOUS WEEKEND!! 

COUNTRY HUGS-N-KISSES!! 
LARISSA  ๐Ÿง