Showing posts with label My Favorite Things. Show all posts

Sunday, September 20, 2020

Clean & Simple Genius Holly Jolly Cardinal Card for MFT 2020 Card Design Superstar Challenge!!

Pin It
HELLO CRAFTY FRIENDS!! 

So I actually wasn't going to make anything for the MFT 2020 Card Design Superstar Challenge, but then I changed my mind with a little encouragement!! I'm one of those Designers who doesn't have as much confidence in my talents as I probably should have!! I get really intimidated and I question my talents then I talk myself out of entering!! After making a  Card just for me for the challenge, my AMAZINGLY Supportive Husband and Boys talked me in to entering it!! 
So here's my Entry for the Clean & Simple Genius Category!! 
I Started by Die Cutting the Stitched Rectangle Scallop Edge Frame Die-Namics from some of the MFT Positively Preppy 6x6 Patterned Paper!! I chose the Rainbow Diagonal Strip as I LOVE the idea of Rainbow even in the Winter Months!! 
Next I Die Cut all of the Parts to the Cardinal using the NEW Holly Jolly Cardinals Die-Namics Set!! I used ALL MFT Cardstocks that I'll have linked below!! I actually Cut 2 of the Body Pieces so I could have a more layered Tail and Body!! I think the Dimension really adds to the overall look of the Cardinal!! I also used Copic Markers to add some Dimension to the Cardstock!! I used Cardinal: R43, R46 & R89   Beak: E99 & YR68  Tummy: N0 & N2  Holly Leaves: G19 & YG17  Center of Holly Berries: R89  Branch: E43 & E47  I also Layered 2 Die Cuts of the Branch for more dimension too!!
 
I LOVE this Die Set because there are so MANY ways you could create the Cardinal!! With or without the Santa Hat and with or with out the Wings!! I think BOTH ways are FUN and that's one thing I like about investing in Pieced Die Cut Images!! The options are ENDLESS!!
These IMAGES are ALL the SAME Card, I just wanted to take Photos during my process of putting the Cardinal together to show the differences when you use the Cardinal with and without the Wings and adding White Gel Pen Details for MORE INSPIRATION when using this Set!! Sometimes if you're like me you have to SEE something in order to be INSPIRED to use something in different ways other than the way they were intended to be used!! I HAVE TO SEE it when I'm creating so I'll put things together before adhering anything and take Photos so I can see what I like BEST!! I KNOW this isn't everyone's process, but I thought I'd share mine with you just in case it HELPS you when you're trying to create or deciding on the finished Design of your Projects!! 
Although I LOVE the Cardinal with his Wings and the Cross Hatched Tummy, I ended up LOVING the Vintage feel of the Cardinal WITHOUT the Wings or added White Gel Pen details added to the Tummy for this Design!! So after assembling all of the Colored Die Cut parts of the Cardinal I wanted to add some Texture to my Cardinal so I added some White Pen Details to her Eyes and Cheeks and I LOVE the way they make her Face POP!! I added some Sparkle to the Holly Berries and the Beak so I added some Midas Touch Shimmer Pen and then added some Morning Dew Nuvo Drops for some Shine and Dimension!! I set it aside to dry while I created the background!! I've used some Distress Oxide Ink in Tumbled Glass and Peacock Feathers then added some Water Splatters and some Black Soot Distress Paint Splatters!!
I adhered the Branch onto the Card Panel and then I Stamped and Embossed the Sentiment from the BB Unicorns and Glitter Stamp Set!! I chose this sentiment because I thought it fit the Card Design and it nested perfectly in between the opening of the Branch!! I adhered everything together and my Card was finished!! I just LOVE how HAPPY and PLAYFUL it is and it really makes me think about my MIL who would have LOVED to have received this Card!! Cardinals were her FAVORITE Bird and every time the Boys and I see one the boys say "Mom Grandma's watching over us and telling us she LOVES us from Heaven!!" 

THANKS SO MUCH for stopping by today and I hope you have a FABULOUS WEEK!! 

COUNTRY HUGS-N-KISSES
LARISSA   ðŸ’–

S U P P L I E S
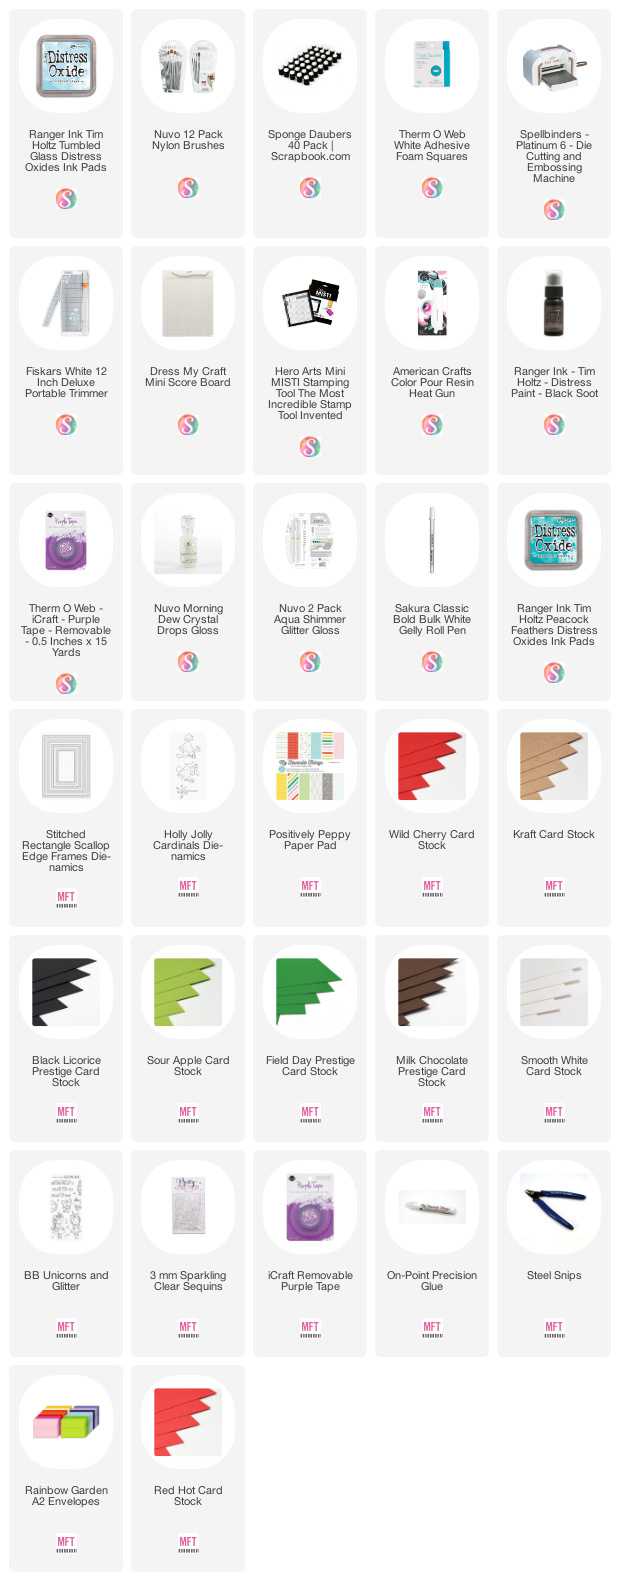
Below you will find links to the supplies used to create this project(s). Click the icon for the store underneath the thumbnails to start shopping. Where available I use compensated affiliate links at no extra cost to you. Your support helps me to keep bringing you new projects. Thank you!
Saturday, June 4, 2016

TWO FUN Interactive Cards with Mint Owl Studio!! =)

Pin It
Mint Owl Studio
HELLO!!
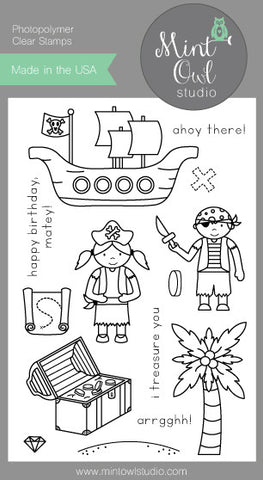
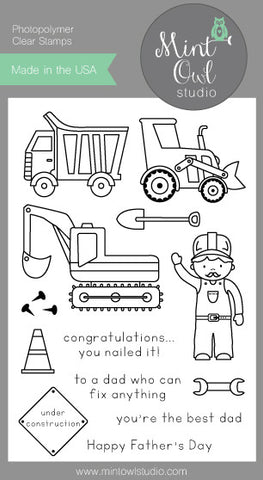
I'm stopping by today to share a Couple REALLY FUN Interactive Cards that I've made using some NEW Stamps from Mint Owl Studio!! I LOVE to make Interactive Cards and when I saw the "A Pirates Life" Stamp Set and the "Under Construction" Stamp Set I just COULDN'T WAIT to create with them!! Even my Boys have been LOVING these New Sets!! So I started by Stamping and Embossing the Images onto Distress Water Color Paper and then I used my Distress Inks to Water Color them in!! I Fussy Cut them out leaving a Small White Border!! I JUST LOVE the way they turned out and hope you do too!!??
A Pirate's Life    Under Construction 
For the "Happy Birthday Matey" Card I thought it would be FUN to have the Ship Sailing across the Card!! I wanted to have a Shore Line and then the Ship could Dock or Sail!! SQUEAL!! I'm SO HAPPY with how it turned out!! I used some Clear Wink of Stella Glitter Marker to make the Sails, the Pirate Flag and Pirate's Hat, Gem, Treasure, the X on the Map and the Coconuts!! I LOVE the touch it adds!! I used a Pretty Pink Posh Border Die to Create my Waves and then a Lawn Fawn Slider Die to create the opening for my Slider!! I also used a Lawn Fawn Stitched Border Die for the Shore Line!! I Stamped the Sand Image and several of the Sand Specks using Gathered Twigs Distress Ink and then I used a Sponge Daubber to Ink up the Shore using Antique Linen and Gathered Twigs Distress Ink!! For the Sea I used Peacock Feathers and I LOVE the way it looks against the Images!! For the Sky I used Tumbled Glass and Sketchbook and then I took some Water and Splattered it to add in some texture!! For the Shore I wanted even more texture so I Splattered some Black and Gold Acrylic Paint Spots and I really like how it makes it feel like a REAL Beach!!=)
I wanted my Pirate Girl to be holding the Gem so I took an Exacto Knife and cut along her hands and then slipped the Gem in them with a small piece of Foam Tape so it looks Dimensional!! =)


For the "Congratulations" Card I wanted it to look like the Excavator was Digging and then Loading the Dump Truck and the Dump Truck could Drive off!! I used a Couple Pretty Pink Posh Border Dies to create the "Dig Site"!! I think its PERFECT, Don't You!!?? Then I used a Small Slider Die from MFT too create both of the Slider Openings!! I Stamped and Embossed onto Distress Watercolor Paper and used Distress Inks to Water Color the Images!! I used my NEW Mini Misti Stamping Tool (that I was LUCKY enough to WIN during) Misti Mania!! There's still time to ENTER to WIN one so GO NOW and ENTER!! =)
I was able to Double Stamp and Emboss my Sentiment and Embossed it with both Black and White Embossing Powder!! I used Distress Inks to Create my Backgrounds and then added Water Splatters and some Black, White and Gold Acrylic Paints to add even more texture!! I LOVE the way it adds to the whole Card!!
 
 
Here's a Short Video showing how AWESOME they are in ACTION!! =)
So what do you think!!?? Aren't these New Stamp Set FUN!! They make Masculine and Interactive Cards SO EASY and FUN to CREATE!! I HOPE I've INSPIRED you today!!??   =)
THANKS SO MUCH for stopping by and I hope you have a FABULOUS WEEKEND!!
COUNTRY HUGS-N-KISSES
LARISSA   =)

Friday, May 27, 2016

Newton's Nook Designs Inky Paws Challenge #32 ~ Use an Arrow!! =)

Pin It
HELLO and HAPPY FRIDAY/MEMORIAL DAY WEEKEND!! =)
Today I'm here with Newton's Nook Designs for the New Inky Paws Challenge #32 ~ Use an Arrow!! I was SUPER EXCITED about the New Challenge and decided to use the New Points & Plumes Die Set along with the New Adventure Awaits Stamp Set for my Card today!!
Points & Plumes Die set by Newton's Nook Designs   Adventure Awaits Stamp Set by Newton's Nook Designs
Here's my take on the Challenge Photo!!
I thought it would be FUN to create a Die Cut Background using the Arrow Dies and then I Watercolored a Distressed Watercolor Card Base to go underneath my Die Cut Card Panel!! I used Distress Inks in Tattered Rose and Spun Sugar, Cracked  Pistachio, Tumbled Glass and Peacock Feathers and Worn Lipstick!! I LOVE these Colors together!! Then I Die Cut a MFT Zig Zag Rectangle Die from some Distress Watercolor Paper and Stamped and Embossed my Sentiment along with a Small Arrow Detail!! I Embossed everything in some SSS Fine Detail Antique Gold Embossing Powder and then I decided I wanted the Sentiment to "POP" off my Card alittle more so I used the NEW Mini Misti Stamping Tool I won during the Misti-Mania Event going on over on the My Sweet Petunia Blog to Double Stamp and Emboss the Sentiment using Versa Fine Black Onyx Ink just slightly off from my Antique Gold Stamped and Embossed Sentiment and I REALLY LOVE the way it turned out!! (If you haven't been entering for your chance to WIN a Mini-Misti Stamping Tool I HOPE you'll GO and get entered for your chance to WIN!! SQUEAL!! Such an AMAZING EVENT!! Iliana ROCKS!!)   =) 
Then to Ground my Sentiment a Bit I Die Cut some SSS Antique Gold Embossed Cardstock along with some Black Cardstock using a Reverse Confetti Edge Essentials Confetti Cuts  Mini Zig Zag Die!! I Adhered them one ontop of another on the Bottom of the Zig Zag Rectangle Stamped Sentiment Piece!! Then I added some Gold and Black Acrylic Paint Splatters and a Mix of Sequins from Little Things from Lucy's Cards Brushed Gold Sparkly Sequin Mix!! I also added some Pretty Pink Posh Iridescent Mini Star Confetti to finish it off!! I LOVE LOVE LOVE the way it turned out!! I CAN'T WAIT to see what you create for this Month's Newton's Nook Designs Inky Paws Challenge #32 ~ Use an Arrow!! THANKS SO MUCH for stopping by and I hope you have a FABULOUS MEMORIAL DAY WEEKEND!!
COUNTYR HUGS-N-KISSES
LARISSA   =)

Friday, September 11, 2015

Mylar Pumpkin Shaker Bag for MFT Card Design Superstar Contest!! =)

Pin It


Hello!!
I'm stopping in to share the First Card I've made and entering into the MFT You Could be a Card Design Super Star Contest!! You can check it out here on their Blog!!  I have LOVED LOVED LOVED ALL of the AMAZING cards that have been entered so far and I'm SO HAPPY I'm not ONE of the Judges who is going to have the EXTREEMLY HARD Job of narrowing it down to the Top 10 Entries!! EEEKKKK!! I am however SO EXCITED about ALL of the Talent and ALL of the LOVE that is shared during these type of Contests!! Makes me HAPPY to be a Part of this AWESOME Community of Crafters!! =)
I've had this Idea in my Sketch Book for a Year now!! I made this card for a Paper Smooches SPARKS Challenge going on NOW!! (Maybe you'll Play along for a chance to WIN if you have the TIME!!??) I decided it would be FUN to use the Same Mylar Gift/Treat Bag and create a Pumpkin!! Do you remember those Vintage Pumpkin Candy Buckets from when you were a Kid!!?? They were what EVERYONE had to go Trick-or-Treating with!! There weren't THOUSANDS of options like there are today!! =) This is a Spin off of that design only I've turned it into a Pumpkin Shaker for the Front of my Card!!
Upcycle a dollar store plastic pumpkin bucket into a gorgeous burlap-covered pumpkin!:
 I Colored the Front and the Back Sides of the Mylar Treat Bag with Copic Markers R08, YR68 for the Orange, and E37, E18 for the Stem!! Then I Folded the Bag Inside Out to give the Rounded Corners for the Pumpkin Shape!! I started with the Die-namics Paper Bag Peek-a-Boo Die Cuts and I cut out Three Layers each and glued them together to create the Face on my Mylar Shaker Bag Pumpkin!! =) I also used the CUTE Little Spider from the same set and Layered three of those Die Cuts together too!! I also used the Die-namics Fishtale Flags Dies to Die Cut a Flag Banner for my Sentiment that I Heat Embossed in White from an MFT Spider Web Retired Sentiment Set!! I Water Colored my Background using my New Peerless Water Colors and MAN am I LOVING how VIBRANT these colors are!! I found these on SALE for 70% off at a Craft Store because they had been opened and a few of the Sheets had been torn!! SCORE for me though!! =) I was doing a COMPLETE HAPPY DANCE!! SQUEAL!! =) I added some Pretty Pink Posh Sequins in 6mm Sunshine Glow, 4mm Sparkling Clear, 4mm Tangerine, 4mm Charcoal and some of the Silver Shimmer Seed Beads and Tied the Bag Closed!! I Rolled Up the Top to resemble a Stem and then add a Die Cut Felt Leaf from the MFT Die-namics Falling Leaves Die Set!! I also added some Burlap Twine, a Vintage Gold Button and some Wink of Stella Glitter Marker to the Face Images so it looks like the Pumpkin is Glowing!! Some Wiggly Eyes on the Spider and Fishing Line to Attach the Spider to the Card Front and a Few more Sequins were Scattered around the Card and it was Finished!! I sure hope you like my Card and that it brings back some AMAZING Memories from your Childhood!!?? It sure makes me SMILE remembering how MUCH FUN we had getting Dressed Up in our Homemade Halloween Costumes as a Family Growing up and ALL of the Candy we were able to Collect in these Vintage Pumpkin Candy Buckets!!  =)
 

Here' s a FAST Video to show these Shakers in Action!! =) THANKS for Watching!!
THANKS SO MUCH for stopping by and I hope you have a FABULOUS WEEK!!
COUNTRY HUGS-N-KISSES
LARISSA   =)

Friday, August 21, 2015

Lesson #12 – Design: Symmetry/Asymmetry & Lesson #14 – Color: Color Saturation!! =)

Pin It

Print
Hello!!
I'm stopping in to share the Card I've made for the MFT Summer School
Lesson #12 – Design: Symmetry/Asymmetry
Lesson #14 – Color: Color Saturation
Challenges!! I think this card fits for Both of these Challenges!!??  =)

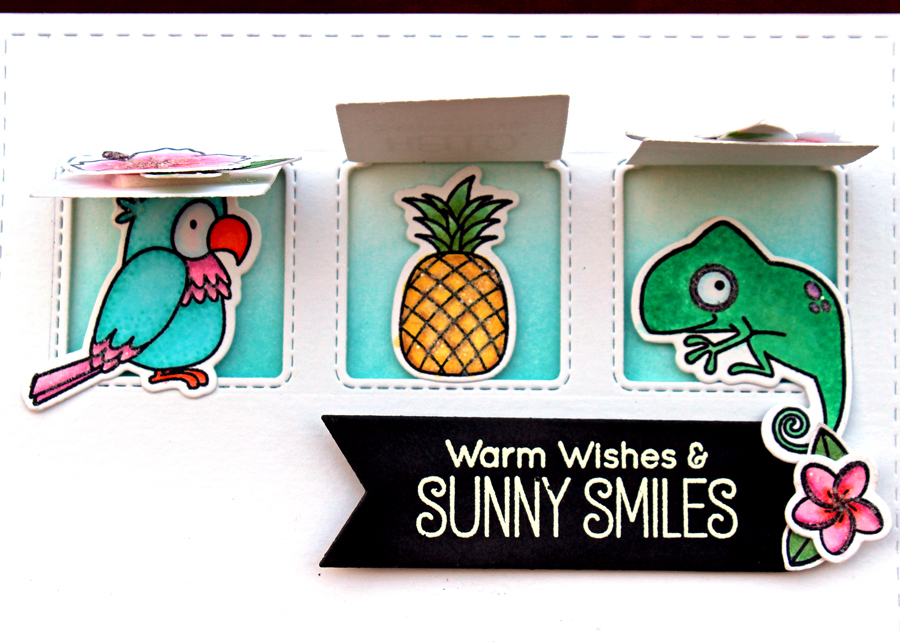
I've used SEVERAL of the New August Release Stamps and Dies for this Card!! MFT BB Polynesian Paradise Stamp Set and the Coordinating MFT BB Polynesian Paradise Die Set, MFT Stitched Interactive Window Trio Die and the Stitched Banner from the MFT BluePrints 20 Die Set!! I used my Copic Markers to Color the Images and then added some Clear Rock Candy Distress Glitter for some Sparkle!!  I LOVE how it turned out!!
I also wanted to share my BEAUTIFUL Hibiscus Flowers with you!! I have NEVER Planted these before and decided to give them a try!!?? OMG these have been SO EASY to Grow and take care of!! I'm SO GLAD I tried them!! ENJOY!!  =)
THANKS SO MUCH for stopping by and have a FABULOUS WEEK!!
COUNTRY HUGS-N-KISSES
LARISSA  =)

Absolutely Amazing with MFT & Colour Q Challenges!! =)

Pin It
Print
Lesson #13 – Design: Hard vs. Soft


Hello!!
I'm stopping in to share the Card that I've made for the MFTWSC242 Challenge, the MFT Summer School Lesson #13-Design: Hard vs. Soft Challenge and the Colour Q #304 Challenge!! I had a REALLY FUN time creating this Card and adding ALL of the Elements!! =) I HOPE you Absolutely LOVE this Card as much as I do!!??  =) I've used Felt to create my Flower Cluster Design and the I added a few Buttons to the Centers to help Harden the Design alittle!! I've used SEVERAL MFT Dies and I've used a couple just to create some Masks for Inking!! I've used the MFT Cross Stitch Oval Stax Dies Set, the MFT Gerbera Daisy Die Set, the MFT Rolled Scallop Rose Die, the MFT Rolled Blooming Rose Die, and the Leaves from the Retired MFT Flower Set!! Some Vintage Buttons tied with Grey Twine and a Few Sequins in Different Sizes and my Card was Finished!! I think the Elements Balance really Nicely between Hard and Soft!!?? What do you think!!??  =)

 
THANKS SO MUCH for stopping by and I hope you have a FABULOUS WEEK!!
COUNTRY HUGS-N-KISSES

LARISSA   =)

Friday, June 26, 2015

MFT Summer School Challenge ~ Lesson #2 – Composition: Focal Point!! =)

Pin It

Print

Print


Hello!!
I'm stopping in to share a Card I've made for the MFT Summer School Challenge ~ Lesson #2 – Composition: Focal Point!! I also decided it would be FUN to play along with the MFT Color Challenge #24 too so I combined the Two and I LOVE the end Result!! =)
I just Fell in LOVE with the New MFT BB Adventure Is Calling Stamp Set and thought it would be FUN to showcase the Sweet Bunny Image!! I've used the MFT Die-Namics Pierced Stars Die Set and created a FUN Layered Design using the Different Colors from the Color Challenge!! I used some MFT Black Licorice and  MFT Lemon Chiffon Cardstock and then some Avery Elle Paper for the Persimmon Colored Star!! Then I used my Copic Markers to Color in the Sweet Bunny!! I added Black Gel Pen for the Eyes and some Clear Wink of Stella Glitter Marker and a few White Gel Pen accent dots to the Checks!! Then a Few Blue Iridescent Sequin Stars and Mini Sequins from Neat & Tangled to finish of the Design!! SQUEAL!!  =)
THANKS SO MUCH for stopping by and I hope you have a FABULOUS WEEKEND!!
COUNTRY HUGS-N-KISSES
LARISSA   =)