

HELLO!!
I'm here today for the Paper Sweeties November 2020 Release Party!!
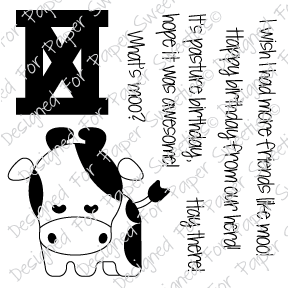
Today I'm showcasing the NEW Hay There Stamp Set and the coordinating Hay There Die Set!!
Here's a look at the NEW Set!!

I Started by creating my Card Panel!! I Started with a White Cardstock Panel and Inked with some Tumbled Glass Distress Oxide Ink!! I added some Water Splatters and some Black Soot Distress Paint Splatters for some added texture!! Then I Cut a piece of BOLD Black and White Patterned Paper for the bottom 1/3 of the Card Panel!!

I Stamped and Embossed the Cow Image and used Copic Markers to color it in Cow: C01, C03 & C5 Cheeks: R00 Nose: E40 & E42
Then I Inked the Circle background using some Purple Tape as a Mask and Inking the Sky with some Tumbled Glass Distress Oxide Ink!! I added some Water Splatters for some Texture and then I removed the Mask and Masked off the Sky!! Then I inked the Ground with some Hickory Smoke Distress Oxide Ink!! I wanted to add Sparkling Snow, so I added some Glue Pen to my Ground and added some WoW Twinkling Puff Powder!! SWOON!! I LOVE the texture and sparkle of this Powder!! Then I added some Vintage Glass Glitter for even more Sparkle!!I Stamped and Embossed the Sentiment using my MISTI Stamping Tool and curving it to match the Curve of the Circle Frame!! I Stamped with Versa Fine Black Onyx Ink and Embossed with WoW Embossing Powder in Clear Gloss!! I adhered the Cow Image using some Foam Tape and then adhered the Circle Scallop Frame to the Card Panel!!


How SWEET Is this NEW SET!!?? Today I wanted to create a SWEET Holiday Card using these NEW Products along with an Image and Sentiment from the Jingle All the Way Stamp Set and the coordinating Jingle All the Way Die Set!!
Lets' get to my Project!!

I Started by creating my Card Panel!! I Started with a White Cardstock Panel and Inked with some Tumbled Glass Distress Oxide Ink!! I added some Water Splatters and some Black Soot Distress Paint Splatters for some added texture!! Then I Cut a piece of BOLD Black and White Patterned Paper for the bottom 1/3 of the Card Panel!!

I Stamped and Embossed the Cow Image and used Copic Markers to color it in Cow: C01, C03 & C5 Cheeks: R00 Nose: E40 & E42
I wanted to added some Holly and a Jingle Bell to the Cows Head to add to the Holiday Spirit!! So I Stamped and Embossed the Holly Image from the Jingle All the Way Stamp Set!! I used YG03, YG45 & G19 to color the Holly Leaves!! I Die Cut the Holly Leaves out using the coordinating Jingle All the Way Die Set!! I added some Whit Gel Pen details after I Die Cut it out using the coordinating Hay There Die Set!! I wanted to add it to a Circle Scallop Frame, so I Die Cut it out of some Patterned Paper and then built up the Frame from some White Cardstock I glued together 5 Frames!!

Then I Inked the Circle background using some Purple Tape as a Mask and Inking the Sky with some Tumbled Glass Distress Oxide Ink!! I added some Water Splatters for some Texture and then I removed the Mask and Masked off the Sky!! Then I inked the Ground with some Hickory Smoke Distress Oxide Ink!! I wanted to add Sparkling Snow, so I added some Glue Pen to my Ground and added some WoW Twinkling Puff Powder!! SWOON!! I LOVE the texture and sparkle of this Powder!! Then I added some Vintage Glass Glitter for even more Sparkle!!

I adhered the Patterned Paper Panel over the Inked White Cardstock Card Panel using some Therm O Web Ultra Bond Adhesive and then added some Zig Zag Stitching with my Sewing Machine to three different areas on my Card Panel!! I finished off the Design with some Sparkling Clear Sequins a Red Clay Heart, some Snowflakes and a FUN Twine Bow with a Jingle Bell to finish it off!! I LOVE the way it turned out!!
Please continue to hop along and visit the AMAZING Design Team blogs to be inspired by their AMAZING projects:
Debbie Marcinkiewicz – Paper Sweeties
THANKS SO MUCH for stopping by today and I hope you
Have a FABULOUS WEEK!!
COUNTRY HUGS-N-KISSES
LARISSA 💗


