Showing posts with label Frame 1 Die. Show all posts

Thursday, March 5, 2015

Spring Coffee Lovers Blog Hop w/ Paper Smooches!! =)

Pin It

Print

Hello!!
I'm stopping in to share a card that I've made for the Spring Coffee Lovers Blog Hop!!
I wanted to use the Sweet Little Coffee and Tea Dies from Paper Smooches!! I die cut them and started to play around with a Layout!!?? I truly had NO IDEA or Direction I was heading in, I just KNEW I wanted to use the Die Cuts!!?? After looking through my other Paper Smooches Dies I decided to Die Cut a Frame 1 Die!! I decided to cut it in half and use it as the Base/Table for my Coffee Mugs!! I then used the Shadows Stamp Set to create a Shadow for the Mugs on the Frame Die Cut using SSS Fog Ink!!  I then die cut a Brick Patterned Paper from the Crate Paper Boys Paper Collection!! I wanted to tone it down alittle, so I die cut a Vellum piece to layer over the top and I LOVE the way it looks!! Then a LightBulb went off!!??  =)  I thought it would be FUN to create a SWEET Little Coffee Mug Couple!! =) Since it is a Spring theme, I thought I'd go for a HAPPY Color Palette!! I used the New Incognito Stamp Set and I stamped and Embossed the Glasses and Face Features!! Then I fussy cut them out!! I used a N0 Copic Marker to add some shading to the Glasses!! I wanted them to be even more dressed up so I stamped a Handsome Little Hat from the Noggin Toppers Stamp Set and then I used the New Baby Bow Die and I die cut a Pretty Floral Patterned Paper for a Bow!! I LOVE the way they turned out, adding just the right finishing touches!!  =) I stamped my sentiment on the Vellum and then heat embossed it using Clear Embossing Powder!! At this point, I thought I was DONE!!?? Something felt like it was missing though!!?? So after thinking about it I decided the Coffee Mugs needed so Steam!! So I took the Flap Happy Stamp Set and stamped two different Trail Images to use as the Steam for my Coffee Mugs!! =) I wanted it to look as though the steam was rising and then forming Hearts!! =) I really LOVE the look!! I stamped them underneath the Vellum panel so they would appear faint just like real Steam!! =) I had to mask the images in orfer to get the look I wanted, but I really like the way it turned out!! I then took a Wink of Stella Clear Glitter Marker and traced over the Trail/Steam Images ontop of the Vellum and I really like the subtle look it adds!! I added a Tiny Heart Die Cut and then I decided to add Wiggly Eyes to the Glasses just to add even MORE FUN to this scene!! The Girl is Winking!! =)
THANKS SO MUCH for stopping by and I hope you have a FABULOUS WEEK!! 
COUNTRY HUGS-N-KISSES
LARISSA   =)

Wednesday, November 19, 2014

Paper Smooches Holiday Card!! =)

Pin It


Hello!!
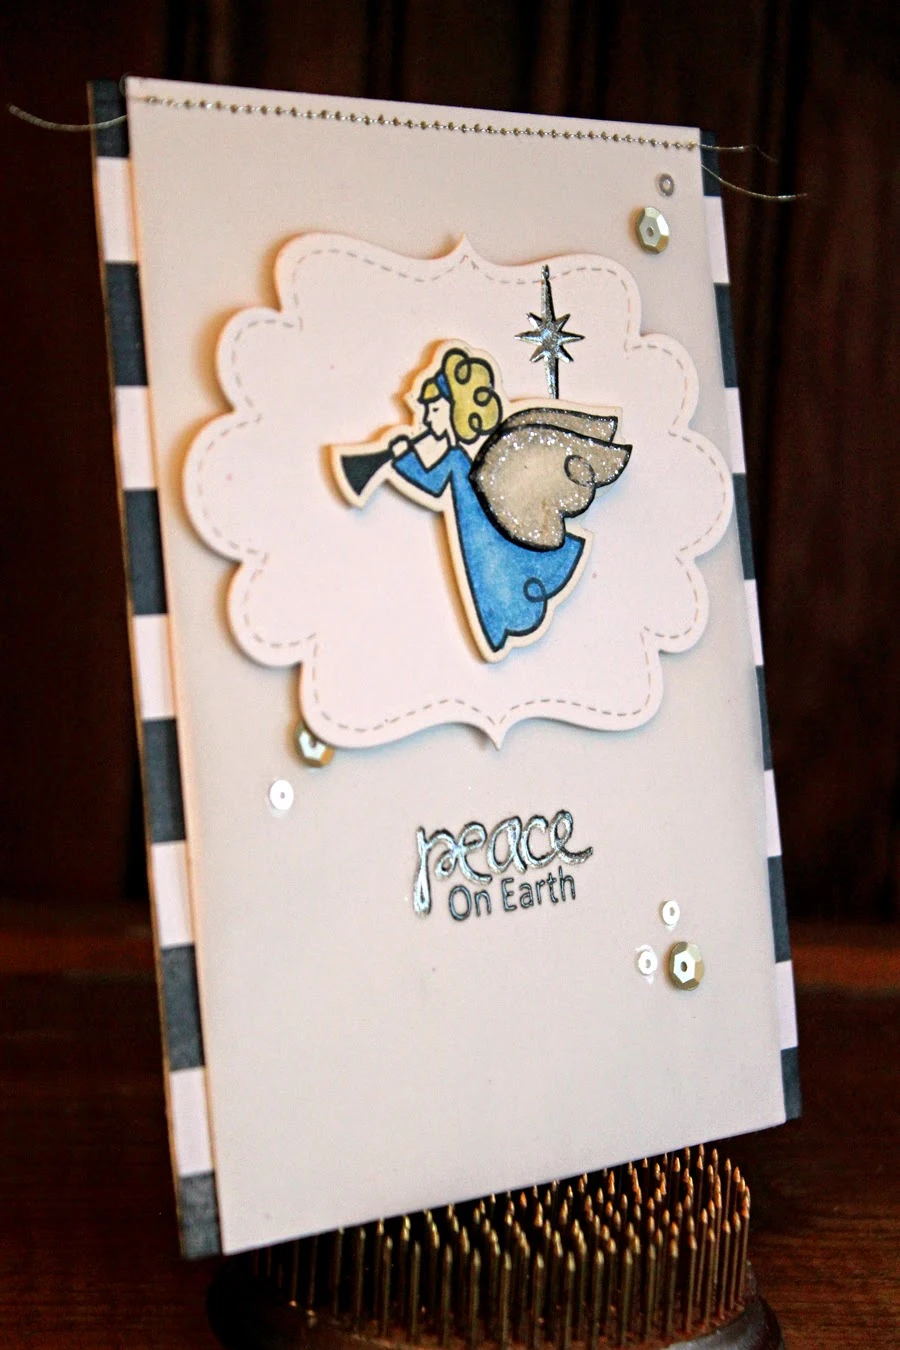
I'm stopping in to share a Holiday Card I've made for two different Challenges going on over on the Paper Smooches Blog!! I'm entering this into the Guest Designer Search - December Challenge and the Anything Goes Challenge on the Paper Smooches SPARKS Challenge Blog!! =)


I started by using one of my New Favorite Paper Smooches Stamp Set "A Blessed Christmas"!!
I LOVE EVERYTHING about this set and have SO MANY Ideas with the Images/Sentiments in the Set!! Now if I only had an EXTRA 4-6 Hours in a Day to be able to make them ALL!! HAHAHAHA!! =)


I wanted to use the Angel Image and I wanted to give her some Dimension by making the Wings 3-D!! I LOVE to add dimension to my cards and this was SUPER easy to do just by stamping and cutting the Wings out a couple different times!!  I cut the entire Wing Section out and then cut just the Large Single Wing Image out making sure to color around the edge of the Wings with a Black Soot Distress Marker to give them a seamless and finished look once all of the pieces were layered together!! I used my Color Pencils and Gamsol to color in my Angel and then I added some Rock Candy Distress Glitter to the wings for some added Sparkle!! I Die Cut a Stitched Frame 1 Die Cut from some White Neenah Solar Cardstock and stamped and Embossed the Holy Star Image using some Ranger Platinum Gold Embossing Powder!! Then to make it POP I stamped over it again off setting the Star alittle bit this time using my Versa Fine Black Ink and I LOVE the way it looks!! I added some Clear Embossing Powder over the Top just to finish it off and to make sure that I didn't end up with a smudge from Ink transfer!! =) I then took some Vellum and a White Neenah Solar Cardstock Panel and stitched across the top with my Sewing Machine and some Platinum Metallic Thread!! I then masked my Sentiment so I could repeat the same Platinum Embossing Powder treatment to the Peace word and then I stamped the rest of the sentiment in plain Versa Fine Black Ink and again covered it with Ranger Clear Embossing Powder to make sure I didn't have any Ink smears!! I added some Clear Crystal Pretty Pink Posh Sequins in 4mm size along with some Platinum Sequins from Hazel and Ruby!! I LOVE the little bit of extra Sparkle and FUN that they add and my Card was finished!!


Hopefully you Like my card as much as I do and I hope you'll think about playing along with one of these challenges too!!?? The Guest Designer Challenge ends tonight November 19th at 11:59 pm and the Anything Goes Challenge Deadline is Saturday, November 22nd at 11:59 pm PST !!
THANKS SO MUCH for stopping by and I hope you have a FABULOUS WEEK!!

COUNTRY HUGS-N-KISSES
LARISSA   =)