Showing posts with label Beach Therapy. Show all posts

Monday, August 3, 2020

Beach House Therapy Treat Box Celebrating Paper Sweeties 8th Anniversary!!

Pin It

HELLO CRAFTY FRIENDS

In honor of Paper Sweeties 8th Anniversary and to show our appreciation to our loyal customers, we have a ton of specials, sales, giveaways, contest and MORE going on all month long!!
This Gift Box is alittle more Time consuming, but WORTH it for that SPECIAL someone!! I've used the Sweet Cuts Treat Box Die along with the Treat Box Add-on: Home & Garden Stamp and Die Set to create my own Beach House Treat Box!! SWOON!! I LOVE how it turned out!! I went with a Beachy Color theme and colored everything with Copic Markers!! The only patterned paper I used is the Text Simple Stories Paper for the main part of the Beach House!! I added touches of Glitter Nuvo Drops for some extra Dimension and Sparkle and embossed the Mini Tag with some WoW Red Glitter Embossing Powder!! A Die Cut Anchor and some Strawberry Seam Binding finish off the Design!! 
We are celebrating Paper Sweeties 8th Anniversary ALL month long!! Debbie started this ‘sweet’ product line in August of 2012, and she can hardly believe that it’s already been 8 years of creativity, sharing and FUN!!  In honor of this momentous occasion, Paper Sweeties is giving their valued fans and customers a few ways to join in on the celebration!!

August 1st through 31st!

1.  WIN A $50 SHOPPING SPREE AT PAPER SWEETIES!
Visit our blog (here) and bookmark our site so you can find us quickly and keep up to date on all posts!  We will be sharing a 'hidden letter' on the Paper Sweeties company blog each day that we post throughout the month.  Read all of our August blog posts and find the hidden letter in each post.  After you have retrieved all the hidden letters, unscramble them to reveal the secret word.  Once you have solved the puzzle and figured out what the secret word is, contact us with your answer.  The FIRST person to contact us with the CORRECT secret word will WIN A $50 SHOPPING SPREE at Paper Sweeties ... but NOTE, you cannot submit your guess until we announce that the final 'hidden letter' has been shared!

2.  RECEIVE 25% OFF YOUR ENTIRE FULL-PRICE PURCHASE of $50+ AND HELP YOUR FAVORITE CREATIVE DESIGNER WIN BIG TOO!
Visit each of our talented Creative Designer's individual blogs where they will be sharing a 'unique coupon code' for 25% off your entire full-price purchase of $50 or more!  We will be keeping track of the unique coupon codes redeemed throughout the month and tallying the totals at the end of the month.  Be sure to support your favorite Paper Sweeties Creative Designer, because the designer with the most coupons redeemed will be earning a $50 gift certificate to the restaurant/store of their choice OR a $100 shopping spree at Paper Sweeties!

MY CODE: Larissa8

3.  EARN A $50 SHOPPING SPREE AT PAPER SWEETIES!
Purchase a minimum of $50 (product total must be at least $50 AFTER any coupons have been redeemed) during the month of August either through our e-commerce shop or in person from our She Shed during our August Day Crops.  For EACH $50 you spend in August, your name will be added to a basket and one name will be drawn on September 1st to be the winner of a $50 shopping spree at Paper Sweeties!

4. EARN A FREE STAMP SET!
All Paper Sweeties DOLLS and DOLL OUTFITS are BUY 3 GET 1 FREE during the month of August!  Please leave us a comment on your order form to let us know the name of the FREE doll or outfit stamp set you'd like as your prize!

5.  Receive 50% off our SALE and/or RETIRING SOON CATEGORIES!
As always, save BIG on clearance products being retired to make room for new goodies coming soon!  ALL Planner sets are included in this half off SALE!
THANKS SO MUCH for stopping by and have a FABULOUS WEEK!!
HUGS-N-KISSES
LARISSA 

Wednesday, July 15, 2020

Paper Sweeties July Look Back Inspiration Day 3!!

Pin It


HELLO!!

I'm here with Paper Sweeties for the July Look Back Inspiration Day 3!! Today I'm using the Beach Therapy Stamp Set and the coordinating Beach Therapy Sweet Cuts Die Set!! I've been really ENJOYING the process of making CAS Style Cards lately and I really LOVE the way this one turned out!! I think this Card could be used for SO MANY Occasions just by changing out the Sentiment!!
I Started by Die Cutting a TE Toffee Cardstock Panel and then I Die Cut a Circle Window out of a Piece of Scrap Paper and used it for a Stencil to Stencil the Sun using some TE Sugar Cube Ink!! I then removed the Stencil and added some Black Soot Distress Paint Splatters!! I wanted the Water to be defined so I added some White Stitching with my Sewing Machine and I really LOVE the added dimension and texture the stitching adds!!  


I Stamped and Embossed the Ship Image and Colored it with Copic Markers!! I used  Ship:             Sails:            
Heart and Flags:   R00, R02 & R22  I Die Cut the Image out and then I added some White Gel Pen Details!! I also added some Glitter Pen to the Heart and Flags and then coated them with some Morning Dew Nuvo Drops for some Shine and Dimension!! I added the Ship to the Card Panel using some Foam Tape just behind the Sails and then Glued the Ship to the Card Panel after I Stamped and Embossed the Sentiment!! I Stamped the Sentiment from the Mermaid Wishes Stamp Set in Versa Fine Black Onyx Ink and Embossed with some WoW Neutral Ultra Shimmer Glitter Powder!! I LOVE the touch of Sparkle and it ties the POPS of Coral together!! This Card could be used for a Welcome Baby Card, a Congrats Card, a Graduation Card a Birthday Card and SO MANY other Occasions just by changing the Sentiment!! 

Please continue to hop along and visit the AMAZING Design Team blogs to be inspired by their AMAZING projects:
Debbie Marcinkiewicz – Paper Sweeties 

THANKS SO MUCH for stopping by today and I hope you Have a FABULOUS WEEK!!


COUNTRY HUGS-N-KISSES
LARISSA ðŸ’—

Tuesday, July 14, 2020

Paper Sweeties July Look Back Inspiration Day 2!!

Pin It

HELLO!!

I'm here with Paper Sweeties for the July Look Back Inspiration Day 2!! Today I'm using the Beach Therapy Stamp Set and the coordinating Beach Therapy Sweet Cuts Die Set!! I've used the SWEET Treat Box Sweet Cuts Die Set to create the Treat Box using some Patterned Paper!! 
I Started by Die Cutting the Treat Box from some Patterned Paper and then inked the edges with Peacock Distress Oxide Ink!! I Stamped and Embossed the Image and then Colored it with Copic Markers!! I used  R000, R00, R02 & R22.
 I Die Cut the Image out using the coordinating Dies and then I added some White Gel Pen Details!! I added it to a Circle that I inked with some Peacock Feathers!! The Circle was Die Cut from the Circle Scallop Frames Sweet Cuts Die Set!! Then I added the Jelly Fish to the cent er of the Circle with some Foam Tape for some dimension!! I Die Cut the Tag from the     Die Set and then Stamped and Embossed the Sentiment!!  I added it to the Treat Box with a Mini White Clothes Pin and then added a Bubblegum Seam Binding Ribbon!! Such a SWEET Treat Box to give for ANY occasion!! 

Please continue to hop along and visit the AMAZING Design Team blogs to be inspired by their AMAZING projects:
Debbie Marcinkiewicz – Paper Sweeties 

THANKS SO MUCH for stopping by and come back tomorrow for some more AWESOME Inspiration!! 

Have a FABULOUS WEEK!!


COUNTRY HUGS-N-KISSES
LARISSA ðŸ’—

Friday, August 23, 2019

Paper Sweeties 7th Birthday Blog Hop w/ Pink & Main!!

Pin It


Hello!!
I'm here with Paper Sweeties today for a FUN Blog Hop with Pink & Main to help CELEBRATE Paper Sweeties 7th Birthday!! I have several projects to share for today and each one has its own personality!! I ENJOY the part of the FUN/CHALLENGE, when using products that have already been picked for you and you have to use them and create projects with them!! Well here's what I've created for today's Blog Hop!! 

My First Project HAD to be a Treat Box!! I LOVE making these and use them ALOT so I like having them on hand for when the occasion arises!! I started by using the Paper Sweeties Treat Box and Die Cut it from some of the Pink & Main It's a Party 6x6 Patterned Paper Pad!!
Here's a Photo to show how to use this Die Set even with 6x6 Patterned Papers!! It's alittle larger than most 6x6 patterns on the pads, but the Fold Side can be cut from the edge and will NEVER be seen as its adhered to the inside of the Treat Box!! So don't ever feel like you CAN'T use this Die Set with ALL of your 6x6 Papers!! If I'm honest that's ALL I use!!! I hardly ever buy 12x12 Patterned Papers unless I see a specific pattern I like!! I Die Cut 2 of these panels and then used some Gina K Designs Terrific Tape to adhere it together!! I cut a Rectangle to fit the front of the Treat Box and then added Distress Oxide Ink in both Scattered Straw and Peacock Feathers around the edges!! I used the NEW Cupcake and Sprinkles Stamp and Die Set and created a Sweet Cupcake!! Yummy enough to eat right!!?? 
I used Copic Markers to Color the Top and Wrap using colors that coordinate with the Patterned Paper!!  (Cupcake: RV00, RV11 & RV34  YR00 &YR18  Wrap: BG00, BG45 & BG69  Flowers: RV00, RV11 & RV34  Y11 & YR23  Leaves: YG21, YG25 & G07) I created the base of the Cupcake from some TE Cardstock and then used some Glitter Paper to Stamp and Emboss the Detail Layer and Die Cut it out and adhered it to the Cupcake Base!! I wanted to create a Candle so I decided to use a part of the Patterned Paper from the It's a Party Paper Pad!! Then I added a Pink & Main Birthday Boy Glossy Dots to the top for the Flame!! Tied a Twine Bow and added a Bubble Gum Seam Binding Bow, along with Stamping and Embossing the Sentiment from the Pink & Main Birthday Script Stamp Set onto a Tag Die Cut from the Paper Sweeties Beautiful Little Wishes Sweet Cuts Die Set using some VersaFine Black Onyx Ink and Embossing it with WoW Neutral Shimmer Glitter embossing Powder!! Added the extra Lil' Flower Image from the set and my Treat Box Gift Tag and the Design was complete!! 
I used more of the Patterned Paper from the Pink & Main It's a Party 6x6 Patterned Paper Pad as the background for my next Card inking the edges with some Weathered Wood Distress Oxide Ink!! Then I Die Cut the Paper Sweeties Circle Scalloped Frame Sweet Cuts Die from some Therm O Web Deco Foil Toner Sheet and Foiled it with some Turquoise Deco Foil!! It matches the Patterned Paper PERFECTLY!! I Inked the inside Circle with some Tumbled Glass Distress Oxide Ink and then adhered it to my Card Panel using Gina K Designs Foam Tape!! I Stamped and Embossed the Cupcake Image from the NEW Cupcake and Sprinkles Stamp and Die Set and created a Sweet Cupcake!! Yummy enough to eat right!!?? 
I used Copic Markers to Color the Top and Wrap using colors that coordinate with the Patterned Paper!!  (Cupcake: RV00, RV11 & RV34  YR00 &YR18  Wrap: BG00, BG45 & BG69  Flowers: RV00, RV11 & RV34  Y11 & YR23  Leaves: YG21, YG25 & G07) I created the base of the Cupcake from some TE Cardstock and then used some Glitter Paper to Stamp and Emboss the Detail Layer and Die Cut it out and adhered it to the Cupcake Base!! I wanted to create a Candle so I decided to use a part of the Patterned Paper from the It's a Party Paper Pad!! Then I added a Pink & Main Birthday Boy Glossy Dots to the top for the Flame!! I Stamped and Embossed the Present Image from the Paper Sweeties Hugs & Kisses Stamp Set!! I used the Copic Markers in Y11 & YR23!! Then I Die Cut the TE Sea Salt Cardstock from the Paper Sweeties Sweet Borders Die Set!! I Stamped and Embossed the Sentiment using some Versafine Black Onyx Ink and Embossing with WoW Neutral Shimmer Glitter Embossing Powder!! I LOVE how all of the SPARKLE adds to the Design of the entire Card!! 
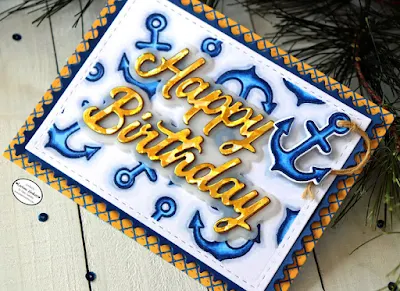
For my last Card I wanted to create more of a Masculine Design!! Although, I think this could work for a Female too!! These are some of my FAVORITE Colors, so I'd LOVE a card like this!! Depends on the recipient I suppose!!?? I started by using more of the Patterned Paper from the Pink & Main It's a Party 6x6 Patterned Paper Pad as the background for my last Card!! I die cut a Frame from some TE Blueberry Cardstock and then Stamped and Embossed the Anchor Image from the Paper Sweeties Beach Therapy Stamp Set onto the Card Panel using some Versa Mark Ink and Embossing with Ranger Ink Navy Metallic Embossing Powder!! I used my 1/2" Purple Tape to tape the edges off as I wanted to keep the border White!! 
I then used my Copic Markers to Color in the Anchor Images!! I used B32, B34 & B39 then added some shading around the Anchors using C3 & C00!! I LOVE the way it turned out and how well it matches the Patterned Paper!! I also wanted some dimension, so I decided to POP UP one of the Anchors beside the Happy Birthday Sentiment!! I used the coordinating Beach Therapy Sweet Cuts Set and added some Burlap Twine to make it look more realistic!! 
I used the Pink and Main Happy Birthday Dies for my Sentiment!! I Foiled some Deco Foil Toner Sheets with the Deco Foil in Gold Shattered Foil and then Die Cut the Happy!! I also Die Cut it again from some TE Mustard Cardstock and layered them altogether to create a 3-D Die Cut!! I Die Cut the Shadow Layer from some Vellum and then adhered them together!! I used Foam Tape to POP UP the sentiment and I LOVE how the Card turned out!! I hope I've INSPIRED you today with some different ideas on how to use these Images and that you'll create something to share with us as we CELEBRATE Paper Sweeties 7th Birthday!! Use the #papersweeties on Instagram so we can see what you create or share with us on the Paper Sweeties FAN FB Page!! CAN'T WAIT to see what you Create!! 

Hop along with the talented designers from Paper Sweeties and Pink & Main to spark your creativity!!
Visit the Pink & Main blog to see what their design team has created for today’s hop!
**********
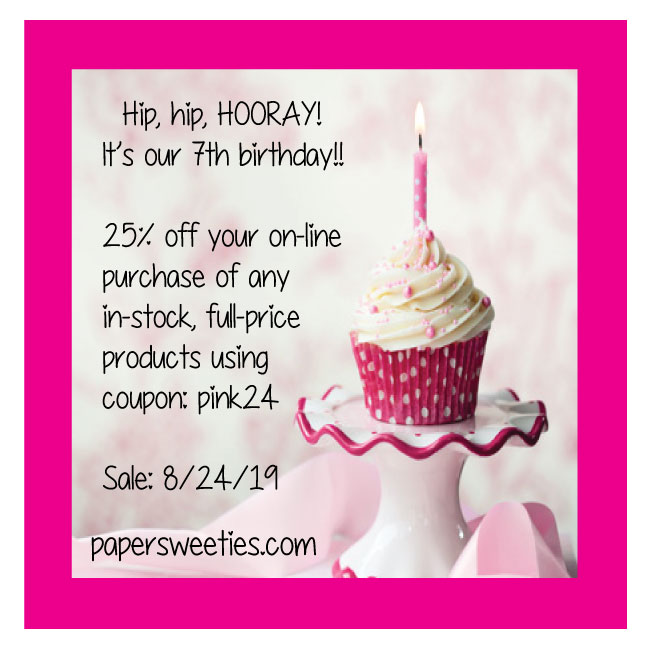
TODAY ONLY, TREAT yourself to 25% off your entire full-price order through our website using the coupon below … sale ends 8/24 at 11:59 pm EST!
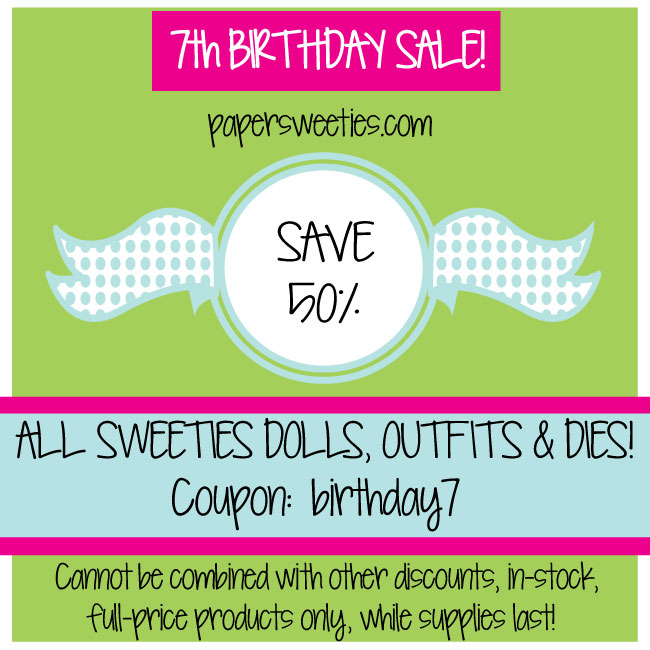
And, we are continuing our month-long celebration by offering HUGE 50% OFF DISCOUNTS on ALL Paper Sweeties dolls, doll dies and doll outfits using coupon below:

THANKS SO MUCH for stopping by and I hope you ENJOY ALL of the AMAZING Inspiration on the Blog Hop!! Have a FABULOUS WEEKEND!!

COUNTRY HUGS-N-KISSES
LARISSA   =)

Tuesday, July 16, 2019

Paper Sweeties July 2019 Release Rewind!!

Pin It

HELLO CRAFTY FRIENDS!!

Welcome to Day 3 of the Paper Sweeties 
July Release 2019!! 
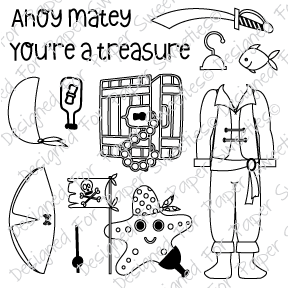
I created a CAS Card today using the *NEW* stamp set called "Beach Therapy" Stamp Set and the coordinating "Beach TherapySweet Cuts Die Set + the "Ahoy Matey" Stamp Set!!
 Here's a look at ALL of the the NEW Sets available NOW in the Paper Sweeties Store!!
Beach Therapy


You're a Treasure by Larissa Heskett for Paper Sweeties using Beach Therapy, Ahoy Matey and Circle Scalloped Fr
I've created a little Scene inside of the Circle Scalloped Frame Die!! I used a Newton's Nook Designs Sunscape Stencil along with Scattered Straw, Wild Honey and Peacock Feathers and Tumbled Glass Distress Oxide Inks!! The Sea was cut from some TE Sprinkles Cardstock!! Then I Colored the Light House Image with Copic Markers and adhered it to the center of the Frame with some Foam Tape!! I Die Cut the Frame from some Oreo TE Cardstock and used Foam Tape to POP it up!! A Heart Sprinkle was added to the Light House for some cuteness!! 

Then I Stamped and Embossed the Sentiment from the Ahoy Matey Stamp Set!! 

For more inspiration please visit the rest of the AMAZING Design Team Blogs!! 

THANKS SO MUCH for stopping by and I hope you have a FABULOUS WEEKEND!! 

COUNTRY HUGS-N-KISSES
LARISSA   =)

Monday, July 15, 2019

Paper Sweeties July 2019 Release Party!!

Pin It

HELLO CRAFTY FRIENDS!!

Welcome to Day 2 of the Paper Sweeties 
July Release 2019!! 
I created a couple SWEET Treat Boxes using the *NEW* stamp set called "Beach Therapy" Stamp Set and the coordinating "Beach Therapy" Sweet Cuts Die Set!!
 Here's a look at ALL of the the NEW Sets available NOW in the Paper Sweeties Store!!
Beach Therapy


 I wanted to make some SWEET Treat Boxes!! Summer is FULL of LOTS of occasions that require Gifts of some kind and I wanted to share an Easy Design along with more of time consuming Design!! BOTH SO WORTH the time and effort to create!! I started by creating the Treat Box using the Sweet Cuts Treat Box Die!! Then I added the Anchor Image to a Circle Die Cut from the Scalloped Circle Frames Die Set!! I inked the center with some Tumbled Glass and Peacock Feathers Distress Oxide Ink!! Tied a Burlap Twine through the Anchor and added the Frosting Seam Binding and Red Gross Grain Bow!! A Little Hello Tag was Die Cut and Stamped and Embossed to finish off the design!! 
This Gift Box is alittle more Time consuming, but WORTH it for that SPECIAL someone!! I've used the Sweet Cuts Treat Box Die along with the Treat Box Add-on: Home & Garden Stamp and Die Set to create my own Beach House Treat Box!! SWOON!! I LOVE how it turned out!! I went with a Beachy Color theme and colored everything with Copic Markers!! The only patterned paper I used is the Text Simple Stories Paper for the main part of the Beach House!! I added touches of Glitter Nuvo Drops for some extra Dimension and Sparkle and embossed the Mini Tag with some WoW Red Glitter Embossing Powder!! A Die Cut Anchor and some Strawberry Seam Binding finish off the Design!! 


For more inspiration please visit the rest of the AMAZING Design Team Blogs!! 

THANKS SO MUCH for stopping by and I hope you have a FABULOUS WEEKEND!! 

COUNTRY HUGS-N-KISSES
LARISSA   =)