Showing posts with label TE Cardstock. Show all posts

Wednesday, October 13, 2021

Newton's Nook Designs Holiday Release 2021 ~ Christmas Cocktails & Dairy Christmas!!

Pin It


HELLO CRAFTY FRIENDS!! 

I'm here with Day 3 of the 
Today we're showcasing the NEW "Christmas CocktailsStamp Set + coordinating Christmas Cocktails Die Set and the 
"Dairy ChristmasStamp Set + coordinating Dairy Christmas Die Set!! 
Let's take a look at the AWESOME New Sets!!
How AMAZING are these NEW Sets!!??
SQUEAL!! I just LOVE them and the FUN Designs!! 
Here's what I've created for today!!

I LOVE creating my own Patterned Paper with FUN Sets like the NEW "Christmas Cocktails" Stamp Set!! It's HARD to pick just one FAVORITE Image, so I like to use them ALL!! Plus, this is another PERFECT Way to create Mass Produced Christmas Cards because if you already have them all positioned in your MISTI Stamping Tool, then you can Stamp MULTIPLES all at the same time!! 
I Started by placing all of the Images into my MISTI Stamping Tool and Stamped my Card Panel using Versa Fine Black Onyx Ink and then Embossed with WOW Clear Gloss Embossing Powder!! (The Embossing wouldn't be necessary, but I personally LOVE the ADDED Texture and Dimension that it  adds to a SIMPLE Design like this) Especially for Christmas Cards!! Makes them feel that much MORE Special!! I did have to rearrange the Images 2 more times to fill in the entire background, but again with the MISTI Stamping Tool, this Process is EASY, Especially once you already have the Main Design figured out because you can just continue to Stamp ALL of your Card Panels in Assemble Line Style until they're ALL DONE!! The Final Step was to add some Black Soot Distress Paint Splatters!! Then I set the Panel aside to Dry Completely!! 
Next I Die Cut the Scalloped Circle from the NEW Meowy Christmas 6x6 Paper Pad using the Circle Frames Die Set!! 
I just ADORDLE the Red and White Polka Dot Patterned Paper!! Then I Die Cut 2 more Layered Circle Dies!! One from some TE Green Apple Cardstock and another from some TE Sugar Cube Cardstock!! I Stamped and Embossed the Sentiment onto the Sugar Cube Cardstock Circle and Embossed again with WoW Clear Gloss Embossing Powder!! Then to finish off the Design I Adhered the Scalloped Circle Sentiment to the top 2/3 of the Card using Foam Tape and then I added some Trinity Stamps Andradite Sparkle Rhinestones!! They compliment the Green Apple Cardstock, but also have a STUNNING Iridescent Sparkle that ties in with the Red Polka Dot Patterned Paper too as they SPARKLE in the Light!! Then I adhered a Trinity Stamps Candy Apple Heart Sprinkle Clay Embellishment to the Sentiment Circle and I LOVE the way it finishes off the Card!!  

Would you like to WIN the "Christmas Cocktails" or the "Dairy Christmas" Stamp Set!!?? 

We will choose ONE lucky winner for each stamp set!

Here's how to win: Comment on the NND blog and Design Team blogs (see list below)! The winner will be chosen at random from the collective reveal posts. Make sure to check out each of their blogs and comment for your chance to win. You will not know which blog has been chosen so the more you comment on the better your chances are of winning! You have until Thursday October 14th at 9pm ET to comment  -- winners will be announced on the blog post on Friday, October 15th. 

Check out all the awesome Design Team Blogs below to enter:

THANKS SO MUCH for stopping by today!! Make sure to leave me comments ALL Week for your chance to WIN!! I read EVERYONE and they MEAN more to me than you'll ever know!! 
 Make sure to check out the Newton's Nook Designs Blog on Friday, October 15th to see if you're one of the LUCKY Winners!! Then join us again tomorrow as we showcase the NEW "Prehistoric ChristmasStamp Set, "Christmas Pheasant" & "Heartfelt HolidaysStamp Set + coordinating Dies!! 
Have a FABULOUS WEEK!!

COUNTRY HUGS-N-KISSES
LARISSA 💖

Tuesday, October 20, 2020

Newton's Nook Designs October Holiday Release 2020 ~ Dear Santa & Nutcrackers!!

Pin It
Newton's Nook Designs Holiday Release 2020 #newtonsnook #newtonsnookdesigns #holidayrelease2020

HELLO CRAFTY FRIENDS!! 
I'm here with Day 2 of the 
Today we're showcasing the NEW "Dear Santa" Stamp Set coordinating Dear Santa Dies and "Nutcrackers" Stamp Set coordinating Nutcrackers Dies!!
Let's take a look at the AWESOME New Set!!
Dear Santa Stamp Set & Dear Santa Die Set by Newton's Nook Designs

Nutcrackers Stamp Set & Nutcrackers Die Set by Newton's Nook Designs
How FUN are these NEW Sets!! I LOVE them and I can't wait to share what I've created with you!! 
Nutcrackers Stamp Set & Nutcrackers Die Set by Newton's Nook DesignsNutcrackers Stamp Set & Nutcrackers Die Set by Newton's Nook DesignsNutcrackers Stamp Set & Nutcrackers Die Set by Newton's Nook DesignsNutcrackers Stamp Set & Nutcrackers Die Set by Newton's Nook DesignsNutcrackers Stamp Set & Nutcrackers Die Set by Newton's Nook Designs
For my 1st Card I've used the Image from the NEW Dear Santa Stamp Set!! I Stamped it with Versa Fine Black Onyx Ink and then Embossed it with WoW Clear Gloss Embossing Powder!! Then I used Copic Markers to Color the Image!! 
Santa: R14, R37 & R39   N0, N2, N3, N5 & N8  Y11 & YR23  
List: E81 & E84
Nutcrackers Stamp Set & Nutcrackers Die Set by Newton's Nook Designs
I Die Cut the Image out using the NEW coordinating Dear Santa Die Set!! Then I added some White Gel Pen details and some Midas Touch Shimmer Pen to Santa's Belt Buckle for some Shine!! Then I Die Cut a Stitched Circle from the Circle Frames Die Set from some Distress Watercolor Paper!! I Masked off the Ground using some Purple Tape and then Inked the background using Tumbled Glass Distress Oxide Ink!! Then I added some water Splatters for some texture!! I removed the Mask and reapplied it to the Sky to Ink the Ground using Hickory Smoke Distress Oxide Ink!! 
Nutcrackers Stamp Set & Nutcrackers Die Set by Newton's Nook Designs
For my Card Panel I Die Cut a Stitched Rectangle and then I used the HO, HO, HO Sentiment from the set to Stamp a Design in the background about 1/3 of the way up from the bottom of the Panel in TE Sea Salt Ink!!  I LOVE the light Grey Color as it adds to the Design, but isn't taking away from the Focal Image!! Then I Added some Black Soot Distress Paint Splatters for some Texture!! 
Nutcrackers Stamp Set & Nutcrackers Die Set by Newton's Nook Designs
I Die Cut the Large Scalloped Circle from some Black Plaid Patterned Paper using the 
Circle Frames Die Set and then Die Cut a Circle from some TE Cherry Pop Cardstock to layer behind the Focal Circle!! Then I Stamped and Embossed the Sentiment onto the Focal Circle using a Sentiment from a NEW Set being showcased later this Week!! So you're getting a SNEAK PEEK!! 😉 I Colored in the Sentiment using Copic Markers in Ombre` using R14, R37 & R39!! I Added some shading to the Ground using Copic Markers in N1 & N2 and used the Colorless Blender to blend things out!! I adhered the Santa using Foam Tape to the Focal Circle and adhered it together to the other Circles!! Then adhered them to the Card Panel again using Foam Tape!! I added some TE Gold Drip Drops to finish off the Design and I LOVE the way it turned out!!  
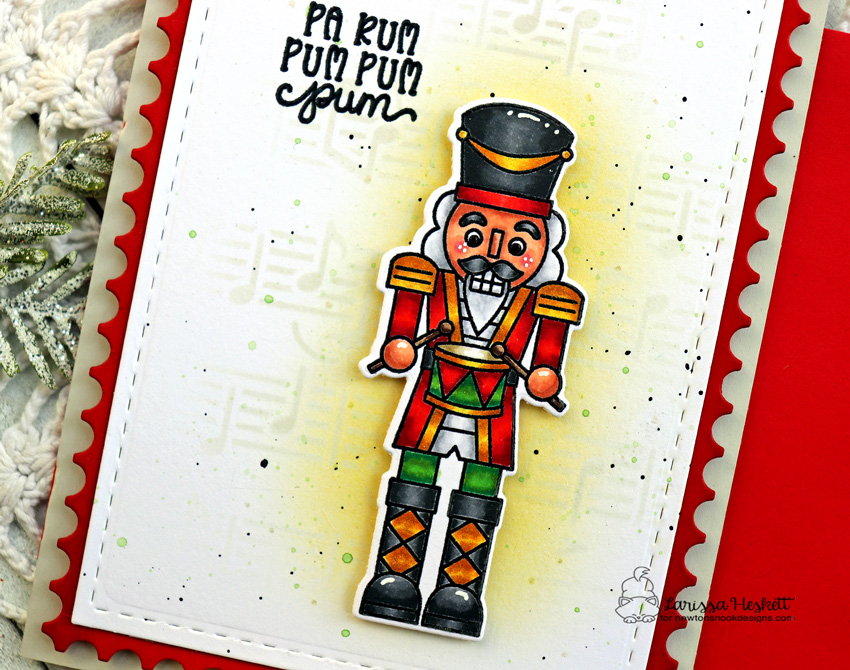
Pa Rum Pum Pum Pum Card by Larissa Heskett created for Newton's Nook Designs using Nutcrackers Stamp Set, Nutcrackers Die Set, Music Stencil & Framework Die Set #newtonsnook #newtonsnookdesigns #nutcrackers #musicstencil #frameworkdieset
I Started by Stamping and Embossing the NEW Nutcracker Image and used Copic Markers to color it in!! 
Red: R14, R37 & R39  Green: YG03, YG17 & G16   
Yellow: Y11, Y15, YR23  Black: N3, N5 & N8   
White: N0, N1 & N2  Skin: E000, E11 & E13   Cheeks: RV11  
Drum Sticks: E33, E39 
Pa Rum Pum Pum Pum Card by Larissa Heskett created for Newton's Nook Designs using Nutcrackers Stamp Set, Nutcrackers Die Set, Music Stencil & Framework Die Set #newtonsnook #newtonsnookdesigns #nutcrackers #musicstencil #frameworkdieset
I Die Cut the Image our using the NEW coordinating Nutcrackers Die Set!! I added some White Gel Pen Details and some Midas Touch Shimmer Pen to ALL of the Yellow areas for a touch of Shine!! 
Pa Rum Pum Pum Pum Card by Larissa Heskett created for Newton's Nook Designs using Nutcrackers Stamp Set, Nutcrackers Die Set, Music Stencil & Framework Die Set #newtonsnook #newtonsnookdesigns #nutcrackers #musicstencil #frameworkdieset
I Die Cut a Stitched Rectangle Card Panel and added some Scattered Straw Distress Oxide Ink behind where I wanted the Nutcracker Image to go!! Then I placed the Music Stencil over my Card Panel after I sprayed the back out it with Pixie Spray!! Then I added some Pumice Stone Distress Oxide Ink using an Ink Blender!! Then I added some Water Splatters and some Mowed Grass Distress Ink Splatters!! I also added some Black Soot Distress Paint Splatters and some Midas Touch Shimmer Pen Splatters to finish off the Design!! 
Pa Rum Pum Pum Pum Card by Larissa Heskett created for Newton's Nook Designs using Nutcrackers Stamp Set, Nutcrackers Die Set, Music Stencil & Framework Die Set #newtonsnook #newtonsnookdesigns #nutcrackers #musicstencil #frameworkdieset
I Stamped and Embossed the Sentiment from the set using Versa Fine Black Onyx Ink and Embossed with WoW Clear Gloss Embossing Powder!! Then I adhered the Nutcracker Image using Foam Tape!! I Die Cut a Framework Die Cut Frame from some TE Cherry Pop Cardstock and adhered the Card Panel to the Frame then adhered it to a TE Sea Salt Cardbase using some Fun Foam!! I LOVE this Card and the way that the Nutcracker seems to be bringing a BRIGHT Light with him as he Plays his Holiday Music!! 

Would you like to win theDear Santa Stamp Set or theNutcrackers Stamp Set!!?? We will choose ONE Lucky Winner for each stamp set!!

We will choose ONE lucky winner for each stamp set!!

Here's how to win: Comment on the NND blog and Design Team blogs (see list below)! The winner will be chosen at random from the collective reveal posts. Make sure to check out each of their blogs and comment for your chance to win. You will not know which blog has been chosen so the more you comment on the better your chances are of winning! You have until Thursday October 22nd at 9pm EST to comment  -- winners will be announced on the blog post on Friday, October 23rd. 

Check out all the awesome Design Team Blogs below to enter:

Newton's Nook Designs

Ellen Haxelmans

Larissa Heskett

Samantha Mann

Zsofia Molnar

Maria Russell

Andrea Shell

Tatiana Trafimovich

Amy Tsuruta

Amanda Wilcox


THANKS SO MUCH for stopping by today!! Come back tomorrow for a look at the NEW "A Kitten Christmas" Stamp Set + coordinating Diesand "Christmas Puppies" Stamp Setcoordinating Dies!!
 Don't forget to check out the Newton's Nook Designs Blog on the 23rd to see if you're one of the LUCKY Winners!! 
Have a FABULOUS WEEK!!

COUNTRY HUGS-N-KISSES
LARISSA   💗

Friday, September 11, 2020

Thinking of You Card w/ Newton's Nook Designs!!

Pin It
Newton
HELLO CRAFTY FRIENDS!! 
I'm up on the Newton's Nook Design Blog today sharing this BEAUTIFUL Thinking of You Card showcasing the Hummingbird Stamp Set!! SWOON!! I just LOVE the Images in this Set and there are SO many ways to use them!! 
Hummingbird Stamp & Die Set by Newton's Nook Designs
Here's a look at the Hummingbird Stamp Set just in case its NEW to you!!??
Thinking of You Card by Larissa Heskett for Newton's Nook Designs using Hummingbird Stamp Set, Floral Roundabout Stamp Set and Circle Frames Die Set #hummingbird #floralroundabout #circleframes #thinkingofyou #tayloredexpressions
I Started by Stamping and Embossing my Images and coloring them with Copic Markers!! 
I used Versa Fine Black Onyx Ink and WoW Clear Gloss Embossing Powder!! I used Copic Markers to color the Images!! I've used NEW to me Copic Marker Colors!! I'm trying to step out of my Normal Color Combos and experiment with some NEW Combos!! It was FUN to see how they came together and I really like the Combo!! (Flowers: BV000, BV00, BV02 & BV08  Y00 & Y13   Hummingbird: YG00, YG11, YG17 & YG99  RV00, RV02, RV06 & RV09   E40 & E81)
After Coloring I Die Cut them out using the coordinating Hummingbird Die Set!! I added some White and Black Gel Pen details to add some highlights!!  
Thinking of You Card by Larissa Heskett for Newton's Nook Designs using Hummingbird Stamp Set, Floral Roundabout Stamp Set and Circle Frames Die Set #hummingbird #floralroundabout #circleframes #thinkingofyou #tayloredexpressions
Next I created my Circle Focal Point using the 
Circle Frames Die Set!! I Die Cut some TE Cookie Monster Cardstock using the Scalloped Circle and a White Stitched Circle!! I Inked using some TE Cookie Monster Ink and then I Stamped and Embossed the sentiment "Thinking of you" from the Floral Roundabout Stamp Set three times around the circle edge!!  Although the sentiment comes as a straight Stamp, you can easily create a curve with it onto your stamping block or your MISTI Stamping Tool!! I like to create a Panel that I Die Cut my Circle from and then I add the Panel inside of my MISTI Stamping Tool and then I add the Circle to the Die Cut opening that it was Die Cut from after I apply some removable adhesive to the base of the MISTI so that the Circle will stay in place while I'm Stamping!! I align the Sentiment where I want it and then pick it up with the MISTI!! Just another AWESOME  thing about photopolymer stamps!!
Thinking of You Card by Larissa Heskett for Newton's Nook Designs using Hummingbird Stamp Set, Floral Roundabout Stamp Set and Circle Frames Die Set #hummingbird #floralroundabout #circleframes #thinkingofyou #tayloredexpressions
 After Heat Embossing I added some Rose Quarts Glitter Pen Splatters for some Sparkle and Shine!! The Rose Iridescent Glimmer really adds to the Design!! Plus, who doesn't like some Sparkle!!?? 😍
For the Card Panel background I added a subtle pattern of flowers using the large image from the Floral Roundabout Stamp Set!! I Stamped with some TE Sea Salt!! I LOVE this Ink not only for Subtle Stamping, but it also Stamps really well on Colored Cardstock for a BEAUTIFUL Tone-on-Tone look!! Then I added some Black Soot Distress Paint Splatter and some Nuvo Rose Quartz Shimmer Splatters!! Then I finished off the design with some Studio Katia Pearls!! They have a BEAUTIFUL Iridescent finish on them and it really coordinates with the Rose Quarts Splatters!! I created a FUN coordinating Envelope too!! I used a coordinating TE Cookie Monster Envelope so it matches the Card PERFECTLY and Stamped the Floral Roundabout Stamp Set using TE Sea Salt Ink!! Then I added some Rose Quartz Splatters to tie it all together!! I LOVE the way this Card and Envelope Set turned out!! 
I hope I've INSPIRED you today!!?? 
THANKS SO MUCH for stopping by and I hope you have a FABULOUS WEEKEND!!
 

COUNTRY HUGS-N-KISSES
LARISSA  🌸

Saturday, August 29, 2020

Congratulations on your New Home with Poppystamps!!

Pin It
6a01157003623c970c01b8d25908ec970c-320wi
HELLO CRAFTY FRIENDS!! 
I'm here today to share a Congratulations Card that I've made for a Friend who just purchased their First Home!! I'm in LOVE with the NEW Poppystamps Proper Brick House Craft Die, so I had to use it for my Card today!! I'm also linking up to the Poppystamps Challenge #71 Heat Wave!! 
I Die Cut the Proper Brick House Die from some TE Sea Salt Cardstock, and some Earl Grey Card Stock and then I used Distress Oxide Inks to ink it up!! I used Gathered Twigs, Persimmon, Dried Marigold and Hickory Smoke and I LOVE the way it turned out!! I also Inked another piece of Cardstock for behind the Die Cut I wanted the Layered Looks, so I left some of the Bricks in the Die Cut and removed others!! I inked the Early Grey Cardstock that I used for the Frames and the Rook using some Hickory Smoke and Gathered Twigs Distress Oxide Ink!! I Die Cut the inside of the Windows from some White Cardstock and Inked them with some Mustard Seed Distress Oxide ink and then added some Midas Touch Glitter Pen and coated them with some Nuvo Drops to make them look like Glass Windows!! I LOVE the way they Shimmer and Shine in the light!! 
I Die Cut some Grass for the Background and then Inked the Background with some Tumbled Glass, Peacock Feathers and Mustard Seed Distress Oxide Inks and added some water splatters!! I LOVE the way that the HOT Sun is Shinning from behind the House almost making it appear ILLUMINATED!! I think that goes along with the Challenge along with the Warm Colors that I used!! 
THANKS SO MUCH for stopping by today and I hope you have a FABULOUS WEEKEND!!

COUNTRY HUGS-N-KISSES
LARISSA  💖
 

Wednesday, August 19, 2020

Newton's Nook Designs August Release ~ Batty Newton, Spooky Roundabout & Spiderweb Stencil!!

Pin It
HELLO CRAFTY FRIENDS!! 
I'm here with Day 3 of the 
Newton's Nook Designs June Release!! Today we're showcasing the NEW "Batty Newton" Stamp Set + coordinating Batty Newton Dies"Spooky Roundabout" Stamp Set, and the Spiderweb Stencil!!
Let's take a look at the AWESOME New Set!!

Batty Newton Stamp & Die Set by Newton's Nook Designs

Spooky Roundabout Stamp Set + Circle Frames Die Set + Banner Trio Die Set by Newton's Nook Designs
Spiderweb Stencil by Newton's Nook Designs

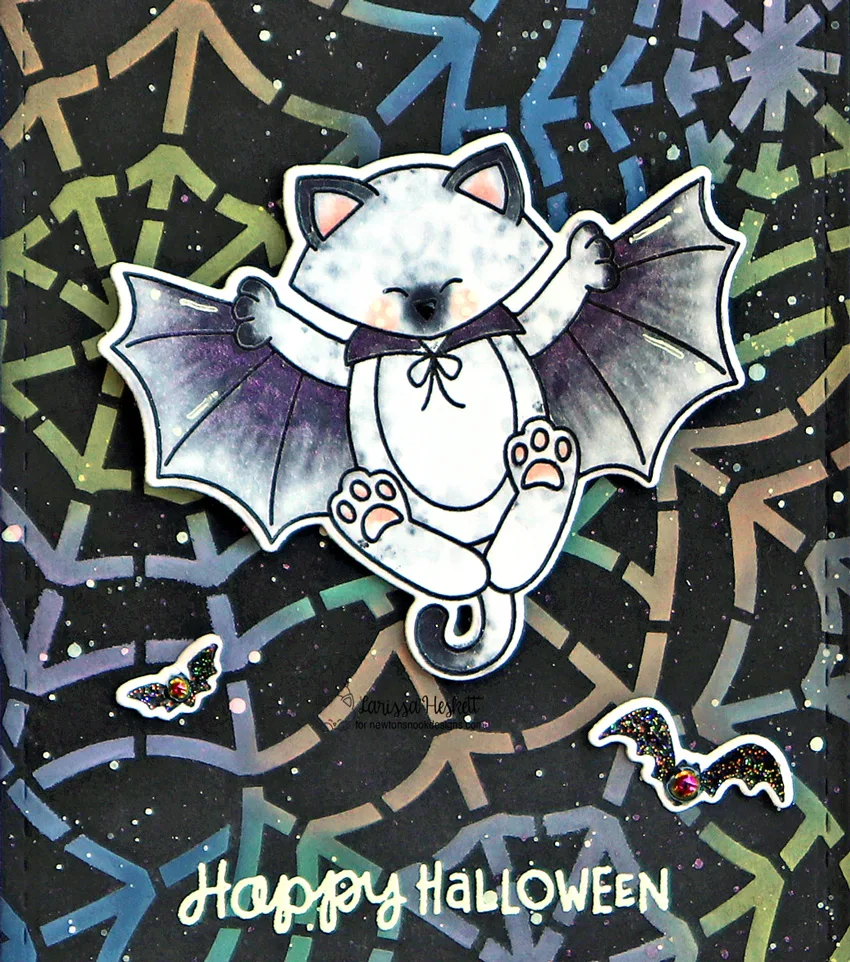
Happy Halloween Card by Larissa Heskett for Newton's Nook Designs using Batty Newton, Spiderweb Stencil, & Frames & Flags #newtonsnook #newtonsnookdesigns #battynewton #spidewebstencil #framesandflags
SQUEAL!! I just LOVE this SWEET NEW Batty Newton Stamp Set!! I wanted to create a FUN Background to set my scene so I sprayed the backside of the NEW Spiderweb Stencil and adhered it over my Black cardstock Card Panel!! 
Spiderweb Stencil by Newton's Nook Designs inked with Distress Oxide Inks
I used Distress Oxide Inks to Ink up the FUN Design!! Squeezed Lemonade, Dried Marigold, Wiled Violet, Twisted Citron and Blueprint Sketch!! I tried to apply the Colors beside a Color that would blend rather than make mud!! I really LOVE the results and I think this would be FUN to play around with more to see what other results you could get!! I then Die Cut the Panel using a Stitched Rectangle Die!! 
Happy Halloween Card by Larissa Heskett for Newton's Nook Designs using Batty Newton, Spiderweb Stencil, & Frames & Flags #newtonsnook #newtonsnookdesigns #battynewton #spidewebstencil #framesandflags
I Stamped and Embossed the NEW Batty Newton Image and colored it in using Copic Markers!! Batty Newton: N0, N2, N4, N6 & N8    Cheeks: R11  Then I Die Cut it out using the coordinating NEW Batty Newton Die Set!! I Stamped and Embossed the Bat Images also from the Set in Black Onyx Ink and Embossed with WoW Neutral Ultra Shimmer Embossing Powder!! Then I Die Cut them out!! I added some Nuvo Rose Quartz Shimmer Pen to the Batty Newton Wings and the Collar and then I also added some Splatters to the Spiderweb Background!! SWOON!! I LOVE the Shimmer it adds!! 
Happy Halloween Card by Larissa Heskett for Newton's Nook Designs using Batty Newton, Spiderweb Stencil, & Frames & Flags #newtonsnook #newtonsnookdesigns #battynewton #spidewebstencil #framesandflags
I Die Cut a Frames & Flags Scalloped Rectangle from some TE Lavender Glaze Cardstock and inked the edges litghtly with some Wilted Violet Distress Oxide Ink to help make the panel POP!! Then I adhered the Stenciled Card Panel after I Stamped amd Embossed the Sentient in WoW Bright White Embossing Powder!! I also added some Picket Fence Distress Paint Splatters for some Light Highlights!! I Adhered the Batty Newton with some Gina K Designs Foam Squares and adhered the other Bats jut gluing the center of them so I could POP up their Wings!! I adhered 2 Black Iridescent Pearls to the center of the Bats and y Card was finished!! I also created a coordinating Envelope using a TE Lavender Glaze Envelope and Inking the NEW Spiderweb Stencil in Black Soot Distress Ink!! I also added some Picket Fence Distress Splatters and I LOVE the way this set turned out!! 
Fab(BOO)lous Card by Larissa Heskett for Newton's Nook Designs using Spooky Roundabout and Circle Frames Die #newtonsnook #newtonsnookdesigns #spookyroundabout #circleframes #fabboolous
For my next Card I KNEW I wanted to use more of a Pastel Color Scheme and I REALLY LOVE the way it turned out!! I Started by Stamping and Embossing the NEW Spooky Roundabout Image onto some Distress Watercolor Paper!! Then I used Copic Markers to Color it in!!  Ghosts: V000 & V01   Pumpkins: YR00 & YR02    Skulls: YG00 & YG01  Stars: Y11   Candycorn: YR00, Y11 & N0    Bats: T0 & T3   Background: B41, B45 & B37 
Fab(BOO)lous Card by Larissa Heskett for Newton's Nook Designs using Spooky Roundabout and Circle Frames Die #newtonsnook #newtonsnookdesigns #spookyroundabout #circleframes
I Die Cut the Image out using the Circle Frames Die Set and then backed it with a TE Oreo Cardstock Circle and then I Die Cut the Scalloped Circle from some TE Lavender Glaze Cardstock!! I Inked the edges with some Wilted Violet Distress Oxide Ink to help make it POP!! Then I created my Card Panel!! I Stamped the NEW Spooky Roundabout Image onto the bottom 1/3 of my Card Panel using some TE Sea Salt Ink!! I inked it a few times using my MISTI Stamping tool to help make it alittle darker and I really LOVE it!! Then I added some Black Soot Distress Paint Splatters and then I Stamped and Embossed my Sentiment using my MISTI Stamping tool to help curve the sentiment to HUG the Scalloped Circle Focal Point!! I LOVE curving my Sentiments and really think it helps to draw your eye to the Center of the Card!! New I adhered a few Iridescent Pearls to finish off the Design!! 
Fab(BOO)lous Card by Larissa Heskett for Newton's Nook Designs using Spooky Roundabout and Circle Frames Die #newtonsnook #newtonsnookdesigns #spookyroundabout #circleframes
To finish off this Set I Stamped a coordinating TE Lavender Glaze Envelope with the NEW Spooky Roundabout Image using the same TE Sea Salt Ink!! The MISTI Stamping tool makes this easy to do!! Then I Stamped and Embossed the Sentiment and added some Black Soot Distress Paint Splatters!! This card just makes me HAPPY!! 

Would you like to win the "Batty Newton" or "Spooky RoundaboutStamp Set!!?? 

 This stamp set will be given away to ONE lucky winner!!

Here's how to win: Comment on the NND blog and Design Team blogs (see list below)! The winner will be chosen at random from the collective reveal posts. Make sure to check out each of their blogs and comment for your chance to win. You will not know which blog has been chosen so the more you comment on the better your chances are of winning! You have until Thursday August 20th at 9pm EST to comment  -- winners will be announced on the blog post on Friday, August 21st. 

Check out all the awesome Design Team Blogs below to enter:

Newton's Nook Designs

Ellen Haxelmans

Larissa Heskett

Samantha Mann

Zsofia Molnar

Maria Russell

Andrea Shell

Tatiana Trafimovich

Amy Tsuruta

Amanda Wilcox


THANKS SO MUCH for stopping by today!! Come back tomorrow for a look at the NEW "Knight Owl" Stamp Set + coordinating Dies, and "Pug-kin" Stamp Setcoordinating Dies!!
 Don't forget to check out the Newton's Nook Designs Blog on the 21st to see if you're one of the LUCKY Winners!! 
Have a FABULOUS WEEKEND!!

COUNTRY HUGS-N-KISSES
LARISSA   💗
S U P P L I E S
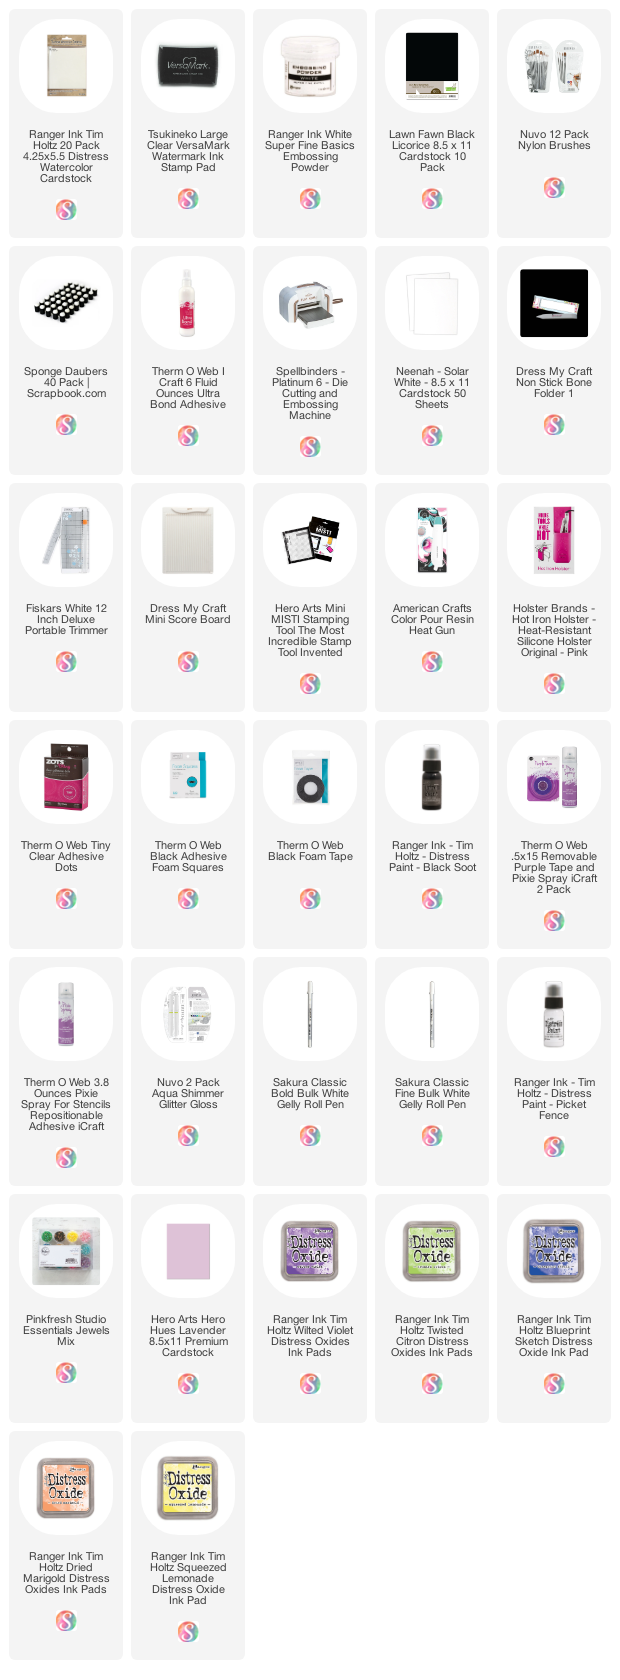
Below you will find links to the supplies used to create this project(s). Click the icon for the store underneath the thumbnails to start shopping. Where available I use compensated affiliate links at no extra cost to you. Your support helps me to keep bringing you new projects. Thank you!!