Showing posts with label Rainbow Shattered Glass Deco Foil. Show all posts

Saturday, May 1, 2021

InterNational Scrapbooking Day w/ Therm O Web & Page Maps!!

Pin It
HELLO CRAFTY FRIENDS!! 


I'm here with Therm O Web, as today is International Scrapbooking Day!! YIPPEE!! We want to CELEBRATE by offering a Chance to WIN a $30 Gift Card to the Therm O Web Store + some Goodies from Photoplay Paper!! 

All you have to do is create either a Layout or a Card that's INSPIRED by one of the Page Maps Sketches above and share with us Via Social Media, making sure to TAG #thermoweb so they can find it!!  
I've created a Duo of Cards for today using the 1st Sketch as my INSPIRATION along with some NEW Therm O Web Deco Foil Toner Card Fronts and some Newton's Nook Designs Products as we just finished up a FULL Week of Collaborations w/ even more chances to WIN that EXPIRES on SUNDAY!! So if you haven't already make sure you ENTER HERE and HERE for a chance to WIN!!
I Started with the NEW Deco Foil Toner Card Fronts ~ Time to Fly!! Then I Cut a piece of Deco Foil in Rainbow Shattered Glass large enough to cover the Toner Card Front and ran it through my Laminating Machine!! 
SWOON!! How BEAUTIFUL is this!! Then SAVE the Negative Foil as we'll use this to make our Second Card!! 
I took the Negative Foil Piece and Placed it over a Piece of Deco Foil Toner Sheets and ran it through my Laminating Machine!! Then removed the Film and SWOON!! Another Piece for my Second Card Panel!! NO WASTE!! 
Then I added some Black Soot and Picket Fence Distress Paint Splatters for some dimension!! 
I Started by Cutting a Strip of Vellum for BOTH Cards!! Then I Die Cut the NND Frames Squared Die Set Label from both Black and White Cardstock!! 
Next I Die Cut the Smaller Label from the NND Slimline Frames & Windows Die Set again from both White and Black Cardstock!! 
Then I also Die Cut the Same Small Label twice from a Piece of Deco Foil Toner Sheet that I Foiled with the Rainbow Shattered Glass Deco Foil!! I LOVE how it POPS on top of the Large Label Die Cut!! I tried to line up the Dies so that the Labels would be Die Cut from the same Color area for a seamless Design!! 
Next I Die Cut 4 of the NND Butterfly Images using the NND Slimline Frames & Potholes Die Set!! Again using the same Deco Foil Toner Sheet that I foiled with the Rainbow Shattered Glass Deco Foil!! I tried to align it again with area of the Card Panel so the Foil colors would be Seamless!! 
Just make me HAPPY!! 
I adhered the Vellum Strips to the Deco Foiled Toner Card Front Panels using Gina K Designs Foam Tape!! Then I adhered the Small Label on top using some Ultra Bond Adhesive!! I Adhered the Large Label using another piece of Gina K. Designs Foam Tape and then adhered the Small Deco Foiled Toner Sheet Label on top of the Large Label using more Ultra Bond Adhesive!! 
I Stamped the Small Stitched Circles Die Cut from the NND Circle Frames Die Set using the "You are so Kind" Sentiment from NND Little Lilies Stamp Set!! I Embossed with WoW Embossing Powder in Clear Gloss & Bright White!! Then I adhered some Trinity Stamps Midnight Ball Baubles!! The iridescent Color pairs so well with the Rainbow Deco Foil when moved in the Light!! 

So there you have it a DUO of Cards using by the 1st Sketch!! I hope I've INSPIRED you and that you'll join in on the FUN for SEVERAL chances to WIN!! Just follow the LINKS I've provided!! 
Also, here's another way to SAVE this WEEKEND taking advantage of a ONE DAY SALE!!


Hope you have a FABULOUS WEEKEND and that you get the Chance to CREATE!! 

COUNTRY HUGS-N-KISSES 
LARISSA πŸ’–

Friday, January 22, 2021

Stock You Stash Challenge w/ Therm O Web & Reverse Confetti ~ LOVE is in the Air!!

Pin It

HELLO CRAFTY FRIENDS!! 
I'm joining in the FUN Reverse Confetti Stock Your Stash Challenge ~Love is in the Air!! Therm O Web Deco Foil Products make this Challenge even more AMAZING!! 
Just look at the SHINE!! SWOON!! 
I'm sharing this Card using several of the NEWLY Released Products from Reverse Confetti!! I Started by Die Cutting the NEW Outlined Frame Cover Panel from some Distress Watercolor Cardstock!! Then I Inked the inside top right hand side of the Cover Panel using some Tumbled Glass Distress Oxide Ink!! Then I added some Water Splatters and some Black Soot Distress Paint Splatters for some Texture!! 

I wanted to back the NEW Outlined Frame Cover Panel with some NEW Deco Foil in Glass Slipper!! I Cut a Large Piece of the Glass Slipper Deco Foil and placed it over the Deco Foil Toner Sheets, color side up!! Placed it in a Parchment Sheet Folder and ran it through my Laminating Machine!! Then I removed the Film and Die Die Cut the Rectangle and the Big Love Die!! I backed the Outline Frame Cover Panel with the Glass Slipper Deco Foil using some Ultra Bond Adhesive and SWOON!! I LOVE it makes the Frame POP!! 
I wanted to Die Cut the center of the Heart for the Big Love Die using some Rainbow Shattered Glass Deco Foil!! I Cut a Piece of Deco Foil Toner Sheets and then covered it with a Piece of Rainbow Shattered Glass Deco Foil large enough to cover the Deco Foil Toner Sheet and ran it through my Laminating Machine Color Side up and inside of a Parchment Sheet Folder!! Then I Die Cut the Heart!!  
I Stamped and Embossed the SWEET Dog Holding the Heart from the NEW Reverse Confetti Love is in the Air Stamp Set using Versa Fine Black Onyx Ink and Embossed with WoW Clear Gloss Embossing Powder!! Then I Colored it with Copic Markers!! 
Puppy: C0, C2, C4 & C8  Cheeks: R11  Heart: RV04 & RV09
Then I Die Cut the Image out using the coordinating NEW Love is in the Air Dies!! Then I adhered Gina K Designs Foam Tape and Squares to both the Rainbow Shattered Glass Deco Foiled Heart and the Dog Image!! I adhered the Heart to the Big Love Die Cut Word and then adhered it to the bottom Right Hand Side of the Card Panel using some Ultra Bond Adhesive and then adhered the Dog on top of the Big Love Die Cut using the Gina K Designs Foam!! 
Then to finish off the Design I added a Pink Clay Heart Embellishment that I colored with Copic Markers to match the Heart the Dog is holding using a Zots Bling Adhesive Dot!! I like the way that the Pink Hearts create a Visual Triangle to help move your eyes across the Design of the Card!!
This Card is SURE to BRIGHTEN the recipients day and could be used for several occasions!! I hope I've INSPIRED you today and if you'd like to check out a few more Card Ideas using some of the same Products please visit the BLOG POST HERE!! 

THANKS SO MUCH for stopping by today and I hope you have a FABULOUS WEEKEND!! 

COUNTRY HUGS-N-KISSES
LARISSA  πŸ’—

S U P P L I E S
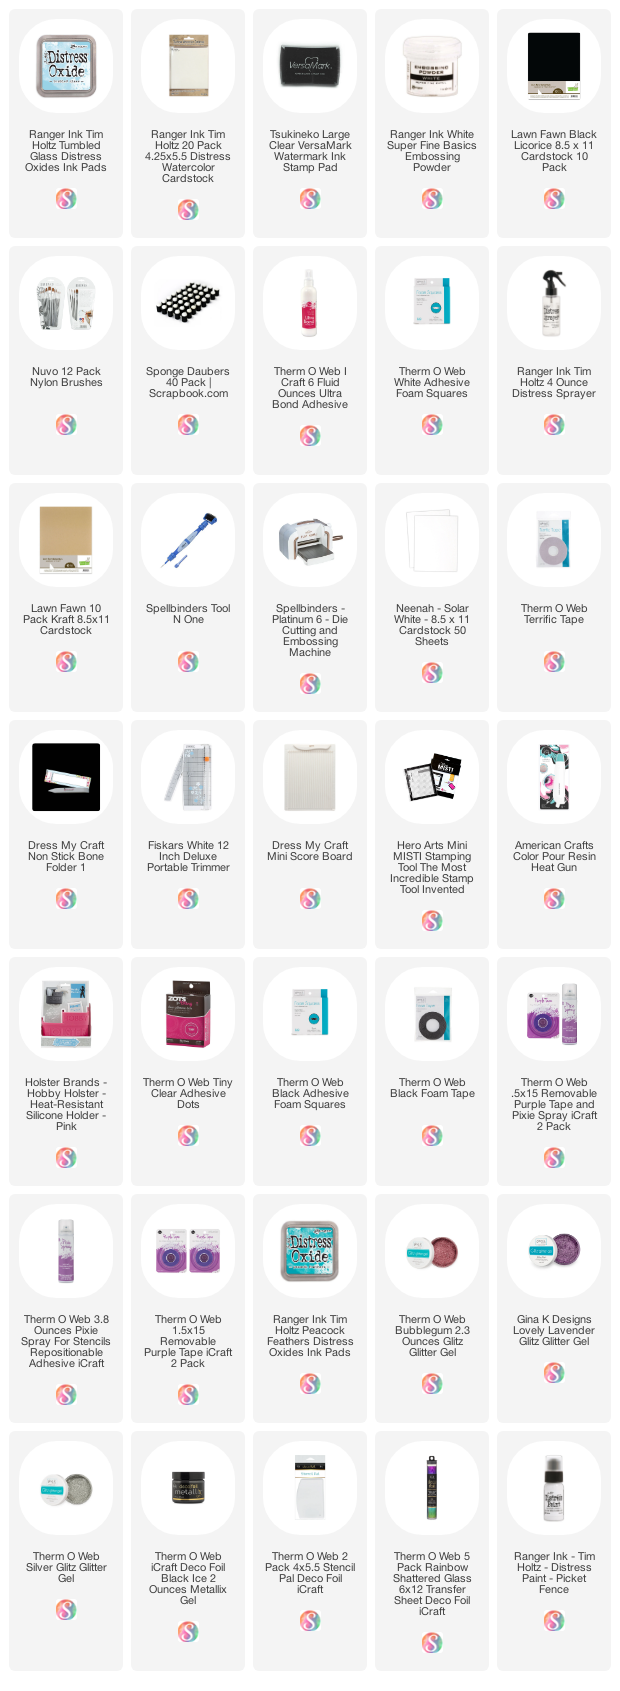
Below you will find links to the supplies used to create this project(s). Click the icon for the store underneath the thumbnails to start shopping. Where available I use compensated affiliate links at no extra cost to you. Your support helps me to keep bringing you new projects. 
Thank you!! πŸ’“

Friday, July 24, 2020

I like you Cat-itude w/ Newton's Nook Designs!!

Pin It
Newton
HELLO CRAFTY FRIENDS!! 
HAPPY Friday!! Who's ready for the Weekend!!?? I am, it's Fair Weekend so we have LOTS going on and I'm bracing myself for just 3 more weeks of FUN with my boys before School starts!! I'm really NOT ready!! 
I'm up on the Newton's Nook Designs Blog today sharing a really NEAT Technique I call Negative Stenciling!! I came up with it after wanting to use the Negative pieces after I Deco Foil Flock a project!! 
I Like Your Cat-itude by Larissa Heskett created for Newton's Nook Designs using the Meow Stencil, Frames & Flags Die Set, Cat-itude Stamp Set and Frames Squared Die Set along with Therm O Web Deco Foil, Deco Foil Flock and Transfer Gel Duo!! #newtonsnook #newtonsnookdesigns #meowstencil #catitude #thermoweb #decofoil #decofoilflock
Here's the Card I've created for today!! I had a Negative piece of White Latte Deco Foil Flock that I had left over after creating another Card!! I didn't want to wast the entire sheet of Deco Foil Flock, so I decided to try and Stencil over the Negative space and these are the results!! SWOON!! It's hard to see in the photos, but the Negative Stenciled design is Inlaid into the Deco Foil Flock Sheet!! In real life it looks so AWESOME and I'm sure the recipients will look at it and WONDER!!?? How did they do that!!?? 
I Like Your Cat-itude by Larissa Heskett created for Newton's Nook Designs using the Meow Stencil, Frames & Flags Die Set, Cat-itude Stamp Set and Frames Squared Die Set along with Therm O Web Deco Foil, Deco Foil Flock and Transfer Gel Duo!! #newtonsnook #newtonsnookdesigns #meowstencil #catitude #thermoweb #decofoil #decofoilflock
First step is to spray the back of your Meow Stencil with some Pixie Spray!! Then place it over the Negative Deco Foil Flock Sheet lining up the Stenciled Design!! Then Stencil over the Design with some Deco Foil Transfer Gel Duo using a Stencil Pal!! Remove the Stencil and set the panel aside to dry!! Once completely Dry I used the Rainbow Shattered Glass Deco Foil Sheets to Foil over the Stenciled Design!! I removed the Deco Foil Film and this is the AMAZING Result!! I just LOVE how AWESOME it looks!! 
I Like Your Cat-itude by Larissa Heskett created for Newton's Nook Designs using the Meow Stencil, Frames & Flags Die Set, Cat-itude Stamp Set and Frames Squared Die Set along with Therm O Web Deco Foil, Deco Foil Flock and Transfer Gel Duo!! #newtonsnook #newtonsnookdesigns #meowstencil #catitude #thermoweb #decofoil #decofoilflock
I Die Cut the Panel and then added the Frames and Flags Scalloped Die Cut Frame from some Black Cardstock!! I Stamped and Embossed the Sentiment from the Cat-itude Stamp Set!! Onto a Circle Cut from the Frames Squared Die Set and backed it with a Black Cardstock Circle then I added a Mini Clay Heart to finish off the Design!! I really hope you'll give this Technique a try!! The final results are HARD to to BEAT!! 

THANKS SO MUCH for stopping by and I hope you have a FABULOUS Weekend!! 

COUNTRY HUGS-N-KISSES
LARISSA   πŸ’—

Friday, June 5, 2020

Double the BEAUTY using the NEW Butterfly Stencil Set from Newton's Nook Designs!!

Pin It
HAPPY FRIDAY!! 
I'm up on the Newton's Nook Designs Blog today sharing two BEAUTIFUL Cards using the STUNNING NEW Butterfly Stencil Set!! SWOON!! 
Butterflies Stencil Set by Newton's Nook Designs
If you LOVE Butterflies like I do, then this Butterfly Stencil Set is going to be a MUST have to add to your Crafty Stash!! (Enabler Alert 😜)
For my first Card I've used the Stencil Set along with some Therm O Web Metallix Gel and some Therm O Web and Gina K Designs Glitz Glitter Gels!! SWOON!! Talk about a SHOWSTOPPER!! Can't you just picture me just doing my HAPPY DANCE!! πŸ’ƒ
I Started by Inking the Card Panel!! I like to use the Tim Holtz Distress Watercolor Paper, but ANY Cardstock would work!! I used both Tumbled Glass and Peacock Feathers Inking with my Blender Brushes and then I added some Water Splatters for some Texture!! 
Next I added the Stencil #1 over the Inked Card Panel after I sprayed if with some Therm O Web Pixie Spray!! I then applied a Small amount of the Mettalix Gel in Black Ice using the Stencil Pal!! 
After the Gel was completely dry, I applied the Stencil #2 over the top of the Metallix Gelled Butterflies!! Again I Sprayed the back of the Stencil with Pixie Spray!! Then I applied the Glitz Glitter Gels in Bubble Gum, Lovely Lavender and Silver using the Stencil Pal!! I was just careful while applying the gel, but you could also use some Purple Tape to help keep the colors seperate while applying if you think you need to for some added protection!! 
Here's a Close up look!! Isn't it BEAUTIFUL!! I LOVE the added dimension that you get too with the layers!! Makes the Butterflies POP even more!! 
I Die Cut the Panel using a Stitched Rectangle Die and then I Stamped and Embossed the Sentiment from the NEW Floral Roundabout Stamp Set onto some TE Sea Salt Cardstock with Versa Mark Ink and WoW Bright White Embossing Powder!! I Die Cut it out using the NEW Banner Trio Die Set and applies it to my Card using some Gina K Designs Foam Squares!! I added some Pretty Pink Posh Silver Jewels to finish off the Bodies of the Butterflies and then added the Panel onto a Scalloped Rectangle Die Cut from the Frames & Flags Die Set from some TE Oreo Cardstock and adhered it onto a White A2 Cardbase with some Foam Tape for some dimension!! 
For my second Card I used some Deco Foil Transfer Gel and my FAVORITE Rainbow Scattered Deco Foil!! Talk about a HAPPY Card!!  πŸ¦‹
I started by Inking the Stencil #1 with some Black Soot Distress Ink onto a TE Toffe Cardstock!! Again I sprayed the back of my Stencil with Therm O Web Pixie Spray!! 
Next I applied the Therm O Web Deco Foil Transfer Gel to the Stencil #2 layer that was sprayed with the Pixie Spray and applied over the top of the Inked Butterflies using the Stencil Pal!! The Stencils are etched with the design for REALLY easy work when it comes to layering the designs together!! Takes ALL of the guess work out for you!! 
Then I applied the Therm O Web Rainbow Shattered Glass Deco Foil over the top of the Dry Transfer Gel Duo and I ran it through my Die Cutting Machine!! SWOON!! Talk about STUNNING!! I added some Picket Fence Distress Paint Splatters for some Texture and Stamped and Embossed the Sentiment in some WoW Bright White Embossing Powder from the NEW Hummingbird Stamp Set onto some TE Oreo Cardstock and Die Cut it out using the NEW Circle Frames Die Set!! Then added the Panel onto a Scalloped Rectangle Die Cut from the Frames & Flags Die Set from some TE Oreo Cardstock and adhered it onto a White A2 Cardbase with some Foam Tape for some dimension!! 
I LOVE the way they turned out and I LOVE that there are SO MANY possibilities with this STUNNING NEW Butterfly Stencil Set!! SWOON!! 

THANKS SO MUCH for stopping by today and I hope you have a FABULOUS WEEKEND!! 

COUNTRY HUGS-N-KISSES
LARISSA  πŸ¦‹

S U P P L I E S
Below you will find links to the supplies used to create this project(s). Click the icon for the store underneath the thumbnails to start shopping. Where available I use compensated affiliate links at no extra cost to you. Your support helps me to keep bringing you new projects. Thank you!!

Saturday, February 1, 2020

Love You with Paper Smooches!!

Pin It

HELLO CRAFTY FRIENDS!! 

I'm here with Paper Smooches for the NEW February Challenge!! The theme is "LOVE" perfect for ALL of those Valentine's Day Cards you may need to create!! 

 Here's the Card I've create for this Month's 1st Challenge!! It has so many of my FAVORITE things one it all included in this one design!! I've created a Step Out so you can see how I've created it, just incase you want to create something similar for someone SPECIAL too!! 
FUN FACT: Did you know that the NEW Paper Smooches Half Moon Patterned Papers are able to used with the Therm O Web Deco Foils!!?? You heard that right!! They are printed with a Toner Ink so that means that you can use ALL of the Therm O Web Deco Foils you may have on hand and run them through your Laminating Machine with the Foil Colored side face up and create STUNNING Foiled Patterned Paper!! SWOON!! I just LOVE this Fact and it makes these Paper Smooches Patterned Paper Pads even more VERSATILE to have in your stash!! I've used the Rainbow Shattered Glass Deco Foil over the Tiny Hearts Half Moon Paper Design and the results are just Beautiful!!
You could totally leave the Paper with the White Background, but I wanted to change the color to match with the Foiling that I did, so I've used the Rina K Designs Electro Pop Neon Inks in Blaring Blue, Potent Purple & Popin Pink along with an Ink Dauber and Inked the background to coincide with the Foiling on the Heart Pattern!!
I then wanted to add some stenciling over the Background Design, so I used the Paper Smooched Heart Stencil and adhered it to the Foiled and Inked Background after I sprayed the back side of the Stencil with some Therm O Web Pixie Spray to help keep the stencil in place while I was inking!! If you haven't tried the Pixie Spray yet, its a Stenciling Game Changer!! πŸ˜‰ I used the same Inks that I used for the Background, I just applied a heavier coat in order to make the hearts POP off the Background!! I then Stamped and Embossed the Sentiment "Love You" from the Paper Smooches Snowy Salutations Stamp Set to the Panel using Versa Fine Black Onyx Ink and WoW Neutral Shimmer Embossing Powder!! Then I added a Splattering of some Black Soot Distress Paint just to add some Dimension!! 
I wanted to frame the Panel, so I Die Cut the Paper Smooches Fab Frames Die from some White Cardstock and then I Stitched around the Hole pattern with some Embroidery Thread that matched the Pink Rainbow Shattered Foil Hearts Color!! I did a Back-stitch so that the entire Dot Design was filed with the Stitching, creating a Stitched Frame all the way around the Fab Frame!! I LOVE the way it looks and adds to the Design of the Frame!!
Here's a Close up loo at the Panel!! Hopefully you can get a better look at how all of the Mediums tie together to create a STUNNING finish to the Design of this Card!! SWOON!! It turned out AMAZING and I KNOW the recipient is going to FEEL my LOVE some Valentine's Day!! 

Here's how to play along!! 
Challenge deadline: February 14th, 2020 at 11:59pm PST
Winners will be posted on February 16th 
Next challenge begins February 15th. 

Here are the rules: 
  1. Create a NEW project (card, tag, layout, journaling page, etc).
  2. You must use at least one Paper Smooches stamps/dies or free digital images- please link to our website: http://www.papersmoochesstamps.com
  3. Post your project on your blog/social media platform and submit a direct link to your post/image using our linking system. 
  4. Please display our banner on your blog post (right click on the banner and save to your computer. If you have any trouble, I am happy to email the image to you, savannahland2 at comcast dot net)
  5. All skill levels are welcome!!! 
  6. You can enter as many times as you like! 
Here's what you are playing for: 3 winners
    One winner will win a prize pack (pictured below)
    THANKS SO MUCH for stopping by today and I hope you have a FABULOUS Weekend!! I can't wait to see what you create for this Challenge!! If you try Foiling with your Half Moon Patterned Paper I hope you share with us using the #papersmooches #papersmoochesrocks #thermoweb #decofoil  You NEVER know when Kim or Julia will spot your creations and share them on the Paper Smooches or Therm O Web Instagram Feeds!! πŸ˜‰
    Also if you don't follow already, make sure you follow!! 
    Just click the Links above!! 
    • COUNTRY HUGS-N-KISSES 
      LARISSA  πŸ’–