Showing posts with label Planner Series Checklist. Show all posts

Wednesday, January 15, 2020

Paper Sweeties New Release Party!!

Pin It
HELLO!!

I'm here with Paper Sweeties to share a SWEET Valentine's Treat Box!! This month the Release is just AMAZING!! I unfortunately Broke my Arm in November and had to have Surgery at the beginning of December!! Then I was in a Cast until the beginning of this Month!! Needless to say, I didn't think I'd be able to create, so I didn't have the NEW Release to play with when I realized I was able to create after all!! So my projects this Month will be using some of my FAVORITE Older Products that are PERFECT for those SPECIAL Valentine's Day Gifts, or switch out the sentiment and they'd be GREAT for Birthday's or Anniversaries too!! 
Here's my Project for today!!

I've used the Treat Box Die to create this FUN Box!! 
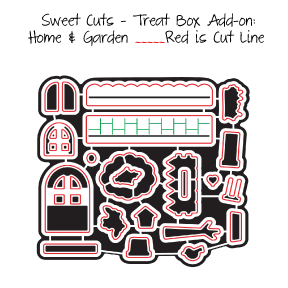
Here's a look at this Set!! 

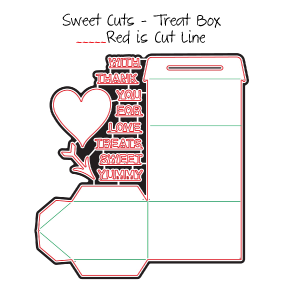
This set is such a GREAT Value for all that you get in it!! Plus SO MANY occasions can be created, and you can use all of the Dies for other Projects too!! For the CUTE Tag I used the Stitched Tags #1 Die Set and the Girl Image is from the Planner Series: Checklist Stamp Set!! I paired it with the Coffee Cup Image from the You Warm My Heart Stamp Set and the Coordinating You Warm My Heart Die Set!! Colored the Images in with Copic Markers and added some Shimmer Pen for some Sparkle!! A layered Bow finished off the SWEET Treat Box that could be used for ANY Occasion!! 

LOVE the way it turned out and Hope I've given you some Ideas on ways to use this SWEET Treat Box Set for some of those Gifts you may need to give!! 

For more inspiration please visit the rest of the AMAZING Design Team Blogs!! 

THANKS SO MUCH for stopping by and I hope you have a FABULOUS WEEK!!

COUNTRY HUGS-N-KISSES
LARISSA   =)

Wednesday, August 14, 2019

Paper Sweeties August 2019 Release Party!!

Pin It

HELLO CRAFTY FRIENDS!!

Welcome to Day 2 of the Paper Sweeties 
August Release 2019!! 
I created a SWEET I'm Proud of You Interactive Tag using the *NEW* stamp set called "Cupcakes and Sprinkles" Stamp Set and the coordinating "Cupcakes and Sprinkles" Sweet Cuts Die Set + the *NEW* "Best Day Ever" Stamp Set!!
Here's a look at the *NEW* Sets!! 


I wanted to create a SWEET I'm Proud of You Tag, with School Starting this Week!! I'm using the *NEW* Sets along with a few of the older sets!! I Started by Die Cutting one of the Paper Sweeties For You Stitched Gift Tags from some Distress Watercolor Paper!! Then I Stamped the Tag using some of the Sentiments from the I'm So Proud Of You Stamp Set with Grey Grout Ink!! I Stamped and Embossed the Cupcake Image and  Apple Image and Colored them using Copic Markers!! I also used the Notebook Image from the Planner Series Checklist Stamp Set and Fussy Cut it out!! I Stamped and Embossed the "Son" Sentiment from the *NEW* Best Day Ever Stamp Set!! 

I wanted to create an Interactive Report Card and I Stamped and Embossed the sentiment onto the inside using  some Red WoW Glitter Embossing Powder for the PROUD and Son!! I LOVE the way it turned out, and I LOVE how you can use the *NEW* Best Day Ever Stamp Set to combine with so many of the other Sentiment  Stamp Sets!! I added the Tag to a Gift Bag made from some Chalkboard Patterned Paper and added A Mini Cloths Pin and a Strawberry Seam Binding Bow to finish off the Treat Box, that I creating by using the Sweet Cuts Treat Box Die!! I hope this gives you some ideas on a different way to use these AWESOME Sets!!

For more inspiration please visit the rest of the AMAZING Design Team Blogs!! 

THANKS SO MUCH for stopping by and I hope you have a FABULOUS WEEK!! 

COUNTRY HUGS-N-KISSES
LARISSA   =)

Sunday, September 16, 2018

Paper Sweeties September Release Rewind!! =)

Pin It

Paper Sweeties DT

            HELLO CRAFTY FRIENDS!! 

I'm here for the Release Rewind of the 
I hope you were inspired by the projects the Design Teamies and I shared yesterday!!??  
If you missed the festivities, click --> HERE <-- to check out all the creativity!
Here's another look at the NEW Products:


I Started by Stamping my Background with the Ruler Image using Grey Ink!! Then Inked the Background using some Tumbled Glass Distress Ink!! Added some Black Soot Distress Ink Splatters and water Droplets and my Background was done!! Then I Stamped and Embossed all of the other Images and Fussy Cut them out!! I also Stamped and Embossed the Sentiment on the inside of the Card!! I've used images from the I'm So Proud Of You Stamp Set!! I Colored then using Copic Markers!! I also used the Apple Image from the Homegrown Stamp Set!! I also used the SWEET Image from the Planner Series Checklist Stamp Set and Fussy Cut them out!! I Stamped and Embossed Madison and created a SWEET School Uniform outfit for her!! I added some Tonic Studios Glitter Pen to the Metal on the Pencil and the Apple Images!! I wanted to create an Interactive Class Book!!  I Stamped and Embossed the sentiment on the Cover and added some of the Smaller Images from the NEW Set!! I adhered it all together and used Foam Tape for Dimension!! I hope this gives you some ideas on a different way to use these AWESOME Sets!!

The Design Team is sharing some fabulous inspiration...be sure to check out their blogs!

Debbie Marcinkiewicz – Paper Sweeties

THANKS SO MUCH for stopping by and I hope you Have a FABULOUS WEEK!!


COUNTRY HUGS-N-KISSES
LARISSA    =)

Saturday, September 15, 2018

Paper Sweeties September 2018 ~ Release Party!!

Paper Sweeties DT


            HELLO CRAFTY FRIENDS!! 

 - our BIG RELEASE PARTY DAY!!  
I hope you were inspired by the projects the Design Teamies and I shared yesterday!!??  
If you missed the festivities, click --> HERE <-- to check out all the creativity!
Here's a look at the NEW Products:


I Started by Die Cutting one of the Paper Sweeties For You Stitched Gift Tags from some Distress Watercolor Paper!! Then I Stamped the Tag using some of the Sentiments from the NEW I'm So Proud Of You Stamp Set with Grey Grout Ink!! I Stamped and Embossed the Images and Colored then using Copic Markers!! I also used some Images form the  I also used the SWEET Image from the Planner Series Checklist Stamp Set and Fussy Cut them out!! I added some Tonic Studios GLitter Pen to the Metal on the Pencil and some Tonic Studios Morning Dew Nuvo Drops to the Apple for some extra Shine and Dimension!! I wanted to create an Interactive Report Card and I Stamped and Embossed the sentiment onto the inside using  some Red WoW Glitter Embossing Powder for the PROUD!! I LOVE the way it turned out!! I added the Tag to a Gift Bag made from some Chalkboard Patterned Paper and added A Mini Cloths Pin and a Strawberry Seam Binding Bow to finish off the A+ Student Report Card Gift Box!! I hope this gives you some ideas on a different way to use these AWESOME Sets!!

The Design Team is sharing some fabulous inspiration...be sure to check out their blogs!

Debbie Marcinkiewicz – Paper Sweeties


THANKS SO MUCH for stopping by and I hope you'll come back tomorrow for a look at one last Project using the ENTIRE September Release!!  Have a FABULOUS WEEKEND!!


COUNTRY HUGS-N-KISSES
LARISSA    =)

Thursday, September 13, 2018

Paper Sweeties September Release Sneak Peeks!! =)

Paper Sweeties DT


            HELLO CRAFTY FRIENDS!! 
How EXCITING!! I'm here with Paper Sweeties for their September Release Sneak Peeks!! 
I've created a SWEET Project today for a Teacher Gift!! 
My Boys are both in school this year!! Beckett is a 6th Grader this Year and my Baby Greyson just started Kindergarten!! I'm EXCITED for him because I KNOW he CAN'T WAIT to be in School ALL day, but I'm also SAD for SO MANY reasons too!! 
So with the NEW School Year in mind I decided to create a Teacher Gift Box!! 


    I LOVE LOVE LOVE how EASY these are to create and they can be 
    used for so many occasions!!  
    Here's the Sets so you can check them out if you've missed them!!??


                                 Treat Box Add-on: Home & Garden

                       Treat Box Add-on: Home & GardenSweet Cuts

I started by Creating my School House Gift Box!! 
SQUEAL!! Isn't it just the CUTEST!! I LOVE the Chimney as I think it adds to the idea that its a School House!! I Die Cut all of the Pieces to create the Box!! I Die Cut them and Inked the Edges using some Hickory Smoke Distress Ink!! I also used the SWEET Image from the Planner Series Checklist Stamp Set and fussy Cut him out!! I Colored him with Copic Markers and added some Gel Pen and Nuvo Drops details!! I Stamped and Embossed the Sentiment onto a Paper Sweeties Stitched Tags 1 Tag Die Cut using the NEW September Release!! A Mini Cloths Pin and a Strawberry Seam Binding Bow was added to finish off the School Gift Box!! I hope this gives you some ideas on a different way to use these AWESOME Sets!!

The Design Team is sharing some fabulous inspiration...be sure to check out their blogs!

Debbie Marcinkiewicz – Paper Sweeties


THANKS SO MUCH for stopping by and I hope you'll come back tomorrow for a look at the ENTIRE September Release!!  Have a FABULOUS WEEK!!

COUNTRY HUGS-N-KISSES
LARISSA    =)