Showing posts with label Bokeh Stencil. Show all posts

Friday, April 10, 2020

New Baby Card with Newton's Nook Designs!!

Pin It
HELLO!! 

I'm here today to this SWEET New Baby Card with Newton's Nook Designs in shades of Turquoise and Grey!! I LOVE the Bitty Bibs Stamp Set and wanted to use the Whale Bib for my Card!! I Stamed and Embossed the Image 6 times and Colored it in using Copic Markers!! 
(Whale: N6, N4 & N2  Cheeks: RV11  Water: BG45 & BG10)  I Die Cut the Colored Bibs out using the coordinating Stitched Die and Then I added the Decorative Scalloped Bib behind each of the Stitched Whale Bibs Die Cut from some Taylored Expressions Confetti Cake Cardstock using the Baby Bib Die Set!! Isn't it cute!!?? 
I layered the Bibs over White Circle Die Cuts that I inked with some Hickory Smoke Distress Oxide Ink!! I set them aside and worked on a FUN Background!! I Started with a TE Confetti Cake Cardstock Panel that I repeatedly stamped with the Sentiment "new baby" with Peacock Feathers Distress Oxide Ink from the Bitty Bibs Stamp Set!! I wanted to add a fun pattern to the Design so I used the Bokeh Stencil Set to add bubbles all over the Stamped background panel with some TE Sugar Cube Ink!! I LOVE that the Stamped Words can still be read as the Pigment Ink is some what transparent and the Bubbles tie in the Bubbles from the Bibs!! It just makes me HAPPY!! 
A few TE Bits and Pieces Iridescent Drip Drops were added for some Sparkle and then the whole panel was framed using a Silver Scallop Frame cut out with the Frames & Flags Die Set!! For the final touches I added some Tonic Studio Shimmer Pen over all of the Whales to make them Sparkle and added some White Gel Pen Highlights to the Cheeks!! I LOVE the way it turned out and hope I've inspired you to create some FUN Cards focusing on a repeat Design Idea!! 

THANKS SO MUCH for stopping by today and I hope you have a 
VERY BLESSED and FABULOUS Easter Weekend!! 

We'll be MISSING our extended Family as we usually spend Easter together!! I can remember getting NEW Dresses every year for Easter Sunday Mass!! It was ALWAYS such a Special Gift and then we'd go to Grandma and Grandpa McConville's House after Mass to Celebrate with ALL of my Aunts, Uncles and Cousins!! We'd ENJOY a very DELICIOUS Family Meal together and then spend the afternoon playing Football, Croquet and Cards (usually Rummy or Pitch)!! It was always sad to see how FAST the day would be over because we had SO MUCH FUN!! 
Looking forward to Celebrating again with them soon and in the mean time LOTS of Prayers are being said to help those during this uncertain Time!! 

COUNTRY HUGS-N-KISSES
LARISSA  💖

S U P P L I E S
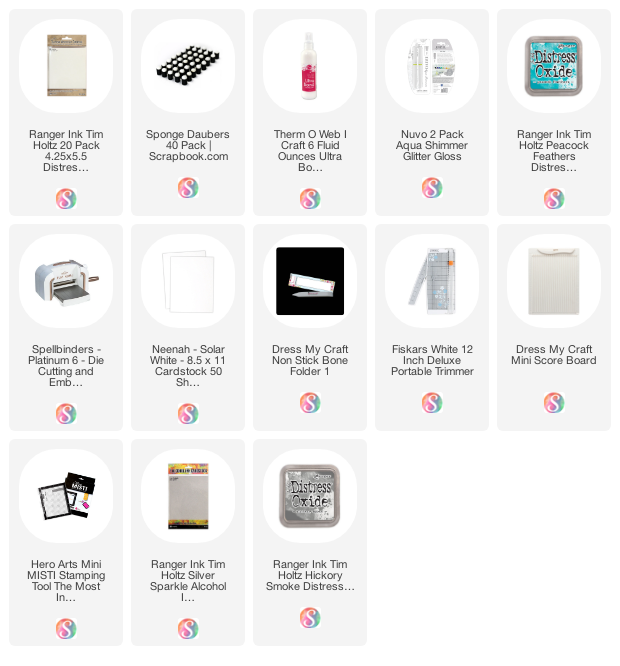
Below you will find links to the supplies used to create this project(s). Click the icon for the store underneath the thumbnails to start shopping. Where available I use compensated affiliate links at no extra cost to you. Your support helps me to keep bringing you new projects. Thank you!!
Wednesday, November 13, 2019

Newton's Nook Designs November Release 2019 ~ Penguin Pile & Let it Snow!!

Pin It

Hello!!
SQUEAL!!
         I'm here with Day 3 of the Newton's Nook Designs November Release!! 
       Today we're showcasing the NEW  
"Penguin PileStamp Set + coordinating "Penguin PileDies and the 
"Let it Snow" Mini Stamp Set!! 
Let's take a look at the AWESOME New Products!!
Piles of Warm Winter Wishes by Larissa Heskett for Newton's Nook Designs using Penguin Piles, Bokeh Stencil, Fancy Edges Tags Die #newtonsnook #newtonsnookdesigns #penguinpile
How SWEET are those Penguins!!?? I LOVE them and with the Holiday Season approaching rapidly, I thought it would be FUN to show how AMAZING they look on Winter/Holiday Tags!! I have several Family/Friends with Winter Birthdays so this Tag Design is going to be PERFECT for those!! I can coordinate the Colors of my Image with the Patterned Paper I want to use and it make coloring the Image a BREEZE too!! I started by Stamping and Embossing the Image and coloring it in with Copic Markers!! I used (Penguins: N0, N2, N4, N6 & N8   Cheeks: R00  Beaks & Feet: YR00 & YR68  Red: R43, R46 & R89  Green: YG61, YG63 & YG67  Pink: RV00, RV11 & RV34  White: N0 & N2) 
I Die Cut the Image out using the coordinating Die!! Then I added White Gel Pen Details Black Glaze Pen to the Eyes and Blizzard Glitter Nuvo Drops to the Rims of the Hats and Ear Muffs!! I also added some Morning Dew Nuvo Drops to the Beaks and Feet for some dimension and shine!! 
Piles of Warm Winter Wishes by Larissa Heskett for Newton's Nook Designs using Penguin Piles, Bokeh Stencil, Fancy Edges Tags Die #newtonsnook #newtonsnookdesigns #penguinpile
I Die Cut 2 Tags using the Fancy Edges Tag Die!! One from White Cardstock and one from some Patterned Paper!! I then used the Bokeh Stencil as a Mask to Highlight the area where I planned on Stamping and Embossing the Sentiment!! I used Tumbled Glass Distress Ink and then Inked over it with Cracked Pistachio Distress Oxide Ink to get the perfect match for the Patterned Paper!! I added some Water Splatters and let it dry!! Then I used a Static Bag to coat over the Inked Circle and Stamped and Embossed the Sentiment!! I Masked parts of the sentiment in order to Highlight a couple of the words!! I used WoW Embossing Powder in Clear and Rockin' Red!! The Irridescent Glitter in the Embossing Powder coordinates with the Iridescent Glitter in the Blizzard Nuvo Drops!! I used a Mini White Clothes Pin to attach the Tags to the Gift Bag and then created a Scrap Ribbon Bow!! I LOVE the way it turned out and just know it's going to bring SMILES to the recipient!! 
Let it Snow by Larissa Heskett for Newton's Nook Designs using Let it Snow, Frames Squared and Snowfall Stencil #letitsnow #newtonsnook #newtonsnookdesigns #snowfallstencil
For my second Card I wanted to showcase this BEAUTIFUL Sentiment!! I Stamped and Embossed the Sentiment with some Distress Oxide Chipped Sapphire Ink and WoW Clear Gloss Embossing Powder!! I used Copic Markers to color it in with an Ombre` Design!! 
I used (B02, B32, B34, B37 & B39)
I then used a Stitched Square Die to Die Cut the Sentiment centering in in the Middle!! I wanted to Frame the Sentiment so I Die Cut another Stitched Square and used the Sunny Studio Stamps Layered Snowflake Frame Die and Die Cut it from the center of the Stitched Square!! It fit the NND Frames Squared Scalloped Frame PERFECTLY!! I wanted the Snowflakes to tie into the Design some I inked the tips of the Snowflakes with some Tumbled Glass Distress Oxide Ink!! For the Cardbase Panel I used the NND Snowfall Stencil and inked with Tumbled Glass Distress Oxide Ink!!  

Let it Snow by Larissa Heskett for Newton's Nook Designs using Let it Snow, Frames Squared and Snowfall Stencil #letitsnow #newtonsnook #newtonsnookdesigns #snowfallstencil
I Adhered the Stitched Squares together using some TE Foam Strips after adding some Blizzard Glitter Nuvo Drops to the Snowflakes and some Iridescent Jewels to the center of the Large Snowflakes!! I LOVE the additions of Sparkle!! Then I glued the Stitched Square to the center of the Scalloped Square!! I added Foam Tape to the back of the Scalloped Square and adhered it to the A2 Snowflake Stenciled Cardbase!!  This Card is just STUNNING in real like and could be used for SO MANY occastions just by adding an additional Stamped Sentiment on the inside of the Card!! 

Would you like to win the “Penguin Pile"Stamp Set!!?? 
This stamp set will be given away to ONE lucky winner!!
Here's how to win: 
Comment on the NND blog and Design Team blogs (see list below)! The winner will be chosen at random from the collective reveal posts. Make sure to check out each of their blogs and comment for your chance to win. You will not know which blog has been chosen so the more you comment on the better your chances are of winning! You have until Thursday November 14th at 9pm EST to comment  -- winners will be announced on the blog post on Friday, November 15th
Check out all the awesome Design Team Blogs below to enter:

THANKS SO MUCH for stopping by today!!  
Don't forget to visit the Newton's Nook Designs Blog on the 15th to see if you're one of the LUCKY Winners and come back tomorrow for a look at the 
NEW "Frosty FolksStamp Set + coordinating Dies!! 
Have a FABULOUS WEEK!!

I'm also Linking Up: 


I was inspired by my Tags for Day 3 and I want to Highlight the Sentiment 
this time and I LOVE the way it looks!! 

COUNTRY HUGS-N-KISSES
LARISSA  =)

Friday, September 27, 2019

2 Cards for the Newton's Nook Designs & WoW Embossing Inspiration Week!!

Pin It
Image may contain: text
HELLO CRAFTY FRIENDS!! 
I'm here with the FUN Newton's Nook Designs & WoW Embossing Inspiration Week!! I'm a HUGE FAN of both of these companies!! If you follow me you'll know that I might be alitte OBSESSED with the WoW Glitter Embossing Powders!! Infact, I probably use it on the majority of my Projects!! 😬 
I've created 2 Projects today!! First I've made this SWEET Halloween Card!! I just LOVE this Witchy Newton Image!! It makes me SMILE every time I see it!! If you're an animal lover too, I'm SURE you have the same reaction!!?? 
Best Witches by Larissa Heskett for Newton's Nook using Witchy Newton, Gingham Stencil, Cascading Stars Stencil, Bokeh Stencil Set WoW Witching Hour Embossing Powder Distress Oxide Inks TE Cardstocks #newtonsnook #wowembossing #halloweencards
I started by creating my FUN background using the NEW Gingham Stencil!! I just LOVE this Stencil and there are SO MANY ways to use it!! I've used both Dusty Concord and Carved Pumpkin Distress Oxide Inks!! I sprayed the back of my stencil with some Therm O Web Pixie Spray, then placed it over my A2 Cardstock panel!! I Started with the Dusty Concord Distress Oxide Ink and inked the design!! Then removed the Stencil and washed the excess Ink off!! I wanted to create a FUN Crosshatched Design so I flipped the Stencil and then replaced it over the Inked Design linking it up again using Carved Pumpkin Distress Oxide Ink!! I absolutely LOVE the results!!
Halloween makes me think of ALL things FUNKY!! So I thought it would be FUN to use the Bokeh Stencil Set over the top of the Gingham and I Inked it up with an Ink Dauber using Versa Fine Black Onyx Ink after using an anti-static tool!! Then added some of the WoW & Simon Says Stamp Witching Hour Embossing Powder!! SWOON!! All of that SPARKLE makes this girls HEART HAPPY!! It's hard to see in the Photos, but in real life this Powder is just AWESOME!! 
I wanted to create a Background to help ground my Sweet Image, so I Die Cut a Circle and inked with Caved Pumpkin Distress Oxide Ink!! Went over it with an Anti-static Tool and then placed the Cascading Stars Stencil over the Circle Die Cut and Inked used Rusty Hinge Distress Oxide Ink and Embossed them using WoW Gloss Clear Embossing Powder!! A few Water Splatters add some extra texture to the background!!! Then I adhered my Stamped and Embossed Image that I colored with Copic Markers!! 
Best Witches by Larissa Heskett for Newton's Nook using Witchy Newton, Gingham Stencil, Cascading Stars Stencil, Bokeh Stencil Set WoW Witching Hour Embossing Powder Distress Oxide Inks TE Cardstocks #newtonsnook #wowembossing #halloweencards
I framed the Background Circle with a couple other Circle Die Cuts one from TE Oreo Cardstock and and one from TE Grape Jelly Cardstock and then Stamped and Embossed the "Best Wishes" Sentiment onto a Circle Die Cut from the Frames Squared Die Set using WoW Clear Gloss Embossing Powder!! I Framed it to match the Focal Image and adhered both using Foam Tape to my Cardbase!! A few Sequins with some Iridescent Jewels finishes off the Design!! 
Tis' the Season to be Fabulous by Larissa Heskett for Newton's Nook Designs using Holiday Foliage Stencil, Frames and Flags Die Set, WoW Embossing Glitter Powder, TE Cardstock & Distress Oxide Inks #newtonsnook #wowembossing #holidaycards
For my Last Card I wanted to create a FESTIVE Holiday Card!! I LOVE Music Paper for the Holidays and I thought it would be FUN to create an Embossed Stencil Design!! I LOVE how it turned out and hope you'll give this Technique a try this Holiday Season!! 
I started by spraying the back of the Holiday Foliage Stencil with some Therm O Web Pixie Spray and then I placed it over the Lawn Fawn Music Patterned Paper!! I then took an Ink Dauber and Inked the Holly Leaves with Pine Needles Distress Oxide Ink after using some Purple Tape to mask them off!! I covered the Inked leaves with WoW Green Glitz Glitter Embossing Powder and heat Set it!! I removed the Purple Tape washed off the Stencil and then replaced it over the Design masking off the Berries!! I inked them with Candied Apple Distress Oxide Ink and then Embossed them with WoW Red Glitz Embossing Powder and Heat set them!! Then before I Stenciled any more of the Design, I Stamped and Embossed the sentiment from the Christmas Haul Stamp Set!! I LOVE this sentiment and I used the WoW Gloss Clear Embossing Powder over my Versa Fine Black Onyx Ink!! 
I then repeated the Process filling in the other Images using Distress Oxide Ink in Vintage Photo Distress Oxide Ink for the Pine Cones and Embossing with Metallic Copper Sparkle Embossing Powder, Peeled Paint Distress Oxide Ink and Embossing with Lime Ricky Embossing Powder!! For the last Images I Inked with Versa Mark Ink and Embossed with Calypso Embossing Powder!! I thing the Design is AMAZING the way that it is, but I wanted to make the Embossed Design POP even more, so I used the same Distress Oxide Inks along with an Ink Dauber to Ink over the Images!! Then I splattered it with some Water Droplets to help add some more Texture!! 
Tis' the Season to be Fabulous by Larissa Heskett for Newton's Nook Designs using Holiday Foliage Stencil, Frames and Flags Die Set, WoW Embossing Glitter Powder, TE Cardstock & Distress Oxide Inks #newtonsnook #wowembossing #holidaycards
 I Die Cut a TE Cherry Pop Cardstock Panel and then Die Cut the Frames and Flags Scalloped Frame from some TE Oreo Cardstock!! Then I adhered it to the Card Base using some Foam Tape to POP it up and add some Dimension!! I LOVE this Card!! 


I hope I've given you some ideas on ways to mix your Images and Stencils with the AWESOME WoW Glitter Embossing Powders!! Don't forget to stop by both of Newton's Nook Designs Blog and the WoW Embossing Blog for MORE inspiration and to get entered for chances to WIN!!
Prizes
Newton’s Nook Designs: $25 gift card
WOW! Embossing Powder: $25 gift card
Here's how to win: Leave comments on the NND & Design Team blog posts using WOW products all week (September 23-27) to enter. One winner will be randomly chosen from blog posts throughout the week so the more posts you leave comments on the better your chances are of winning! You have until Friday September 27th at midnight CST to comment. The winner will be announced on the NND blog post on Monday, September 30th.
THANKS SO MUCH for stopping by and I hope you have a FABULOUS WEEKEND!!
COUNTRY HUGS-N-KISSES
LARISSA =)

Tuesday, May 14, 2019

Newton's Nook Designs May Release ~ Dainty Daisies!! =)

Pin It

Hello!!
SQUEAL!!
         I'm here with Day 2 of the 
               Newton's Nook Designs May Release 2019!! 
.       Today we're showcasing the NEW  
"Dainty DaisiesStamp Set coordinating "Dainty Dasies" Die Set!! 
Let's take a look at the AWESOME New Products!!

Hope you Day is Special by Larissa Heskett for Newton's Nook Designs using Dainty Daisies, Bokeh Stencil, Frames & Flags Die Set
I just LOVE Daisies!! Infact, I had them for my Wedding Flowers!! So as soon as I saw this Stamp Set, I KNEW I wanted to create a Bouquet!! I decided to Mirror Stamp the Image using my Misti and a Gel Printing Plate from Ranger!! Since using this method I have had the BEST results I've ever gotten!! I want to try the NEW Waffle Flower Water Media Mat as I've seen others have AMAZING results with it too for Mirror Stamping!! For now though this method works GREAT!! 
I Colored the Images in using Copic Markers!! 
(Flowers: C5, C3 & C0  Flower Centers: Y11, Y15 & YR23  Leaves: G40, G43 & G46)
I die cut them out using the coordinating Die!! For the Mirrored Image I used the Negative from the first Image and held it up to my light lining it up from the back side of the image, then used purple tape to hold it in place!! I placed the Die into the opening and then ran it through my die cutting machine!! No one would ever know I didn't have the coordinating Die!! 
I used the Bokeh Stencil Set to create a soft Bokeh background using Distress Oxide Ink in Tumbled Glass!! Then I added some Black Soot Distress Paint Splatters!! I Stamped and Embossed the Sentiment onto a Banner  Die Cut from TE Salt Water Taffy Cardstock masking part of the sentiment with Purple Tape and Embossing with both WoW Clear Embossing Powder and Gold Pearl Glitter Embossing Powder!! I used the Frames & Flags Die Set for my Black Scalloped Frame Die Cut from some TE Oreo Cardstock!! A few Pretty Pink Posh Sequins in Sparkling finishes off the Design!! 

Would you like to win the “Dainty Daisies” Stamp Set!!??  
Here's how to win: 
Comment on the NND blog and Design Team blogs (see list below)! The winner will be chosen at random from the collective reveal posts. Make sure to check out each of their blogs and comment for your chance to win. You will not know which blog has been chosen so the more you comment on the better your chances are of winning! You have until Thursday May 16th at 9pm EST to comment  -- winners will be announced on the blog post on Friday, March 15th.
Check out all the awesome Design Team Blogs below to enter:

THANKS SO MUCH for stopping by today!! 
The New Products will be available Friday May 17th!! 
Don't forget to visit again tomorrow for a look at the NEW "Newton Cleans UpStamp Set + coordinating "Newton Cleans UpDie Set!! 

Have a FABULOUS WEEK!!

COUNTRY HUGS-N-KISSES 
LARISSA   =)

Monday, February 11, 2019

Newton's Nook Designs February Release 2019 ~ Loads of Blooms, Flower Trio, Bold Blooms & Bokeh!! =)

Pin It
Hello!!
SQUEAL!!
         I'm here with Day 1 of the 
               Newton's Nook Designs February Release 2019!! 
.       Today we're showcasing the NEW  
 "Loads of Blooms" Stamp Set + coordinating "Loads of BloomsDie Set, the "Flower Trio" Die Set, the "Bold Blooms" Stencil and the "Bokeh" Stencil Set!!
                  Let's take a look at the AWESOME New Products!!


Filled With Beauty by Larissa Heskett     Newton's Nook Designs Products used Bold Blooms Stencil, Loads of Blooms Stamp Set, Frames & Flags Die Set, Therm O Web, Deco Foil Transfer Gel, Nuvo Glitter Pen, Nuvo Glitter Drops, Distress Inks
 What do you think!!?? SWOON Worthy RIGHT!!?? I AGREE!! I LOVE the New Bold Blooms Stencil and there are SO MANY ways you can use it!! For my first Card I decided to use Distress Inks (Dried Marigold, Ripe Persimmon, Spun Sugar, Picked Raspberry, Milled Lavender, Dusty Concord, Tumbled Glass, Bundled Sage, Wild Honey, Tattered Rose and Abandoned Coral)
 I LOVE the NEW 1/2 inch Purple Tape by Therm O Web!! It's PERFECT for ALL of my Stenciling needs!! I used it to hold down my Distress Watercolor Paper and then placed the Stencil over the top and used a few small pieces of Purple Tape to hold it in place while I inked up the different Flowers!! Once the Inking was done I used my Nuvo Glitter Pen to color oved all of the Flowers with the Stencil!!
 SWOON!! Just Look at that BEAUTIFUL Shimmer on those Pastel Flowers!!
 Next I used the Deco FOil Transfer Gel and my Palette Knife to add the Transfer Gel over the top of the Stencil and Inked Flowers!! I LOVE the texture of the Transfer Gel, as it goes on so EASY!!
 Here's a close up of the Dimension it adds, and you can see ALL of the BEAUTIFUL Color popping through!! Set aside to Dry!! You'll know its completely dry when its Clear and no longer Milky looking!!
 I Stamped and Embossed the Sentiment from the NEW "Loads of Blooms" Stamp Set onto a NND Frames & Flags Die Cut and then adhered the Dry Stenciled and Deco Foil Transfer Gel Panel onto a Frames & Flags Scalloped Panel that I Die Cut from some Cardstock!! I added some Nuvo Glitter Drops to the Center of the Flowers just to add even more Sparkle and in real life its SUPER Pretty!!

Thinking of You By Larissa Heskett    Newton's Nook Designs Products used Bold Blooms Stencil, Loads of Blooms Stamp Set, Loads of Blooms Die Set, Frames and Flags Die Set, Distress Inks, Copic Markers
For my next Card I used the Bold Bloom Stencil again for my Background, but this time I used it over Kraft Cardstock and I used some White Pigment Ink to stencil it!! I added some Dark Espresso Distress Ink to the edges of the Frames & Flags Scalloped Panel to make them POP!! I Stamped and Embossed the SWEET Bicycle Image from the NEW "Loads of Blooms" Stamp Set and colored it in using Copic Markers!! I just ADORE the Images in this Set!! So Many occasions they could be used for!! I adhered the Image onto a Circle Die Cut that I inked using Distress Inks to create a Mini Scene!! Some Nuvo Glitter Drops were added to the Center of the Flowers and I stamped and Embossed the sentiment onto the Stenciled Panel!! 

Happy Blooming Birthday By Larissa Heskett    Newton's Nook Designs Products used, Flower Trio Die Set, Load of Blooms Stamp Set, Frames & Flags Die Set, Taylored Expressions Felt, Distress Inks, Black Soot Distress Paint, Pretty Pink Posh Iridescent Jewels
For my last Card today I used the AWESOME New Flower Trio Die Set and Die Cut the Daisy Die from some Taylored Expressions Marshmallow (White) Felt and then used the Leaf Die and Die Cut them from some Taylored Expressions Moss Green Felt!! I wanted FULL Flowers, so I Die Cut 3 Flowers for each Flower!! I like odd # so I also cut 3 Leaves!! I used Yellow Buttons and added some Burlap Twine for the Button Holes!! 
For the Background I Stamped the Happy Blooming Birthday Sentiment from the NEW "Loads of Blooms" Stamp Set and on a Diagonal in MFT Gray Grout Ink!! Then I added some Distress Black Soot Paint and added some Iridescent Jewels for some Sparkle!! I Die Cut a NND Frames & Flags Scalloped Panel and inked the edges with Dark Espresso Distress Ink!! 
I LOVE the way it turned out and I CAN'T WAIT to play with some of the other ideas in my head!! 

Would you like to win the “Loads of Blooms” Stamp Set!!?? 
This stamp set will be given away to ONE lucky winner!!
Here's how to win: 
Comment on the NND blog and Design Team blogs (see list below)! The winner will be chosen at random from the collective reveal posts. Make sure to check out each of their blogs and comment for your chance to win. You will not know which blog has been chosen so the more you comment on the better your chances are of winning! You have until Thursday February 14th at 9pm EST to comment  -- winners will be announced on the blog post on Friday, February 15th. 
Check out all the awesome Design Team Blogs below to enter:

THANKS SO MUCH for stopping by today!! 
The New Products will be available Friday February 15th!! 
Don't forget to visit the NND Blog again tomorrow for a look at the NEW "Woodland Spring" Stamp Set + coordinating "Woodland Spring" Die Set!! 

Have a FABULOUS WEEK!!

COUNTRY HUGS-N-KISSES
LARISSA   =)