Showing posts with label Gingham Stencil. Show all posts

Wednesday, March 16, 2022

Newton's Nook Designs March Release 2022 ~ Tulips & Newton’s Blooms!!

Pin It

HELLO CRAFTY FRIENDS!!
 
I'm here with Day 3 of the 
Today we're showcasing the NEW "TulipsStamp Set + coordinating Tulips Die Set and the "Newton's Blooms" Stamp Set + coordinating Newton's Blooms Die Set !!
Let's take a look at the AWESOME NEW Products!!
SWOON!! How BEAUTIFUL are these NEW Sets!! I'm SO EXCITED for Spring and these Sets are getting me in the Mood for some Spring Flowers!! 

For my First Card, I Started by Stamping and Embossing the NEW Tulips Stamp Set with Versa Fine Black Onyx Ink and WoW Clear Gloss Embossing Powder!! 

I Die Cut my Card Panel and the used the Gingham Stencil to Stencil the Card Panel with Bundled Sage and Forest Moss Distress Oxide Inks!! 
I Colored the Image with Copic Markers!!
Tulips: Y000, Y11, Y15 & YR23   
Green: YG61, YG63 & YG67

Then I used the NEW Tulips Die Set to Die Cut the Image out!! Then I Die Cut the Scalloped Oval Frame using the NEW Oval Frames Die Set from some of the NEW Springtime Paper Pad!! Then another Stitched Oval from some White Cardstock and Inked it with Salvaged Patina Distress Oxide Ink!! 
I adhered the Tulip Image to the Stitched Oval Frame with Foam Tape for some Dimension and then added the Sentiment along with some Trinity Stamps Fairy Rock Rhinestones for some Sparkle!! Along with White Gel Pen Highlights and some Glitter Pen to the Flowers for even more Sparkle!! 


For my Second Card, I Started by Stamping and Embossing the NEW Newton's Bloom Stamp Set with Versa Fine Black Onyx Ink and WoW Clear Gloss Embossing Powder!! 

SQUEAL!! I just LOVE this Sweet Image!! I Colored the Image with Copic Markers!! 

Kittens: E40, E43, E47 & E99
Cheeks and Inside of Ears: R00      
Pink: RV00, R81 & R85     Purple: V000, V15 & V09       Orange: YR00, YR18 & YR68 
Yellow: Y11 & YR23    Black: N0, N5       
Green: YG61, YG63 & YG67  
White: N0 & N3     Dark Grey: N0, N3 & N5     Blue: BG10

I Die Cut all of the Images out using the coordinating
NEW Newton's Bloom Die Set!! Then I added White Gel Pen Highlights, Black Gel Pen Noses!! I added Trinity Stamps Pearls to the Center of several of the Flowers along with Nuvo Glitter Drops for some Dimension and Sparkle!!

Then I Die Cut the Scalloped Oval Frame using the NEW Oval Frames Die Set from some of the NEW Springtime Paper Pad!! Then another Oval from some White Cardstock and Inked it with Salvaged Patina Distress Oxide Ink for the Sky and Bundled Sage Distress Oxide Ink for the Ground!! I adhered several of the Images to the Stitched Oval with Foam Tape for some Dimension and then added the the Scalloped Oval to the Card Panel using Foam Tape!! I adhered the Card Panel to a White Cardstock  A2 Cardbase again using Foam Tape!!  

 Would you like to win the “Tulips” Stamp Set or the "Newton's Blooms" Stamp Set!!?? 
Each Stamp Set will be given away to 
ONE Lucky Winner!!??


Here's how to win: Comment on the NND blog and Design Team blogs (see list below)! The winner will be chosen at random from the collective reveal posts. Make sure to check out each of their blogs and comment for your chance to win. You will not know which blog has been chosen so the more you comment on the better your chances are of winning! You have until Thursday January 20th at 9pm ET to comment  -- winners will be announced on the blog post on Friday, January 21st. 

Check out all the awesome Design Team Blogs below to enter:

Newton's Nook Designs

Donna Idlet

Ellen Haxelmans

Tina Herbeck

Larissa Heskett

Samantha Mann

Zsofia Molnar

Farhana Sarker

Tatiana Trafimovich

Amanda Wilcox


THANKS SO MUCH for stopping by today!! Make sure to leave me comments ALL Week for your chance to WIN!! I read EVERYONE and they MEAN more to me than you'll ever know!! 
 Make sure to check out the Newton's Nook Designs Blog on Thursday, March 17th to see if you're one of the LUCKY Winners!! 
Have a FABULOUS WEEK!!

LARISSA HESKETT ðŸ’™

Monday, April 19, 2021

Newton's Nook Designs April Release 2021 ~ Gnome Garden & Bleeding Heart Stamp Set + Petite Clouds Stencil!!

Pin It

HELLO CRAFTY FRIENDS!! 

I'm here with Day 1 of the 
Today we're showcasing the NEW "Gnome Garden" Stamp Set + the coordinating Gnome Garden Die Set and the "Bleeding Heart" Stamp Set + the coordinating Bleeding Heart Die Set + the Petite Clouds Stencil!! 
Let's take a look at the AWESOME New Set!!

Newtons Nook Designs Gnome Garden Stamp Set and Gnome Garden Die Set
Newton's Nook Designs Bleeding Heart Stamp Set and Bleeding Heart Die Set

Newton's Nook Designs Petite Clouds Stencil
Thanks Card created by Larissa Heskett for Newton's Nook Designs using Gnome Garden, Gingham Stencil, Plaid Stencil Set, Argyle Stencil Set, Circle Frames Die Set & Land Borders Die Set
For my First Card I started by Stamping and Embossing the SWEET Gnome Image!! I'm a LOVER of ALL things Daisy, so I KNEW I had to use the Gnome Holding the Daisy for my Card!! I also knew I wanted to create a FUN Plaid Background with a little SPARKLE!! So this is what I created!! 
Thanks Card created by Larissa Heskett for Newton's Nook Designs using Gnome Garden, Gingham Stencil, Plaid Stencil Set, Argyle Stencil Set, Circle Frames Die Set & Land Borders Die Set
After Stamping the NEW "Gnome Garden" Image with Versa Fine Black Onyx Ink, I Embossed it with WoW Clear Gloss Embossing Powder and then Heat Set my Image!! I Colored it with Copic Markers using: Red: R14, R37 & R39   Skin: E00, E11 & E13    Cheeks: R81   White: N0 & N2   Green: YG61, YG67 & BG75   Yellow: Y11, Y15 & YR23  Blue: B34, B337 & B39   Tan: E40, E42 & E43  Brown: E44, E47 & E49   Black: N3, N5 & N8
Then I used the coordinating NEW Gnome Garden Dies to Die Cut the Image Out!! I added White and Black Gel Pen Details and set the Image aside while I created the Scalloped Circle Background!! I Die Cut a Lawn Fawn Scalloped Circle Die from some TE Cherry Pop Cardstock and then Die Cut a NND Circle Frames Stitched Circle from some Distress Watercolor Cardstock!! I inked the Background using some Stormy Sky Distress Oxide Ink!! Then I Die Cut another Stitched Circle and Die Cut the Grass using the NND Land Borders Die Set and Inked it with Peeled Paint and Lucky Clover Distress Oxide Inks!! Then I added some Copic Marker Grass Details using YG61, YG63, YG67 & E43!! 
To finish off the Scalloped Circle Background I Stamped the "Thanks" Sentiment from the Set around the top half of the Circle using Stormy Sky Distress Oxide Ink and I LOVE how it finishes off the Design!! I adhered my Gnome Image to the center of the Scalloped Circle with some Foam Tape!! 
Thanks Card created by Larissa Heskett for Newton's Nook Designs using Gnome Garden, Gingham Stencil, Plaid Stencil Set, Argyle Stencil Set, Circle Frames Die Set & Land Borders Die Set
Then I created the Background Panel!! I wanted a FUN Plaid Paper so I created my own using the NND Plaid Stencil Set, Gingham Stencil and the Argyle Stencil Set!! I Started by Spraying the Back of my Stencils with Therm O Web Pixie Spray!! This is such a GAME CHANGER when it comes to using Layering Stencils and Multiple Colors of Ink!! I used Mustard Seed Distress Ink first along with the Gingham Stencil and an Ink Dauber, then I used Festive Berries Distress Ink along with the Plaid Stencil #2!! I wanted to add in some Coral so I lined up the Plaid Stencil #1 and applied some Abandoned Coral Distress Oxide Ink!! Again make sure you Pounce as to not mix the Inks!! Next I Inked with Stormy Sky Distress Oxide Ink along with the Argyle #1 Stencil!! Making sure to Pounce when applying this layer as well so the Inks won't blend together!! For the last layer I applied the Gina K Designs Silver Glitz Glitter Gel through the Argyle Stencil #2 using a Stencil Pal!! I LOVE layering ALL of these Stencil Sets together to create my own designs!!  The addition of the Gina K Designs Silver Glitz Glitter Gel really makes the Design Sparkle and Shine and also adds some Dimension that really helps it POP!! I adhered the Scalloped Circle onto the Cardbase using Foam Tape, added a few Silver Jewels and my card was done!! A TE Cherry Pop A2 Envelope matches the Card PERFECTLY and makes it ready to send to a SPECIAL someone!! 
Heartfelt Sympathy Card created by Larissa Heskett for Newton's Nook Designs using Bleeding Heart Stamp Set and the coordinating Bleeding Heart Die Set
For my Second Card I wanted to create a Sympathy Card!! My mother LOVES the Bleeding Heart Flowers and has them in her Flower Garden, so I KNEW I wanted to use them as my Focal at the Top of my Card!! 
This is the Photo I used as my Coloring Inspiration, as they remind me of the ones in my Mother's Garden!! 
Heartfelt Sympathy Card created by Larissa Heskett for Newton's Nook Designs using Bleeding Heart Stamp Set and the coordinating Bleeding Heart Die Set
I Started by Stamping the NEW Bleeding Heart Images 3 Times using Versa Fine Black Onyx Ink and Embossing with WoW Clear Gloss Embossing Powder!! Then I Heat Set the Images and Colored them with Copic Markers!! I used 
Purple: V00, V01, V15 & V09  Green: YG03, YG45 & BG09 
Then I used the coordinating NEW Bleeding Heart Die Set to Die Cut the Images out!! I Masked off the Top part of my Card Panel using Purple Tape and then Inked with Peeled Paint Distress Oxide Ink towards the top of my Panel!! Then I used some Tumbled Glass Distress Oxide Ink towards the Bottom of the Masked off area!! Making sure NOT to blend the two colors together, but rather to just have them meet!! Then I placed the Bleeding Heart Images down and used them as a Marker to see where I needed to add some Wilted Violet Distress Oxide Ink!! I LOVE the way it makes the Images seem as though they are GLOWING!! Then I adhered the Images down using some Ultra Bond Adhesive and then cut off any of the excess Images hanging over the edge of the Card!!   
Heartfelt Sympathy Card created by Larissa Heskett for Newton's Nook Designs using Bleeding Heart Stamp Set and the coordinating Bleeding Heart Die Set
I Stamped and Embossed the Sentiments also from the NEW Bleeding Hearts Stamp Set using Versa Fine Black Onyx Ink and Embossed with WoW Clear Gloss Embossing Powder!! Then finished off the Design with a few Trinity Stamps Fairy Rock Rhinestones and paired it with a TE Lavender Glaze A2 Envelope!! Sympathy Cards are my least Favorite Cards to make, but when I think about it they're probably one of the most HEARTFELT Cards as I KNOW the feelings that I want convey when the Recipient Receives them!! 

Would you like to win the “Gnome Garden” or the “Bleeding HeartStamp Set!!?? 

We will choose ONE lucky winner for each stamp set!!

Here's how to win: Comment on the NND blog and Design Team blogs (see list below)! The winner will be chosen at random from the collective reveal posts. Make sure to check out each of their blogs and comment for your chance to win. You will not know which blog has been chosen so the more you comment on the better your chances are of winning! You have until Thursday April 22nd at 9pm ET to comment  -- winners will be announced on the blog post on Friday, April 23rd. 

Check out all the awesome Design Team Blogs below to enter:

Newton's Nook Designs

Ellen Haxelmans

Tina Herbeck

Larissa Heskett

Samantha Mann

Zsofia Molnar

Maria Russell

Farhana Sarker

Tatiana Trafimovich

Samantha VanArnhem

Amanda Wilcox


THANKS SO MUCH for stopping by today!! Make sure to leave me comments ALL Week for your chance to WIN!! I read EVERYONE and they MEAN more to me than you'll ever know!! 
Come back tomorrow for a look at the NEW "Captivated Kitten" Stamp Set and coordinating Captivated Kittens Die Set!! Don't forget to check out the Newton's Nook Designs Blog on Friday April, 23rd to see if you're one of the LUCKY Winners!! 
Have a FABULOUS WEEK!!

COUNTRY HUGS-N-KISSES
LARISSA ðŸ’–

Thursday, August 20, 2020

Newton's Nook Designs August Release ~ Knight Owl & Pug-kin!!

Pin It
HELLO CRAFTY FRIENDS!! 
I'm here with Day 4 of the 
Newton's Nook Designs June Release!! Today we're showcasing the NEW "Knight Owl" Stamp Set coordinating Knight Owl Dies and "Pug-kin" Stamp Set coordinating Pug-kin Dies!!
Let's take a look at the AWESOME New Set!!
Knight Owl Stamp Set & Knight Owl Die Set by Newton's Nook Designs
Pug-kin Stamp Set & Pug-kin Die Set by Newton's Nook Designs
Good Luck Card by Larissa Heskett for Newton's Nook Designs using the Knight Owl Stamp and Die Set, Batty Newton Stamp Set, Heartfelt Wishes Stamp Set and Frames & Flags Die Set  #newtonsnook #newtonsnookdesigns #knightowl #battynewton #heartfeltwishes #framesandflags
I LOVE this NEW Knight Owl Image and thought it would make the BEST Good Luck card for one of my Boys!! They're the St. Pat's Knights and beings that Owl is a Knight, I think it's PERFECT for wishing them Luck come Game Day, or a Test Day!! Especially with this year looking alittle different due to all of the restrictions ect. I Started by Masking off the Card Panel in order to Ink behind the Image!! I used Scattered Straw and Fossilized Amber Distress Oxide Inks!! Then I added some Water Splatters and Black Soot Distress Paint Splatters!!  
Good Luck Card by Larissa Heskett for Newton's Nook Designs using the Knight Owl Stamp and Die Set, Batty Newton Stamp Set, Heartfelt Wishes Stamp Set and Frames & Flags Die Set  #newtonsnook #newtonsnookdesigns #knightowl #battynewton #heartfeltwishes #framesandflags
I Stamped and Embossed the NEW Knight Owl Image and then used Copic Markers to color it in!! 
I used: Owl: E40, E43, E44 & E47   Cheeks: R11   Beak & Feet: YR00 & YR02   Knights Helmet & Sword: T0, T2 & T4  E55 & E59   Shield: T0, T2 & T4   B34, B37 & B39   Y11, YR23
I used the coordinating NEW Knights Owl Dies to Die Cut the Image out and then I added some White Gel Pen and Shimmer Pen and finished off by adding some Morning Dew Nuvo Drops to the Feather, Beak, Sword, Star & Moon and the Feet for some Dimension and Shine!! 
Good Luck Card & coordinating Envelope by Larissa Heskett for Newton's Nook Designs using the Knight Owl Stamp and Die Set, Batty Newton Stamp Set, Heartfelt Wishes Stamp Set, Frames & Flags Die Set and Plaid Stencil Set #newtonsnook #newtonsnookdesigns #knightowl #battynewton #heartfeltwishes #framesandflags #plaidstencil
I Adhered the Knight Owl Image using some Foam Tape and then I Stamped and Embossed some of the Stars from the NEW Batty Newton Stamp Set!! I also added some Gold Star Sequins!! Then I Stamped and Embossed the Good Luck Sentiment from the NEW Heartfelt Wishes Stamp Set!! I adhered the Card Panel to a Carte Bella School Days Blue Plaid Frames & Flags Scalloped Rectangle and then I adhered it to my Cardbase using some Foam Tape!! I wanted to create a coordinating Plaid Envelope so I used the Plaid Stencil Set it Ink on the Flap of the TE Blueberry Envelope using Hickory Smoke and Blueprint Sketch Distress Oxide Inks!! I LOVE the way this set turned out!! 
Pug-kin Card by Larissa Heskett for Newton's Nook Designs using the Pug-kin Stamp and Die Set, Halloween Trio Die Set , Spooky Roundabout Stamp Set, Frames & Flags Die Set #newtonsnook #newtonsnookdesigns #pugkin #halloweentriodieset #spookyroundabout #framesandflags
LOVE this NEW Pug-kin Image and thought it would make the CUTEST Halloween Card!! I Started by Masking off the Card Panel in order to Ink behind the Image!! I used Scattered Straw and Fossilized Amber Distress Oxide Inks!! Then I added some Water Splatters and Black Soot Distress Paint Splatters!! 
Pug-kin Card by Larissa Heskett for Newton's Nook Designs using the Pug-kin Stamp and Die Set, Halloween Trio Die Set , Spooky Roundabout Stamp Set, Frames & Flags Die Set #newtonsnook #newtonsnookdesigns #pugkin #halloweentriodieset #spookyroundabout #framesandflags
I Stamped and Embossed the NEW Pug-kin Image and then used Copic Markers to color it in!! 
I used: Pug: E40, E43, E47 & E49    Pumpkin: YR00, YR02, YR18 & YR68    Eye's & Mouth: Y11, Y15 & YR23   T1 & T3    Pumpkin Stem:  YG61 & YG67   
I used the coordinating NEW Pug-kin Dies to Die Cut the Image out and then I added some White Gel Pen and Black Glaze Pen, and Shimmer Pen for some Dimension and Shine!!
Pug-kin Card & coordinating Envelope by Larissa Heskett for Newton's Nook Designs using the Pug-kin Stamp and Die Set, Halloween Trio Die Set , Spooky Roundabout Stamp Set, Frames & Flags Die Set and Gingham Stencil Set #newtonsnook #newtonsnookdesigns #pugkin #halloweentriodieset #spookyroundabout #framesandflags #ginghamstencil
I Adhered the Pug-kin Image using some Foam Tape and then I added the Die Cut Bats from the Halloween Trio Die Set!! I also added some Black Iridescent Pearls to the center of the Bats!! Then I Stamped and Embossed the Pug-kin Sentiment!! I adhered the Card Panel to a Prima Spring Farmhouse Black Gingham Frames & Flags Scalloped Rectangle and then I adhered it to my TE Oreo Cardbase using some Foam Tape!! I wanted to create a coordinating Gingham Envelope so I used the Gingham Stencil Set to Ink on the Flap of the TE Pumpkin Envelope using Black Soot Distress Ink!! Then I Stamped and Embossed the Happy Halloween Sentiment from the NEW Spooky Roundabout Stamp Set in WoW Bright White Embossing Powder!! I LOVE the way this set turned out!! 

Would you like to win the "Knight Owl" or "Pug-kinStamp Set!!?? 

 This stamp set will be given away to ONE lucky winner!!

Here's how to win: Comment on the NND blog and Design Team blogs (see list below)! The winner will be chosen at random from the collective reveal posts. Make sure to check out each of their blogs and comment for your chance to win. You will not know which blog has been chosen so the more you comment on the better your chances are of winning! You have until Thursday August 20th at 9pm EST to comment  -- winners will be announced on the blog post on Friday, August 21st. 

Check out all the awesome Design Team Blogs below to enter:

Newton's Nook Designs

Ellen Haxelmans

Larissa Heskett

Samantha Mann

Zsofia Molnar

Maria Russell

Andrea Shell

Tatiana Trafimovich

Amy Tsuruta

Amanda Wilcox


THANKS SO MUCH for stopping by today!! I hope I've INSPIRED you with my Creations this week using the NEW August Release!! Don't forget to check out the Newton's Nook Designs Blog tomorrow to see if you're one of the LUCKY Winners!! 
Have a FABULOUS WEEKEND!!

COUNTRY HUGS-N-KISSES
LARISSA   ðŸ’—

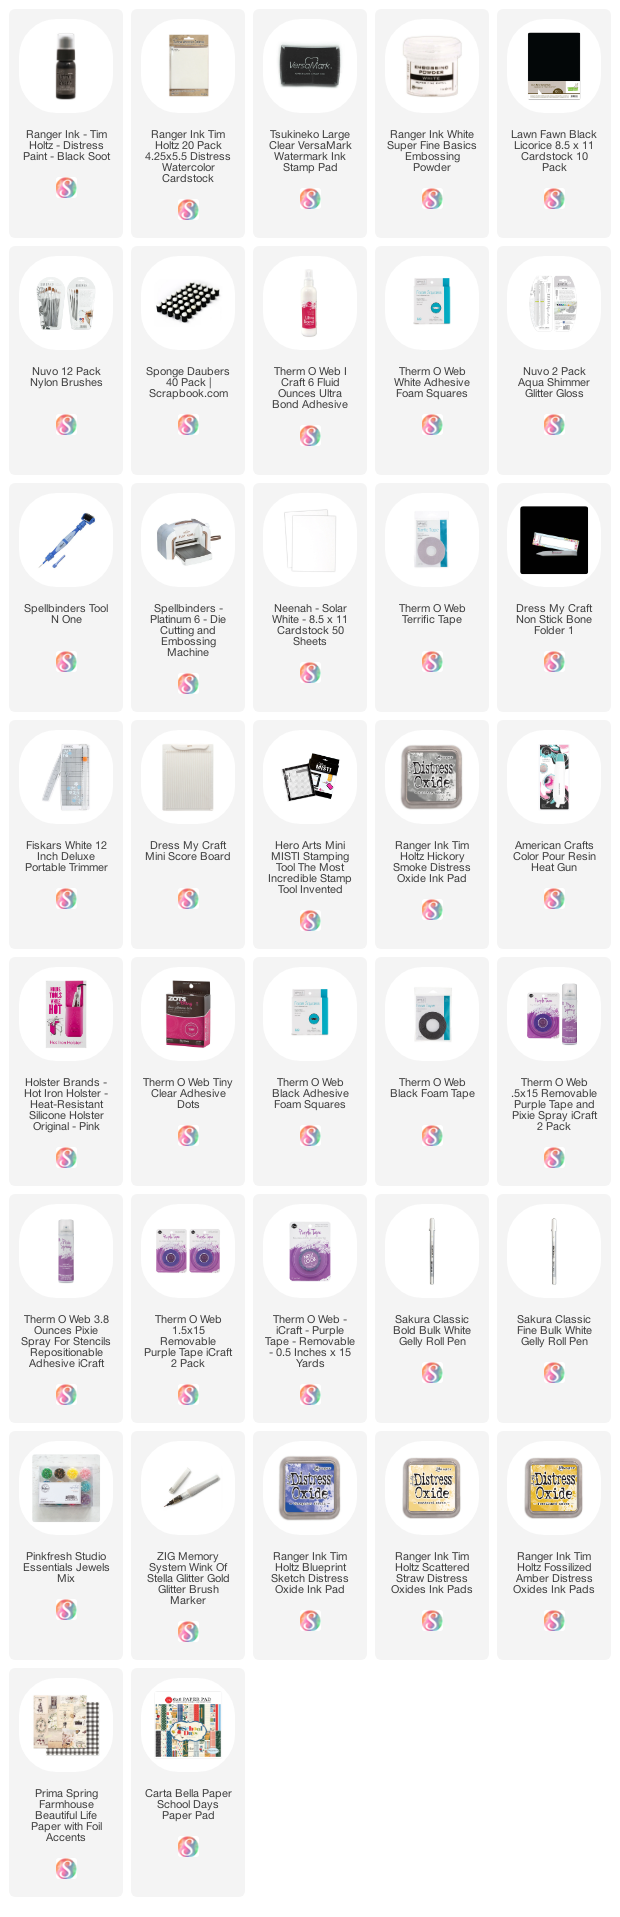
S U P P L I E S
Below you will find links to the supplies used to create this project(s). Click the icon for the store underneath the thumbnails to start shopping. Where available I use compensated affiliate links at no extra cost to you. Your support helps me to keep bringing you new projects. Thank you!!