Friday, November 30, 2018

Fall/Winter Coffee Lovers Blog Hop w/ Paper Sweeties!! =)

Pin It
Paper Sweeties DT

            HELLO CRAFTY FRIENDS!! 

I'm here for the Fall/Winter Coffee Lovers Blog Hop 2018!! 
I hope you'll join the FUN over on the Coffee Loving Cardmakers Blog for the Annual Fall/Winter Coffee Lovers Blog Hop!! 
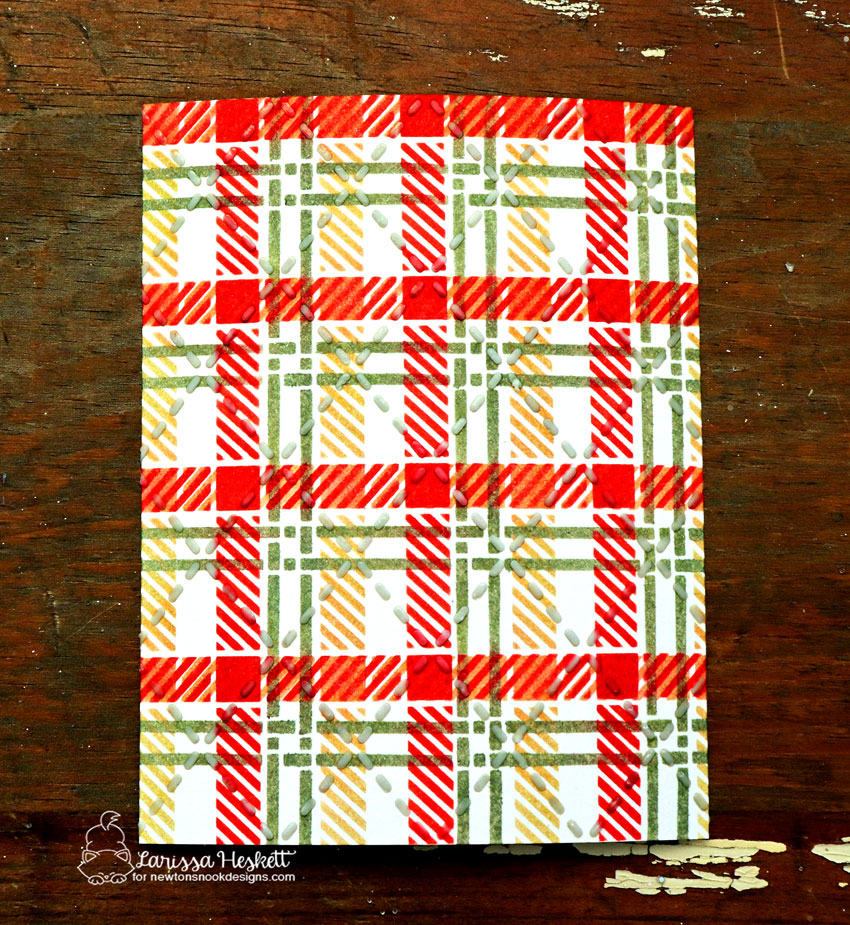
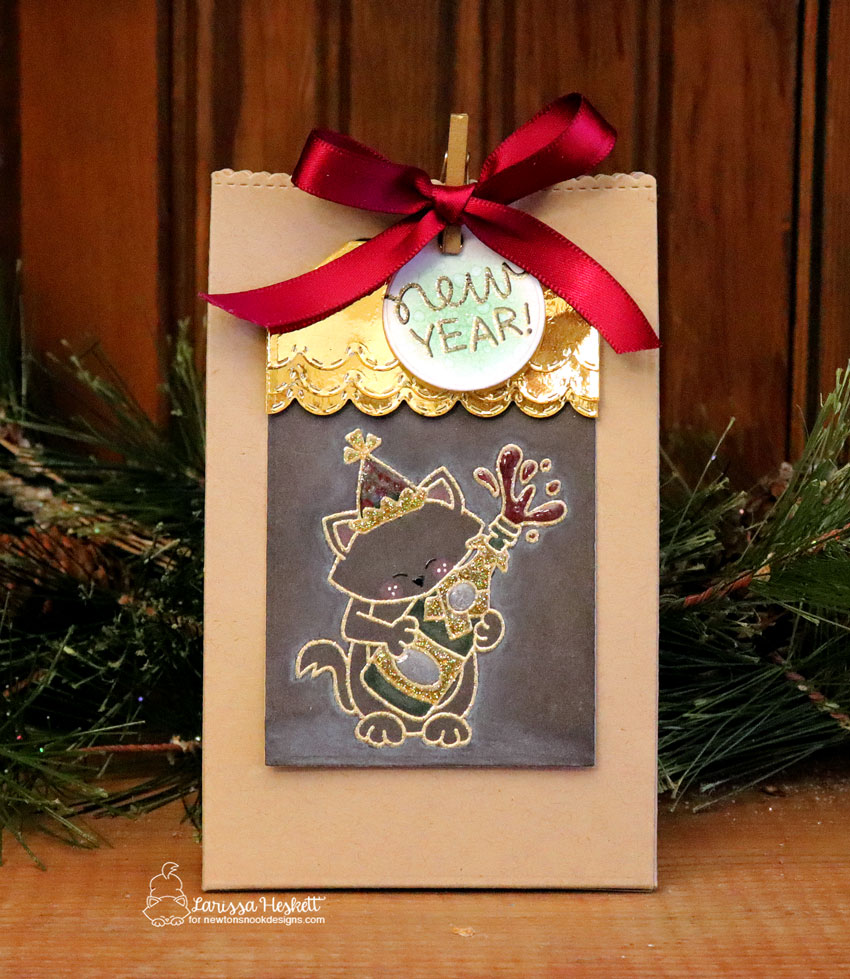
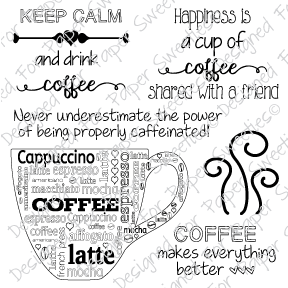
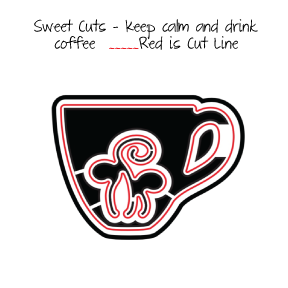
Here's a look at the Project I created!!

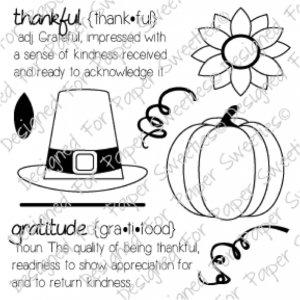
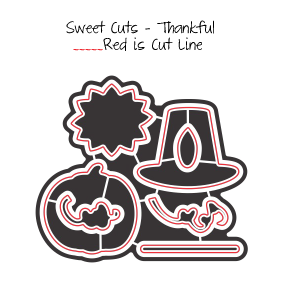
Here are the Products I've used for my Gift Bag today!! 
PS-185
SC-185

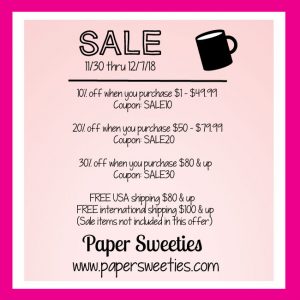
Paper Sweeties is a proud Super Sponsor and flash prize sponsor of the Fall/Winter Coffee Lovers hop!  We have also put together an interactive sale for you to use during the hop ... receive 10%, 20% or 30% off your entire full-price purchase using the coupon codes below:
For the winners ...
Thank you for stopping by!  I hope you are inspired by my projects and will be making some of these for your family and friends this holiday season ... and beyond!
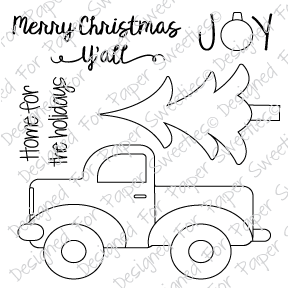
And, one last little bit of news before I go ... coming later this week: Merry Christmas Y'all stamp and coordinating Sweet Cuts die set!  EEK - I can hardly stand the cuteness!   Follow us (links on right sidebar) and stay tuned for an update of when these cutie pies will be available for purchase!

COUNTRY HUGS-N-KISSES
LARISSA    =)

Wednesday, November 21, 2018

Newton's Nook Designs November Release ~ Newton Celebrates & Newton's New Year!!

Pin It
Hello!!
          SQUEAL!!
         I'm here with Day 3 of the 
.                            Today we're showcasing the NEW  
  "Newton CelebratesStamp Set, "Newton's New YearStamp Set!!
                  Let's take a look at the AWESOME New Products!!
Are you EXCITED YET!!?? You're going to LOVE it ALL!!
Here's what I've created today!! 

I Started by Inking with Candied Apple Distress Ink!!  Then I placed the stencil down again shifting it to line up with parts of the Vertical Stencil lines from my first inking, and used Shabby Shutters Distress Ink!! One thing I found when layering was to make SURE that the Ink it DRY!! So use your Heat Gun inbetween colors!! I LOVE using Therm O Web Purple Tape to hold my stencil in place!!
Next I Layered the #2 Plaid Stencil and used Bundled Sage Distress Ink and I really LOVE the contrast between the two Green Shades!!
I wanted to add some SHINE so I decided to add the #2 Argyle Stencil over my inked Plaid Patterns and applied some Therm O Web Deco Foil Transfer Gel!! 
Let the Transfer Gel Dry completely!!  
Then cut a piece of Champagne Therm O Web Deco Foil and run it through your Laminating Machine!! I have found that I like to run it on setting 2 when I'm using Transfer Gel, especially with finer detailed Images or Sentiments!! 
I Stamped and Embossed the Image and used Copic Markers to Color it!! Then used the coordinating Dies to Die Cut it out!! I added some Tonic Studios Aqua Shimmer Pen just to the Drink Portion of the Martini!! I wanted it to look realistic!! Then Coated the entire Glass with some Tonic Studios Morning Dew Nuvo Drops!! I also added some to the Olive as well!! I Adhered the Party Hat and Newton Image onto a Strip of Cardstock that I inked using some Shabby Shutters to ink the background behind my Image!! Water Droplets add some Texture!! I Stamped and Embossed the Sentiment using some WoW Glitter Embossing Powder in Red for part of my Sentiment!! I LOVE how it really POPS off the Card!! I wanted a Scalloped Edge to define the Image Strip so I Die Cut the NND Frames & Flags Die using the Large Scallop Frame and Cut it down to create by Borders!! I LOVE being able to use my dies in different ways!!
So hopefully you're INSPIRED to TRY some different things and to think OUTSIDE of the BOX with these NEW Stencils!! The possibilities are TRULY ENDLESS!!  
I wanted to Create a Chalkboard Tag, that has some Color added!! I've always LOVED the look of those Black & White Photographs with just touches of Color and that was my idea for this Tag!! I Started my Stamping and Embossing the Image with some WoW Gold Pearl Glitter Embossing Powder!! SWOON!! This is one of my ALL time FAVORITE Embossing Powder Colors!! Then I used my Polychromos Colored Pencils!! I added some Tonic Studios Sunlight Glitter Nuvo Drops to the Gold areas and some Morning Dew Nuvo Drops to the Champagne, Labels and the Party Hat!! I added some White Colored pencil around the image and spread it out using some Gamsol!! I like how it POPS off the Tag!! For the Top pf the tag, I Die Cut some Therm O Web Deco Foil Toner Sheets that I Foiled with some Gold Deco Foil!! Creating 3 Layers of Scallops using the NND Fancy Edges Tag Die Set!! Then adhered them altogether!! I tamped and Embossed the New Year Sentiment onto the Circle Tag from the NND Tags Times Two Die Set using the same WoW Gold Pearl Glitter Embossing Powder!! Then inked the center of the Tag with some Evergreen Bough Distress Ink and added some Water Splatters for some Texture!! A Mini Gold Clothespin and a Burgundy Bow finish off the Gift Tag!! 

Would you like to win a $25 Store Credit to Newton’s Nook Designs!!??
ONE lucky comment will be chosen from each reveal day to win!!??

Here's how to win: 
Comment on the NND blog and Design Team blogs (see list below)! The winner will be chosen at random from the collective reveal posts. Make sure to check out each of their blogs and comment for your chance to win. You will not know which blog will be randomly chosen so the more you comment on the better your chances are of winning! You have until Wednesday November 21st at 9pm EST to comment  -- winners will be announced on the blog post on Friday, November 23rd. 
Check out all the awesome Design Team Blogs below to enter:
Larissa Heskett ~ You're Here

THANKS SO MUCH for stopping by today!! 
The New Products will be available Friday November 23rd!! Newton's Nook will also be running a BIG Black Friday SALE so SAVE the DATE!! 
Don't forget to visit the NND Blog tomorrow to see if you're one of the LUCKY Winners and to check out ALL of the details for the BLACK FRIDAY Sale!! 
Have a FABULOUS and BLESSED THANKSGIVING WEEKEND!!


I'm also Linking Up:

COUNTRY HUGS-N-KISSES
LARISSA   =)

Tuesday, November 20, 2018

Newton's Nook Designs November Release 2018 ~ Poinsettia Blooms and Winter Birds!!

Pin It
Hello!!
          SQUEAL!!
         I'm here with Day 2 of the 
.                            Today we're showcasing the NEW  
  "Poinsettia BloomsStamp Set, "Winter BirdsStamp Set!!
                  Let's take a look at the AWESOME New Products!!
 
Are you EXCITED YET!!?? You're going to LOVE it ALL!!
Here's what I've created today!! 
I wanted to create a BEAUTIFUL Layered Poinsettia Wreath Card!! I Stamped and Embossed the images and used Copic Markers to color them in!! I Die Cut the images using the coordinating Dies and then layered the Poinsettia Blooms!! I added Tonic Studios Nuvo Drops in Sunshine to the Centers and used Blizzard Glitter Nuvo Drops for the Berries!! For the Cardbase I used Tumbled Glass and Cracked Pistachio Distress Inks and Inked in the Center and around the edges of the Cardbase!! Then adhered the Poinsettia Blooms using Foam Tape!! I LOVE how this turned out!!
I started by creating my Background!! I used Tumbled Glass Distress Ink to ink inside a Circle Mask I made!! Then I used the NND Music Stencil to Ink over the Tumbled Glass using Antique Linen!! To add some contrast I used Chipped Sapphire to ink around the edges of the Circle!! I Stamped and Embossed the Snowflakes, added some Picket Fence Distress Paint Splatters and then added some Tonic Studios Blizzard Nuvo Drops to the center of the Snow Flakes!! 
I Stamped and Embossed the Images from the New Sets and Colored them in using Copic Markers!! 
I used the Forest Scene Builder Die Set for the Branches!! I inked the edges using Pumice Stone Distress Ink to make them POP!! I added the layered Poinsettia Blooms along with some of the Greenery and added a 3mm Wiggly Eye to finish off the Bird along with some Tonic Studios Morning Dew Nuvo Drops to the Beak, Feet and the center of the Poinsettia!! Tonic Studios Blizzard Nuvo Drops were added to the Berries!! I really LOVE how these sets compliment each other, but equally stand on their own!! 
SO MANY POSSIBILITIES!! 😉

Would you like to win a $25 Store Credit to Newton’s Nook Designs!!??
ONE lucky comment will be chosen from each reveal day to win!!??

Here's how to win: 
Comment on the NND blog and Design Team blogs (see list below)! The winner will be chosen at random from the collective reveal posts. Make sure to check out each of their blogs and comment for your chance to win. You will not know which blog will be randomly chosen so the more you comment on the better your chances are of winning! You have until Wednesday November 21st at 9pm EST to comment  -- winners will be announced on the blog post on Friday, November 23rd. 
Check out all the awesome Design Team Blogs below to enter:
Larissa Heskett ~ You're Here

THANKS SO MUCH for stopping by today!! 
The New Products will be available Friday November 23rd!! Newton's Nook will also be running a BIG Black Friday SALE so SAVE the DATE!! 
Don't forget to come back tomorrow for a look at the NEW "Newton Celebratesand "Newton New Year" + coordinating Dies!!    
Have a FABULOUS WEEK!!

I'm also Linking Up:


COUNTRY HUGS-N-KISSES
LARISSA   =)

25 Days of Christmas Tags 2018 Event w/ CAS-ual Fridays Stamps!!

Pin It

Image may contain: text
HELLO!!
I'm here for the 25 Days of Christmas Tags 2018 over on the In My Creative Opinion Blog!!
Today she's showcasing CAS-ual Fridays Stamps!!
Here's the SWEET Tag I've made for today!!
I wanted to create this FUN Pillow Box ad Gift Tag using the NEW Mistletoe Fri-Dies!! I ran them through using my Embossing Mat and Embossed the entire box using the words Holly & Jolly!! Some Picket Fence Distress Paint Splatters were added to look like Falling Snow!! Then I used the Mistletoe & Holly Stamp Set to Stamp and Emboss the Image!! I Die Cut it out using the coordinating Mistletoe Fri-Dies and then adhered it to a Tag Buddies Fri-Die Tag cut from some Text Patterned Paper!! For the Bow I Die Cut the Bow from some Therm O Web Deco Foil Toner Sheets that I Foiled with Red Deco Foil!! Then I coated it with Tonic Studios Morning Dew Nuvo Drops!! A mini Jingle Bell was added to the center of the Bow!! I tied a Large Red Grossgrain Ribbon around the Pillow Box!! 

Here is a Sneak Peek of the Black Friday freebie that Michele is offering!! 

If you just can't wait to go shopping, please visit the Store RIGHT NOW, PLUS there's several Sets that are RETIRING!! So you can stock up on some of those Products that you might have had on your WISH LIST before they're GONE for Good and at a SALE Price!! You can also use my discount code LARISSASENTME, to save 15% off on all of the goodies in the CFS Shop!!

Plus, I get to give one away too!! YIPPEE!! Be sure to leave a comment, and I will pick 1 random winner drawn from the comments from this post on Saturday, November 24th.  (Be sure you leave me a way to get ahold of you) 

Image may contain: text

THANKS SO MUCH for stopping by and I hope you'll play along!!
Have a FABULOUS WEEK!!
    
COUNTRY HUGS-N-KISSES
LARISSA   =)

Monday, November 19, 2018

Newton's Nook Designs November Release ~ Christmas Haul, Moose Mountain, Snowman Advice & 2 NEW Layering Stencil Sets!!

Pin It
Hello!!
          SQUEAL!!
         I'm here with Day 1 of the 
.                            Today we're showcasing the NEW  
  "Christmas Haul" Stamp Set, "Moose Mountain" Stamp Set, "Snowman Advice" Stamp Set and 2 NEW Layering Stencils "Plaid Layering" Stencil and "Argyle Layering" Stencil!!
                  Let's take a look at the AWESOME New Products!!
 
Are you EXCITED YET!!?? You're going to LOVE it ALL!! I'll admit though, I'm ADDICTED to those NEW Stencils!! I WANT to stencil ALL of the things!! lol  😉
Here's what I've created today!! 
 
For this SWEET Gift Tag I wanted to try my hand at some No-Line Coloring!! I have recently invested in some Polychromos Colored Pencils, and SWOON!! I understand why others are SO in LOVE with them!! I Stamped the Image onto my Kraft Tag Die Cut using the NND Fancy Edges Tag Die!! After coloring the Image in I decided to Emboss the Natural MFT Ink so I Stamped over the Image using Versa mark ink and Embossed it using Clear Embossing Powder!! I think this Step REALLY made the Image Details POP against the Coloring!! I Die Cut it out using the coordinating Die and then Stamped and Embossed the Sentiment!! Again I Stamped part of the Sentiment using MFT Natural Ink and Embossed it using Versa Mark Ink and Clear Embossing Powder and for the FABULOUS I Stamped and Embossed it using some WoW Emerald Glitter Embossing Powder!! SWOON!! I just LOVE Glitter Embossing Powder!! I Inked the background of the Tag with some Lucky Clover Distress Ink added some Water Splatters for texture and adhered the Die Cut Image using some Foam Tape!! I decided to also add some Tonic Studios Aqua Glitter Pen and Nuvo Drops in Morning Dew to some of the Elements just to add some Dimension and Shine!! A Red Seam Binding Bow finishes off the Gift!! 
For my Moose Card, I wanted to create a Slider Design!! My boys, ESPECIALLY Greyson (5) has had a BLAST with this Card!! I also KNEW I wanted to create a Plaid Design for the Card Base!! So I used Tumbled Glass Distress Ink to Ink my Cardbase!! Then I used Ripe Persimmon Distress Ink to create the Plaid Design around the edge!! I LOVE this Stencil Design because I was able to line up the design to make it a cohesive design around my Cardbase just by lining up the stencil!! Then I used Chipped Sapphire to add the other Stencil Pattern to finish off the Plaid Design!! I Die Cut the NND Frameworks Frame from some Black Cardstock and then Layered the Card Design ontop!! I LOVE the Color Palette and think ANY guy (young or old) would appreciate this Card!!  
For the Focal point on my Card I Die Cut the I Die Cut the NND Frameworks Frame from some Distress Watercolor Paper and Inked it up using Chipped Sapphire Distress Ink to match the Stenciling on the Card!! I layered 6 Frames together to make the Frame POP!! Then I Stamped and Embossed the Sentiment using some Hero Arts Shadow Ink!! I added some Tumbled Glass Distress Ink to make the Sentiment POP!! Then I Stamped and Embossed the SWEET Snowman Image and colored it using Copic Markers!! I Fussy Cut it out and adhered it to the Corner of the Frame!! 
For the Cardbase, I started with Tumbled Glass Distress Ink onto an A2 piece of Distress Watercolor Cardstock!! Using Therm O Web Purple Tape to hold my stencil in place to ENSURE a clean Stenciled Design!!  
Next I lined up the Argyle Pattern and Inked again using Spun Sugar Distress Ink!! It's HARD to see in the photos, but there are etched lines that are on the top side of the Stencil to help you with lining the stencil pattern up just right!! Such an AMAZING Design!!  
 
I then brought in the 2nd Stencil and using Chipped Sapphire Distress Ink I decided to line up the Pattern in the open areas!! I wanted to add some Foil and thought it would look best over the Colored ares, so that was my thought process!! There are SO MANY options with this AWESOME Set though!! CAN'T WAIT to see what others will do with it!! 
Then I lined up the Stencil Etching Design over my Inked Cardstock and taped it down using Therm O Web Purple Tape and applied some Deco Foil Transfer Gel over the Stencil using my Tonic Studios Palette Knife!! I applied some Hickory Smoke Distress Ink first, just to help make the Transfer Gel show up in my Photos!! Normally, the Gel Dries Clear and its HARD to see in Photos!! So I wanted to make SURE you could see the Details!! 
Here's what the Design looks like once the Deco Foil Transfer Gel is Dry!! This alone would make a BEAUTIFUL Background!! With just alittle Dimension that Argyle Pattern REALLY comes to life!! 
I Cut a Piece of Iridescent Deco Foil and ran it through my Laminating Machine!! SWOON!! I LOVE the finished results!! I HOPE this HELPS you to think outside of the box and ALL of the different ways you can add your own personal touches to these Plaid, or Argyle Layering Stencil Sets!! 

Would you like to win a $25 Store Credit to Newton’s Nook Designs!!??
ONE lucky comment will be chosen from each reveal day to win!!??

Here's how to win: 
Comment on the NND blog and Design Team blogs (see list below)! The winner will be chosen at random from the collective reveal posts. Make sure to check out each of their blogs and comment for your chance to win. You will not know which blog will be randomly chosen so the more you comment on the better your chances are of winning! You have until Wednesday November 21st at 9pm EST to comment  -- winners will be announced on the blog post on Friday, November 23rd. 
Check out all the awesome Design Team Blogs below to enter:
Larissa Heskett ~ You're Here

THANKS SO MUCH for stopping by today!! 
The New Products will be available Friday November 23rd!! Newton's Nook will also be running a BIG Black Friday SALE so SAVE the DATE!! 
Don't forget to come back tomorrow for a look at the NEW "Poinsettia Blooms" and "Winter Birds" + coordinating Dies!!    
Have a FABULOUS WEEK!!

I'm also Linking Up:

I was INSPIRED by BOTH  Misti Elam for Day 1 and Tracey McNeely for Day 6!! 

COUNTRY HUGS-N-KISSES
LARISSA   =)