Hello Crafty Friends!!
Welcome to the Paper Sweeties October 2021 New Release Party!!
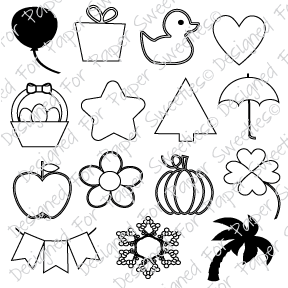
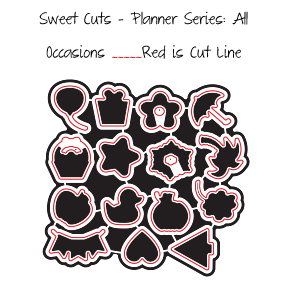
This Month were showcasing the NEW 4th Quarter Sweet Kit!!
Here's a look at the NEW Kit and the NEW Sweet Mini Sets included in the Kit!!


**********
SWOON!! How SWEET is this NEW 4th Quarter 2021 Sweet Kit and those Sweet Mini Sets!! I didn't receive the Kit to create with, just the NEW Sweet Mini Stamp Sets!! I decided to go through some of my FAVORITE Doodlebug Products that are also available in the Paper Sweeties Shop and created an ADORABLE Hello Y'all Shaker Card!!
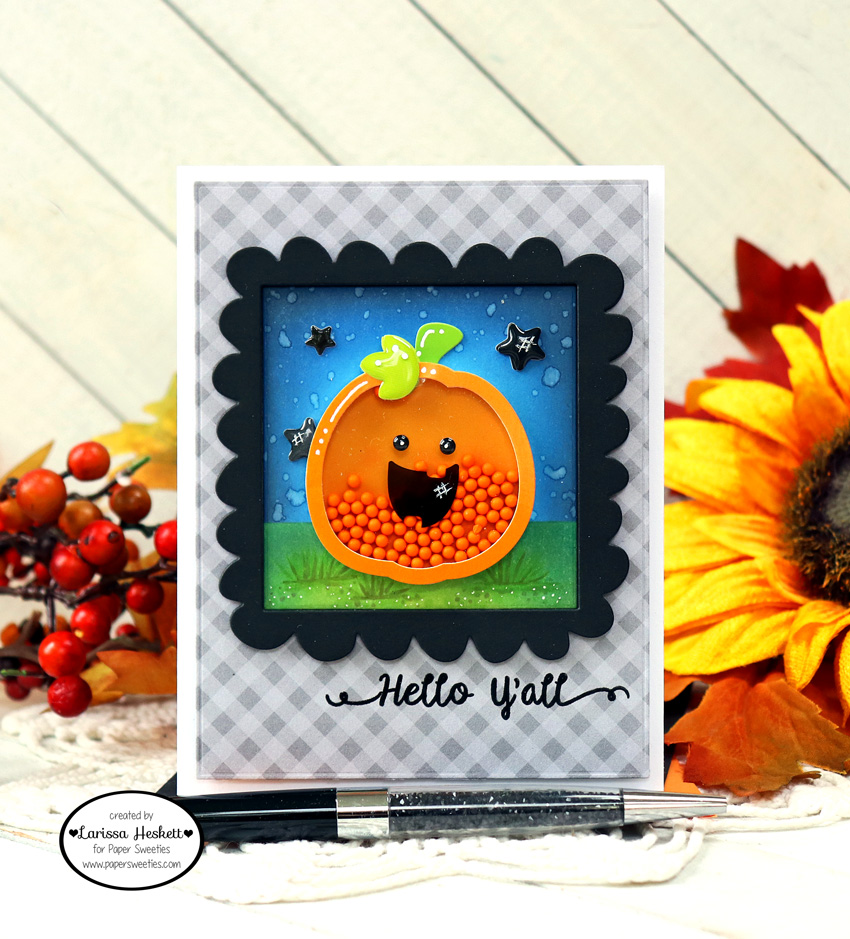
I Started by Cutting some of the Doodlebug Grey Gingham Patterned Paper to fit my A2 Card Panel!! Then I Die Cut 5 Square Scallop Frames from Black Cardstock and adhered them altogether to create a Thick Frame!! I Die Cut another Square Scallop Frame from some White Cardstock and then used the inside Square Panel to create my Scene!! I Masked off the Ground with some Tape and Inked the Night Sky with Salvaged Patina, Prize Ribbon and Black Soot Distress Oxide Inks!! Then I added some Water Splatters for the look of Stars in the Night Sky!! I removed the Tape and then replaced it Masking off the Night Sky!! Then Inked the Ground using Peeled Paint and Pine Needles Distress Oxide Inks!! Then I used Copic Markers to add some Grass!! White Gel Pen details were added for some Highlights!!


Then I adhered the SWEET Doodle Pops Roly Poly Pumpkin Image to finish off the Scene!! I added some White Gel Pen Details to add some Highlights and Personality to the Image!!
(I realize my Doddle Pop is a different one, but this one is just as DARLING and would create the EXACT same Feel!! If you're like me and LOVE Doddlebug, USE what you have in your Stash and Mix and Match with your Paper Sweeties Products you have in your Stash as well!! the possibilities are ENDLESS with these CUTIES!! Then I Stamped and Embossed the "Hello Y'all" Sentiment to the Gingham Card Panel and adhered the Square Scallop Frame Scene to the Card Panel to finish off the Design!!
(I realize my Doddle Pop is a different one, but this one is just as DARLING and would create the EXACT same Feel!! If you're like me and LOVE Doddlebug, USE what you have in your Stash and Mix and Match with your Paper Sweeties Products you have in your Stash as well!! the possibilities are ENDLESS with these CUTIES!! Then I Stamped and Embossed the "Hello Y'all" Sentiment to the Gingham Card Panel and adhered the Square Scallop Frame Scene to the Card Panel to finish off the Design!!

I LOVE the way this turned out and hope I've INSPIRED you with a FUN way to use the NEW Sweet Mini Sets along with several other Products from the Paper Sweeties Shop!!
Visit the other DT Blogs to see more AMAZING Projects using the NEW Products!!
THANKS SO MUCH for stopping by today and make sure to come back tomorrow to see another Project I've made using the NEW Products!!
Have a FABULOUS WEEK!!
Have a FABULOUS WEEK!!
COUNTRY HUGS-N-KISSES
LARISSA 🎃