

HELLO CRAFTY FRIENDS!!
Today I get to showcase the NEW Taylored Expressions Little Monster Stamp &Die Combo Set and the Inky Fingers ~ Monsters Stamp Set!! I had a BLAST working with these Sets and CAN'T WAIT to share what I've created using them!! Here's a look at the NEW Products!! They're available NOW in the TE Shop!!


First I wanted to create a BRIGHT and CHEERY Birthday Card!! I LOVE the look of Plum Punch, Blue Corn and Confetti Cake TE Cardstocks together so those are the colors I went with for this Design!! I Started by Stamping and Embossing the Geo Quad Background Stamp onto some Salt Water Taffy TE Cardstock using Versa Mark Ink and WoW Tickle Glitter Embossing Powder!! I cut the Design in half and then used the Largest TE Stitched Rectangle Stacklets Die Set to Die Cut my Card Panel!! I used some Tumbled Glass Distress Oxide Ink to add some Color to my Card Panel!! Then I Die Cut an older (retired TE Mini Borders Die) to create my Divider, you could use ANY border you have for this!!

I used Copic Markers to Color my Monsters!! (Turquoise Monster: BG10, BG23 and BG45 Cheeks: R00 White Areas: N2 and Colorless Blender Party Hats/Noise Maker/Bow: Y11, Y15 and Y23 Purlpe Monster: V01, V04 and V09) I added White Gel Pen Details and some Tonic Studios Glitter Pen, Morning Dew Nuvo Drops and Black Nuvo Drops for some Sparkle and Dimension!! I Stamped and Embossed the Simple Strips Background Stamp onto some Confetti Cake Cardstock with Versa Mark Ink and Embossed it using WoW White Embossing Powder!! Then I Die Cut it out using the coordinating Simple Strips Die to Die Cut the Banner Strips!!


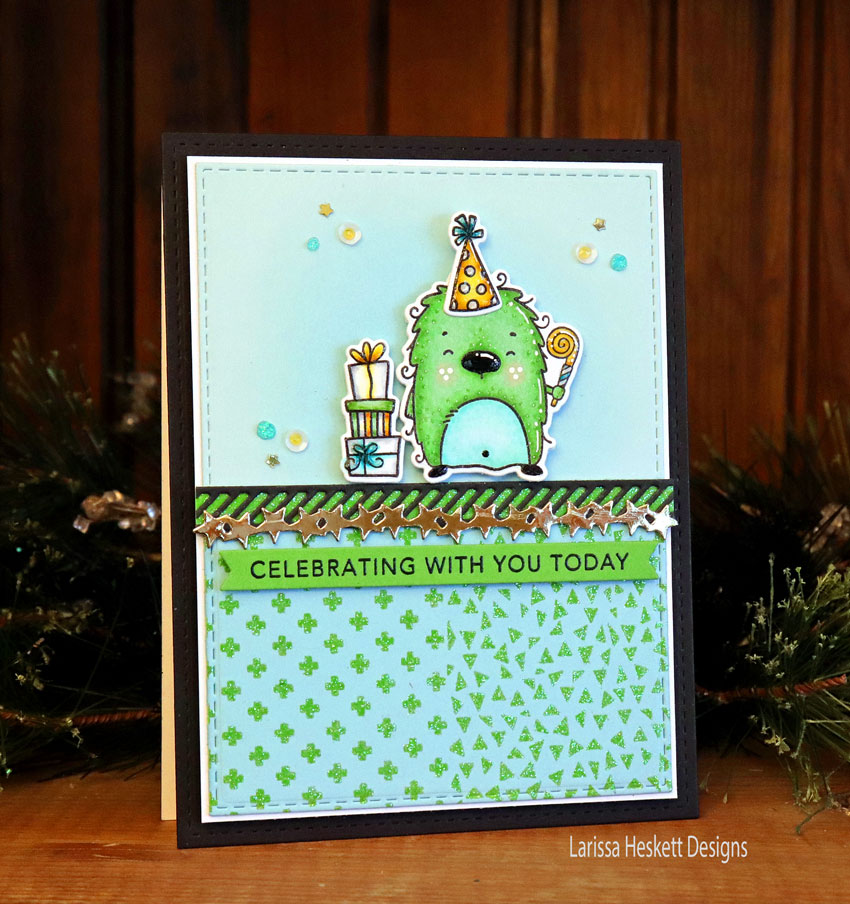
For my Second Card I created a Similar Design only I used a different Color Palette and I LOVE the way it turned out!! I Started by Stamping and Embossing the Geo Quad Background Stamp onto some Sprinkles TE Cardstock!! I Stamped in Versa Mark Ink and Embossed with some WoW Lime Rickey Glitter Embossing Powder!! Then I Die Cut a couple older (retired TE Mini Borders Die) to create my Divider, you could use ANY border you have for this!!

I used Copic Markers to Color the Images!! (Green Monster; G12, G14 and YG17 Belly: BG23, BG10 and BG000 Cheek: R00 Party Hat/Noise Maker/Present: Y11, Y15 and YR23) I added White Gel Pen Details and some Tonic Studios Glitter Pen, Morning Dew Nuvo Drops and Black Nuvo Drops for some Sparkle and Dimension!! I Stamped and Embossed the Simple Strips Background Stamp onto some Lime Zest Cardstock with Versa Mark Ink and Embossed it using WoW White Embossing Powder!! Then I Die Cut it out using the coordinating Simple Strips Die to Die Cut the Banner Strips!!

I LOVE creating Interactive Cards and thought a Birthday Card would be FUN!! I started by Die Cutting the Shinning Star Cutting Plate!! Then I Die Cut the second to largest Flap Stacks Rectangle Die to create my Hinged Door!! I wanted to use the Caps Lock Dad Die for part of my sentiment and Die Cut it from the left over Geo Quad Background Stamped and Embossed Background from a previous Card!! Then I Die Cut it 3 more times from some Lime Zest Cardstock to make it a thicker Die Cut Word!! I also Stamped and Embossed the Simple Strips Background Stamp onto some Lime Zest Cardstock with Versa Fine Ink and Embossed it using WoW Clear Embossing Powder!! Then I Die Cut it out using the coordinating Simple Strips Die to Die Cut the Banner Strips!!

I used Copic Markers to Color the Images!! (Green Monster; G12, G14 and YG17 Belly: BG23, BG10 and BG000 Cheek: R00 Party Hat/Noise Maker/Present: Y11, Y15 and YR23 Turquoise Monster: BG10, BG23 and BG45 Cheeks: R00 Strips: V01, V04 and V09 White Areas: N2 and Colorless Blender) I added White Gel Pen Details and some Tonic Studios Glitter Pen, Morning Dew Nuvo Drops and Black Nuvo Drops for some Sparkle and Dimension!!


I Stamped and Embossed the combination of Sentiments for the Little Monster Stamp Set and Masked parts of it so I could Emboss It using the Same WoW Lime Rickey Glitter Embossing Powder that I used for the DAD letters!! I LOVE the way it turned out!! I added some White Stars also Die Cut from the Shinning Star Cutting Plate Die and Stamped a Party Hat!! I Colored it the same and then added some Tonic Studios Glitter Pen and Morning Dew Nuvo Drops to the Stars and the Party Hat for some Sparkle and Dimension!!


For my last card I wanted to create a Card that looked like it was drawn in a Notebook!!
I Started by Stamping the Notepaper Background using some Tumbled Glass Distress Oxide Ink!! Then I Die Cut the edge using the Notepaper Border Die!!

Then I Stamped all of the Images from the Inky Fingers ~ Monsters Stamp Set!! I wanted to use both of my Boy's Finger Prints for the Monsters and decided to use TE Inks in Confetti Ink, Cherry Pop and Candy Corn!! I added some White Gel Pen to the Teeth and then some Morning Dew Nuvo Drops to the Eyes and Teeth!!

I wanted to use the Caps Lock Dad Die for part of my sentiment and Die Cut it into the Card Panel then Die Cut it 4 more times from some TE Cardstock in Confetti Cake!! I layered them together and inlaid them into the Design!!

So there you have it, aren't these NEW Sets FUN!!?? I hope I've INSPIRED you to create something with the NEW Monsters!! THANKS SO MUCH for stopping by and I hope you have a FABULOUS WEEK!!
COUNTRY HUGS-N-KISSES
LARISSA =)


