Friday, February 28, 2014

Friends Runway Inspired Card!! =)

Pin It


Hello!!
I'm stopping in again today for my THIRD Post!!
I wanted to share a card for the Runway Inspired Challenge!!
This photo spoke to me and I thought of the New MFT Fishnet Cover-Up Die!! I decided it would be the PERFECT background!! Beings it isn't a Perfect Design I decided to leave some of the pieces in the die as well to convey that same feeling!! I also decided after looking through my supplies it would be FUN to use my New PTI Friends Die!! I thought at first I'd do a water colored background and place the Friends Die onto white and center that on my card!! After I started creating though, I decided to stack several of the Friends dies together to make a thicker die cut and then do my water colored panel behind it!! I used some Tim Holtz Distress Water Color Paper and the Distress Inks in Brick Red, Chipped Sapphire and Mustard Seed!! I applied the color straight onto a craft mat and added some water and placed my water color paper into the ink!! I smooshed it around alittle to get the inks moving and then dried it with my heat gun!!
I LOVE the way it turned out!! I glued 5 Friends Black Die Cuts together and attached it to my water color panel. I thought it would be FUN to add a HEART to dot the "I" with and I just HEART that decision!! =) Then I added it to the Fishnet Cover-Up Die cut that I backed with white cardstock using foam tape!! I LOVE the way it came together and I hope you like my take on the Challenge!!

 
THANKS SO MUCH for stopping by today and if you have time I hope you'll check out my other two posts for today!!?? If not though, THANKS for taking the time to stop by and leave me some LOVE I really APPRECIATE the comments!! Have a FABULOUS WEEKEND!! =)

COUNTRY HUGS-N-KISSES
LARISSA   =)

Newton's Nook Designs Inky Paw's Challenge #07!!

Pin It


HELLO!!

So EXCITED to shared today's FUN New Challenge with you over on the Newton's Nook Designs Blog!! We are going GREEN this Month!!

I stamped the Sweet Owl from the Newton's Nook Designs Sweetheart Tails Stamp Set and paper pieced it together!!  I used the New Tweet Talk Stamp Set to stamp the Branch and Birdhouse!! My Sentiment is from the Love' a La Carte Stamp Set!!
  Sweetheart Tails Stamp Set by Newton's Nook Designs Tweet Talk - 3x4 Photopolymer stamp set by Newton's Nook Designs.   Love a la Carte Stamp Set by Newton's Nook Designs
 I thought it would be FUN to use my New American Craft Amy Tangerine Die!! I'm in LOVE with this Photo Frame, but let me worn you if you are going to use thin paper or Vellum like I did you'll want to be VERY careful when removing it from the die!! The stitching cuts are AWESOME, but they also make it really hard to remove the paper from the die!! I ended up tearing almost 5 frames before I got this one to come off unharmed!! I used the New Studio Calico Colored Vellum and I LOVE this shade of green!! I wanted my scene to be mostly Blaack and white with the different touches of green!! I added some Glitter Paper behind the heart cut out and then stamped my sentiment and embossed it with Clear Embossing Powder!! I added some Ink Splatters to the card base just for some added color and my card was finished!!

Are you ready to get your paws inky with us and play along to win a prize? The Challenge winner will receive a $10 store credit to our online store and a Inky Paws Challenge Top Pick Badge to add to your blog! If we get more than 15 participants, we will choose two winners so be sure to tell your friends to play along! 
You have two weeks to play along. Deadline to enter is Friday,  March 14th, 2014 at Midnight CST. The winner will be announced on the NND blog on Monday, March 17th.

Are you ready to play along and get your paws inky? 

Create a NEW project (card or other paper craft item) based on the color combo above.
  • Your project MUST use at least one Newton's Nook Designs stamped image (or free digital stamp - check out our Freebies page).
  • Post your project to your blog or to an online photo gallery such as Flickr or splitcoaststampers (on splitcoast please use keywords newtonsnook and IPC07).
  • Link back to this challenge (if posting in an online gallery copy the link into the photo description). 
  • Submit your project to this challenge using the Inlinkz widget below. You must submit a DIRECT link to your post page.
  • Have more than one great idea? You can enter more than once! Just link up each card separately. 
THANKS SO MUCH for stopping by today and I hope to see you over on the Newton's Nook Challenge Blog!! =)

COUNTRY HUGS-N-KISSES
LARISSA  =)

February Challenge with Paper Sweeties Inspiration #16!!

Pin It

papersweeties inspiration16 Paper Sweeties February Inspiration Challenge #16   Be Mine

Hello!!

I'm stopping in to share the Sweet Vintage Tea Pot Card I made for the Paper Sweeties Inspiration #16 Challenge!!  =)
I can't tell you enough just how much I LOVE this Sweet Tea Pot Die and Stamp Set!! OMG~SQUEALING in Pure Delight!! =)
The New MMY 6x6 Paper Pad PRETTY THINGS was made to be used with this Die and Stamp Set!! The floral patterns and country charm feel is beyond BEAUTIFUL!! So if you're like me and LOVE this style don't walk RUN and grab this Paper Pad, because I have a feeling its going to be HARD to get your hands on if you wait!! I might just be HOARDING a pad because I LOVE it so much!!  =) So after I played around with where I wanted the pattern to be on my Tea Pot I die cut it out and then I used my Fiskar's Stamp Press to stamp the image!! I then added it to my Card Base and added some of the PRETTIEST Vintage Lace I found while on a Junk Jaunt last fall with my mom!! =) I made a bow from some seam binding and then added a Sweet Little Burlap Bow from AC!! Isn't it just the sweetest little bow!!?? LOVE how this turned out and I can't wait to play some more with these products!!  SWOOON!!
Talk about my HAPPY PLACE!! 


THANKS SO MUCH for stopping by and have a FABULOUS WEEK!!

COUNTRY HUGS-N-KISSES
LARISSA  =)

Thursday, February 27, 2014

HB with Reverse Confetti Feb. Color Challenge!! =)

Pin It

Feb14ColorChallenge

Hello!!

So EXCITED to share a Card I made for the Reverse Confetti February Color Challenge!! I have been wanting to play along for a LONG Time now, but it always seems I'm too BUSY!! Today, though I was able to find some time!! YEAH!! So I'm sharing my FIRST Card for this Challenge and I just LOVE the way it turned out!!  =) I started out in a totally different direction!! I was going to go Pretty with Hearts and Arrows because I wanted to use my New Dies and Stamps from them, but once I got going this VERY Masculine Card came about and I LOVE it!!  It seems as of late I've been able to create more masculine cards without trouble than ever before in my creating history!! I used to struggle with them as I have heard LOTS of Crafters say!! Anyway, here is my card in all of its MANLY Glory!! LOL!!  =)


I used the Reverse Confetti: Lots To Say Stamp Set along with their Tag, Banner and Heart Dies!!
LTS_ProductGraphicSheet300  TagMe300  LoveNote
I wanted to add a Vellum Tag over the Grey Dotted Tag to tone down the Pattern just alittle so I decided to stamp and Emboss my sentiment using Clear Embossing Powder over some Charcoal Ink!! I then masked and stamped the Banner using two different sentiment stamps to customize my Greeting and I LOVE the way it turned out!! I also thought it needed alittle more Grey so I added some splatters using my Distress Marker in Pumice Stone that I added water to and then splattered on my card using a paint brush!! A Ribbon for the Tag and some matching patterned paper along the right edge of my card and my card was finished!! =)

THANKS SO MUCH for stopping by today and I hope you have a FABULOUS WEEK!!

COUNTRY HUGS-N-KISSES
LARISSA  =)

Wednesday, February 26, 2014

Prima February Product Picks!! =)

2014 Feb ppp

Pin It


Hello!!
I'm switching it up alittle bit today!! I'm sharing a Bracelet I have made for the Prima February Product Picks Challenge!!  If you are new to my Blog you'll know that I mostly share Cards on my Blog!! What you may not know though is that I LOVE to make Jewelry too!! =) I don't share enough of it though, so I'm going to change that with today's post!!
Starting today, I'll be sharing some of my Jewelry Creations with you and even showing you how I like to package them up to give them away!! I like to use my products to create BEAUTIFUL little boxes or pouches and sometimes I'll even try to share a video to share how I created it for you too!!
Today, I wanted to share a Bracelet I have made for my Baby Sister Skyler who will be celebrating her 21st Birthday tomorrow!! =) I can't believe she is going to be 21!! Makes me feel old even though, I'm not!!
She has been wanting one of my Charm Bracelets and I thought it would be FUN to go through my stash of crafting supplies and put together a BEAUTIFUL COLLECTION of things to put on a Bracelet!! Once I got to looking I realized I had a HUGE Stash of PRIMA: Buttons (both decorative and wooden),  and some charms. I thought it would be FUN to create a Bracelet using them!! So I started by Creating the Main Charm!! I used a Spellbinders Bezel and then added a piece of Prima Patterned Paper!! I always LOVE the SWEET Images on their Papers!! I then added some Vintage Glass Glitter and Regular Glitter for alittle sparkle!! I added a Word Sticker and then I then added some Ice Resin and set it aside to dry/cure for 3 days!! I took a Charm Bracelet Chain and started adding the different Buttons and Charms using Rings!! I made it a Mirrored Design so I have two of everything and they are in exactly the same place on both sides!! (SEE I TOLD YOU I WAS HOARDING THESE) =)

I LOVE the way it came together and I know Skyler is going to LOVE this!! In fact I almost don't want to give this away because I LOVE it SO MUCH!! It's Probably close to one of my most FAVORITE bracelets of ALL Time!! =) Hopefully, she'll know how SPECIAL She is to me if I'm giving it away RIGHT!!?? Anyway, I had a BLAST Pulling out some of my TREASURED PRIMA PRODUCTS to create this Bracelet and I hope you'll look at some of these Products in a different way too!! They can be used on more that just our Cards and Scrapbook Pages!!

THANKS SO MUCH for stopping by today and have a FABULOUS WEEK!!

COUNTRY HUGS-N-KISSES
LARISSA  =)

Birthday Cake Card Guest Designing with Avery Elle!! =)

Pin It
Avery Elle
Hello!!

I'm stopping in with my LAST post as a Guest Designer with the AWESOME Avery Elle Team!! I can't believe how FAST a month can go when you're having FUN!! =)  Today I'm also going to be playing along with the New Avery Elle Challenge Blog!!

This is their First Challenge so I hope you can find the time to play along too for a chance to win a Stamp Set of your choice!! AWESOME!! =)
I thought it would be FUN to use the New Cake and Candles Stamp Set along with the Cupcakes Stamp Set and the coordinating Cupcake Dies and the Ornament Simply Tags:Christmas Dies!!
 Cake & Candles clear stamp set Our 4" x 6" Cupcakes clear photopolymer stamp set is perfect for creating a sweet greeting.  The sentiments included in this set are great for birthdays or a sweet hello.
 Our Cupcakes Elle-ments Custom Steel Die are exclusive to Avery Elle.  These premium steel dies coordinate with our Cupcakes clear photopolymer stamp set and are proudly made in the USA. Our Simply Tags: Christmas Ornament Elle-ments Custom Steel dies (designed by Nina Yang) are exclusive to Avery Elle.  These premium steel dies coordinate with our Simply Tags: Christmas clear stamp set and are proudly made in the USA.
Here is my card!!


I started by Embossing a Dot Cover-Up Die from MFT into the Pink Cardstock also from MFT!! Then I took a MMY Chalkboard Paper and Embossing the Sentiment 4 times using Versa Mark and Hero Arts White Embossing Powder!! I wanted to create a shadow, but wondered what it would look like if I did it with Rock Candy Distress Glitter!!?? So I stamped the Sentiment again just off setting it alittle bit for a shadow look and then added Sticky Stuff Embossing Powder and added the Rock Candy Distress Glitter!! I LOVE the results!! =) I can't wait to do this again!!
I die cut the Ornament Circle and then the Cup Cake Liner and Cupcake Top and some of the Candles and paper pieced them altogether after stamping them!! I covered the Cupcake top and the flame with Distress Glitter and then added some Burlap Twine to the Cupcake!! I'm in LOVE with this card!!
THANKS SO MUCH for stopping by today and I hope you have a FABULOUS WEEK!!
 
COUNTRY HUGS-N-KISSES
LARISSA  =)

Tuesday, February 25, 2014

Paper Trey Ink February Spring Blog Hop!! =)

Pin It


February-blog-hop

Hello!!

I'm stopping in just in time to share a card I made for the Paper Trey Ink February Blog Hop!!
I just got my NEW Stamps today and I just had to pull out the Circle Scribbles and Garden Grace Stamp Sets to make my card!! I also wanted to play along with the Make it Monday Challenge #153:Water Colored Backgrounds too!!
So I decided to use Water Color in my design!!
I created a FUN Spring Scene with Flowers!! I used some Canvas Paper for my base and stamped and embossed in clear embossing powder!! I then repeated the process only I cut out several layers to make the flowers 3-D and I LOVE they way they look!! I used my Faber-Castell Aquarelle Water Color Pencils and then adhered them to my card front off setting them for a FUN 3-D Layered look!!

THANKS so much for stopping by today and have a FABULOUS WEEK!! 

COUNTRY HUGS-N-KISSES
LARISSA  =)

Fun with MFTWSC164 Challenge!! =)

Pin It

MFTWSC164
Print

Hello!!
Stopping by to share a Card I made for the
MFTWSC164 Challenge and for the
Color Palette Challenge 2!!
I decided to use the Fishnet Cover-Up Die-Namics and I LOVE it!! I will be using this ALOT!!
I also used the Vintage Labels Stamp Set and Coordinating Vintage Labels Die and the Strip Border Die from the BluePrints #7 to create my Banner Flags!! I used Papers from MFT's Variety Pack and some Burlap Twine from May Arts Ribbon!!

THANKS SO MUCH for stopping by today and have a FABULOUS WEEK!! =)

COUNTRY HUGS-N-KISSES
Larissa  =)

Sunday, February 23, 2014

TREND WATCH Challenge with WPlus9-Week 3 Birthday Celebration!! ;)

Pin It


Hello!!
I was able to play along with the
WPlus9 Week 3: Birthday Celebration-Trend Watch Challenge!!
I wanted to see if I could combine more than one of these TRENDS into my card and I was able to combine them all!! I think it turned out SO FUN!!
I decided to use the New WPlus9 Whole Lotta Happy Stamp Set along with the coordinating Whole Lotta Happy Dies!! I used the Confetti dots and stars from the Borders & Backgrounds 3 Stamp Set and a PTI Happy Banner Die!! I thought it would be FUN to use some glitter for the center of the stars that I die cut from my card front and then I die cut the same stars from some Ombré' Pink paper and after stamping with Versa Mark I added some Sticky Embossing Powder and then added the glitter!! I LOVE the way it looks!! I then die cut the Happy Banner from some turquoise patterned paper and some vellum and then layered them!! I stamped the Birthday and added some confetti accents using Prima Chalk Ink!! A few star sequins finish off the look and my card was finished!!


Whole Lotta' Happy  Whole Lotta' Happy Die  Borders & Backgrounds 3
I LOVE the way my card came together and I really ENJOYED all of the different entries that were create for the challenge!! If you need some inspiration I hope you'll go and check them out!! You won't be sorry you did!!
THANKS SO MUCH for stopping by and I hope you have a Fabulous Week!!

COUNTRY HUGS-N-KISSES
LARISSA ;)

Thursday, February 20, 2014

Newton's Nook Designs February Release!! =)

Pin It   


Hello!!

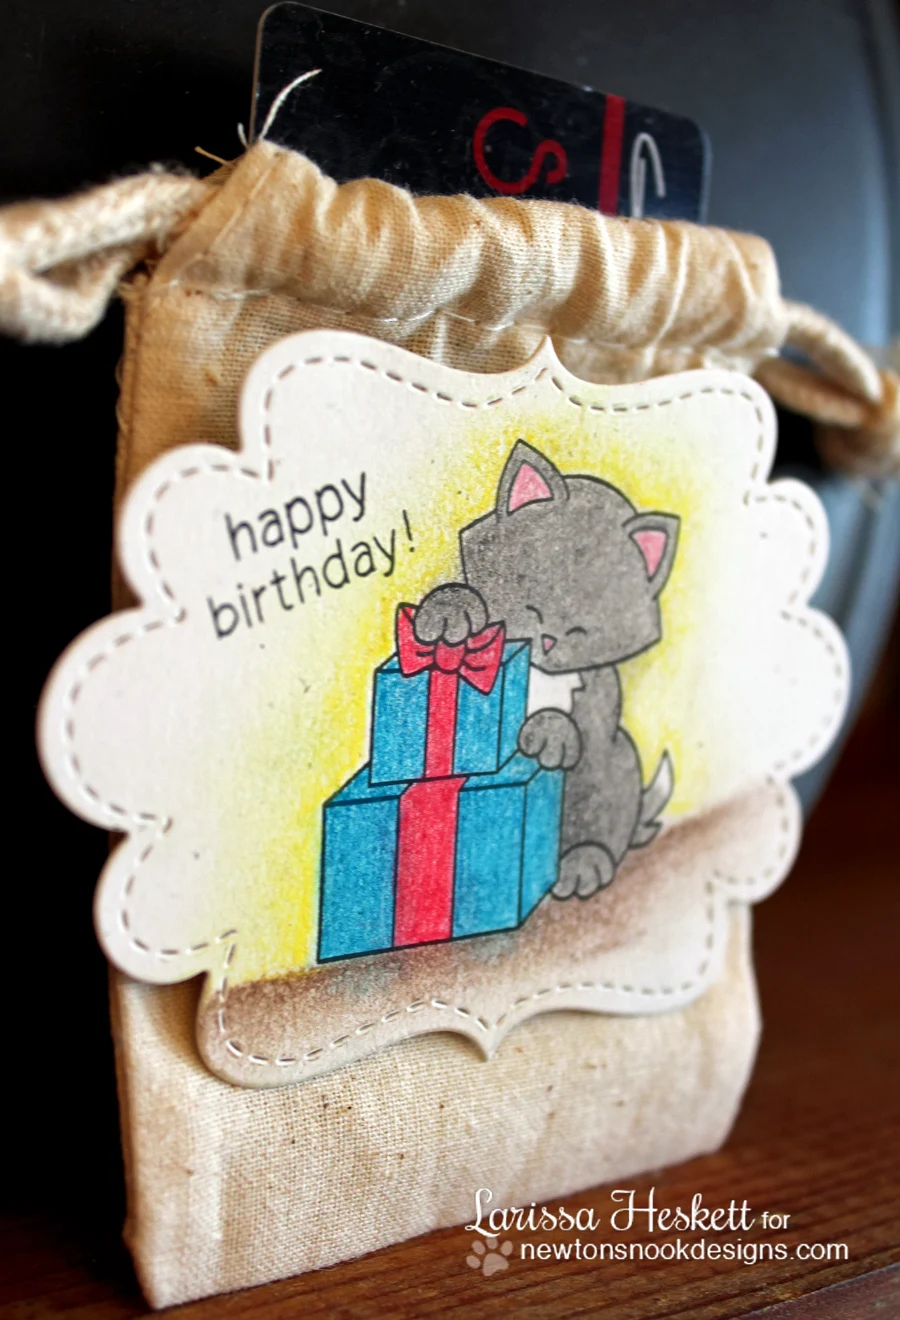
Are you ready for another day of FUN with Newton's Nook Designs February Release!!
Today we are showcasing a New Newton's Birthday Bash Stamp Set!!
I thought it would be FUN to create a Gift  Tag and a Gift Label that could use to make a package SPECIAL!! I die cut my PTI Tag and then stamped on the Vellum and embossed it with clear Embossing Powder!! I then used my Faber-Castell Pitt Pastel Pencils to o color my Image!! I LOVE how it looks on Vellum and how easy it is to color with!! My label was created with a Paper Smooches Stitched Label Die and then I stamped my image and colored it using the same Faber-Castell Pitt Pastel Pencils!! They work great for coloring on cardstock too!!


You're going to absolutely LOVE this set!! There are so many things you can do with it!! =)
Would you like to win Newton's Birthday Bash? This set will be given away to Two lucky winners!
Here's how to win:
Comment on the NND blog and Design Team and Guest blogs (see list below)! Two winners will be chosen at random from the collective blogs February release posts. Make sure to check out each of their blogs and comment for your chance to win. You will not know which blog has been chosen so the more you comment on the better your chances are of winning! You have until Thursday, February 20th at 9 pm Central Standard Time to comment -- winners will be announced on the blog post on Friday, February 21st.
Check out all these awesome Design Team Blogs below to enter:
                                                              Newton's Nook Designs
Debbie Owens (Indy) - Guest Designer
Chrissie Tobas - Guest Designer
THANKS SO MUCH for stopping by today and I hope you have a Fabulous Thursday!!
COUNTRY HUGS-N-KISSES
LARISSA =)